
Battery holder for AA+AAA, Skadis mounted dispenser
Obliczymy ostateczną cenę na podstawie wybranego pliku. Sprawdzisz ją i zaakceptujesz przed płatnością.
Zapisane na tym urządzeniu.

A space saving battery dispenser for AA and AAA batteries for mounting on the IKEA Skådis board with T-nuts.
- Ocena
- 4,778 / 5
- Polubienia
- 193
- Pobrania
- 1141
- Wydruki
- 20
- Wyświetlenia
- 5033
- Oceny
- 18
Aktualizacja u źródła:
Informacje o modelu
- Źródło
- Printables
- Kategoria
- Organizers
- Licencja
- Creative Commons — Attribution — Noncommercial
This is a new version of my space saving battery dispenser for Skadis. It is designed to hold both AA and AAA batteries, 12 AA and 13 AAA. There are holes in the sides of the magazine to make it easy to see how many batteries are left. A drawback of this design is that batteries can fall between the rails when inserted. To reduce the risk of batteries falling out during loading, the rear wall follows the curve of the magazine. However, you still need to be careful when loading.
Installation
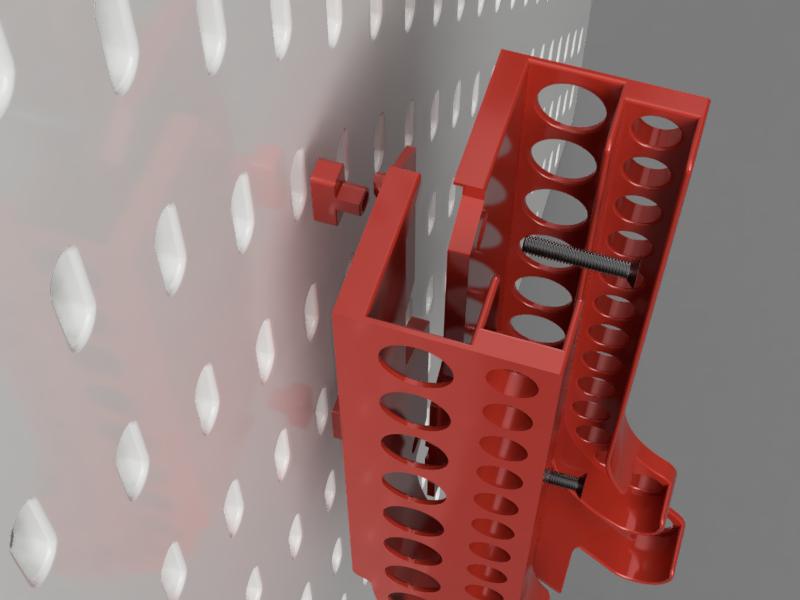
The battery dispenser is mounted on the Skadis board using T-nuts for M3 screws. This ensures that the attachment is strong and secure and can be easily installed and removed with a screwdriver. There are two different versions of the battery dispenser, one with countersunk holes and one with flat holes, which you use depends on the type of screws you use. The screws that fit should be about 15-20mm long.
To assemble the battery dispenser, place the right and left wings together, overlapping them. Then insert the screws through the screw holes and place the screw in the T-nut and tighten until the T-nut is about 2-3mm from the back of the dispenser. Insert the T-nuts vertically through the holes in the Skadis board, then as you tighten the screw the T-nut will turn and lock the battery dispenser to the board.
You can find and download the matching T-nut here: Skadis T-nut for M3 screw.
Printing and print settings
Both the right and left tracks should be printed with the outsides down to minimise support structures. In the model files, the parts are oriented in the best direction for printing. Use PLA for printing with a layer height of 0.2mm and a nozzle width of 0.4mm. A wall, bottom and top thickness of at least 3 lines and an infill of 25%. It is recommended to use a support structure for the screw holes.
More of my models
You might be interested in some of my other models.

Click here if you are interested in seeing more of my models for IKEA Skådis board.
Feedback is always good. To encourage me or other designers to make more models, please hit like and/or post your makes. If something doesn't work or is missing and can be improved, please leave a comment.