
PC Fan to Blower Fan mod + Cheap Air Filtration
Obliczymy ostateczną cenę na podstawie wybranego pliku. Sprawdzisz ją i zaakceptujesz przed płatnością.
Zapisane na tym urządzeniu.

This model includes files and instructions on converting a PC 120 mm axial fan to a blower style fan with filtration.
- Ocena
- 0 / 5
- Polubienia
- 7
- Pobrania
- 65
- Wydruki
- 0
- Wyświetlenia
- 795
- Oceny
- 0
Aktualizacja u źródła:
Informacje o modelu
- Źródło
- Printables
- Kategoria
- Prusa Parts & Upgrades
- Licencja
- Creative Commons — Attribution
⭐Instructions:
🔹3D Printed parts:
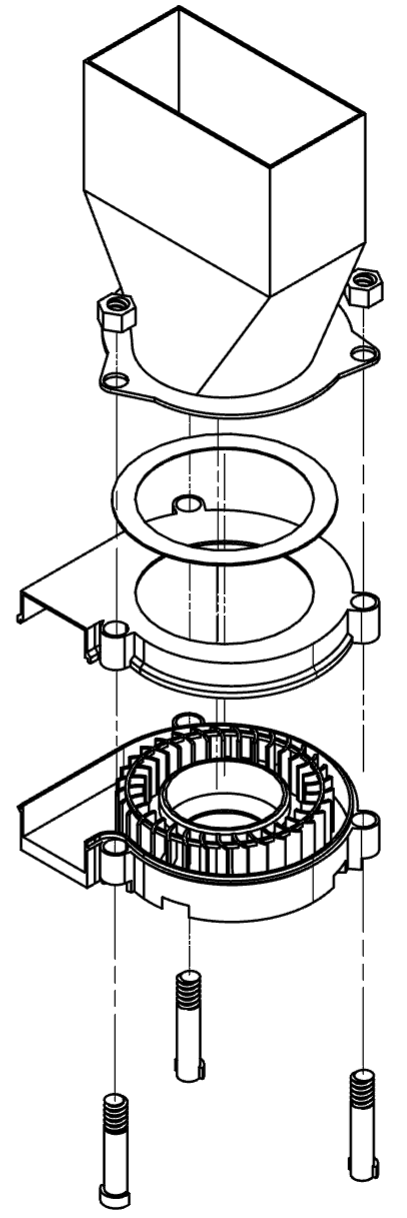
- 1x Housing Base
- 1x Housing Top
- 1x Fan Blades
- 1x Fan Duct
- 3x Screw
- 3x Nut
- optional: 1x Rubber Gasket
- optional: 1x Cutting Stencil
🔹Print Settings:
- All parts print without support except Housing Base
- All parts are oriented in the optimal direction
- To make the Fan Blades as light as possible I used:
- 0.6 mm Nozzle
- 0 % Infill
- 1 Wall loop
- no support
- 1 Top Layer / 2 Bottom Layers
➡ Be careful when using a blow torch to remove strings on such a delicate part.
- Print Rubber Gasket out of a flexible material like TPU
🔹Other Materials:
- 120 mm Fan e.g. Xilence, preferably used
- HEPA Filter iLife Hepa-Filter
- Activated Carbon Filter e.g. activated carbon filter or any other carbon filter which is around 10 mm thick and you can cut 4x 83 mm x 42 mm pieces out of it
🔹Assembly:
- Remove the fan motor from it's housing. Leave around 1-2 cm on it's arms. I used a Dremel for this job. Be careful with the power cable. Remove the fan blades so you only leave the inner part.

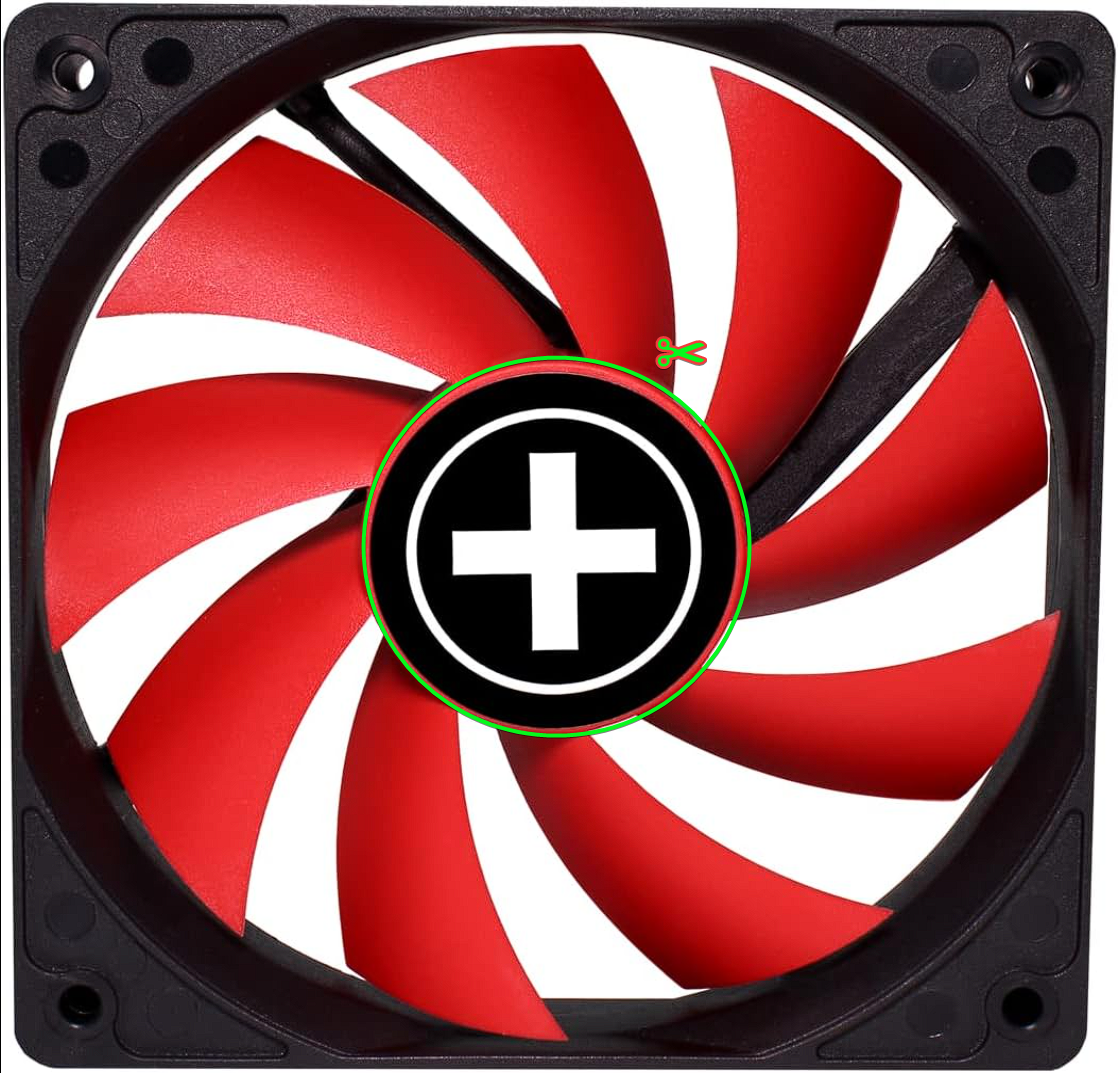
Most complicated part done 👍
- Press the new fan blades onto the housing. It's a very tight fight. You can use glue if not tight enough. If it doesn't cover the original housing all the way remove access material from the original house.
- Take Housing Base part. Insert 3 screws and motor from the back. Place everything on a table. Slide new blades on from the top.
- Check for clearance issues and afterwards place Housing Top on the assembly, securing it with the 3 plastic nuts.
- Once checked if the fan is still spinning you can secure the motor with glue to the Housing Base
- Congratulations 🎉you can now use the fan as a regular blower fan in your projects. Continue with step 7 to use it as an air filtrations system.
- Remove the 3 plastic nuts again.
- Place rubber gasket on top as well as the fan duct (maybe you need a few tries to find the right orientation).
- Place to 3 nuts back on the press everything together
Note: From my testing the gasket did little to now difference. Use glue as an alternative permanent solution if you are satisfied with this model. - Insert the HEPA filter from the top
- Cut 4x pieces out of carbon filter using the stencil part and place them above the HEPA filter
- Done. 😊 Enjoy your clean air during printing.
⭐How I designed this
I recently put my 3D printer in an enclosure. It got hot really fast to around 50°C when printing. Using a fan reduced the temperature by about 10°C. Venting the air outside wasn't an option and just blowing it into the room had me worried about microplastics and other contaminations. I know a small HEPA filter plus activated carbon isn't a perfect solution, but I will update this post as soon as I get my VOC device and did some tests.
Doing my research for this project the BentoBox seemed to be most common and complete model. Upon closer inspection I found issue however with amount of material cost, print time, need of magnets and the lack of blower fans instead to the much lower static pressure axial fans.
I first looked at models of commercial blower fans like this 120mm Radial Fan (Blower) by FarStar - Thingiverse. I then found this design 3D printed 5015 radial fan/blower by cimo - Thingiverse who already did a conversion of an axial fan and 80mm fan experiment by MadVit - Thingiverse who did some tests on different blade designs. Thanks to their huge inspiration I took their design ideas and made my own with thin wall that are only as thick as they needed to be, plastic screw so less extra materials would be needed, the fan duct for the filtration and many more small tweaks.
My model now costs around 3 € in plastic parts (Around 7 € with other materials). Filters are easily accessible and the air pressure is high enough so I can feel a noticeable difference in air quality in a few minutes.
Possible design ideas for a Version 2 include:
- Locking mechanism for the screw so they don't fall out as easily
- Adapter plate to mount the design to a wall and to remove the need of glue for the motor
- Better rubber gasket
- Close gap between Base and Top where the output airflow is
Thank you for trying me design and feel free to remix as you please 👍