
Slim Ender 3 V3 SE Dual 4010 Shroud K1 Edition
Obliczymy ostateczną cenę na podstawie wybranego pliku. Sprawdzisz ją i zaakceptujesz przed płatnością.
Zapisane na tym urządzeniu.

Modified version of my standard Dual 4010 Shroud K1 Edition
- Ocena
- 3,667 / 5
- Polubienia
- 57
- Pobrania
- 225
- Wydruki
- 2
- Wyświetlenia
- 2230
- Oceny
- 3
Aktualizacja u źródła:
Informacje o modelu
- Źródło
- Printables
- Kategoria
- Creality Parts & Upgrades
- Licencja
- Creative Commons — Attribution
The new slim K1 shroud now supports my improved fan ducts (finally managed to learn how to do that).
Print the ducts in PETG, ABS or ASA. The shroud can be printed in what you want, maybe not flexible filaments :)
-BOM:
- 10x M3*8 Screws
- 8x M3*16 Screws
- 10x M3 nut's
- 8x Flat washers
- 8x Lock washers (honestly optional, I don't know how much they affect the build but i've been using them)
- 1x CR Touch cable 10cm
- 1x Molex Picoblade cable
- 2x 4010 Blower Fan
You will also need some way of soldering the fan cables together so a solder station or some solder seal wire connectors will be needed. Please make sure to buy Molex PicoBlade cables as the Micro JST cables do not work they look basically the same but have a different pitch, I found this out the hard way :).
-BOM with links if you are in the UK:
- Two 4010 blower fans (These are from Sovol but came Creality branded); https://www.amazon.co.uk/dp/B08B3HCKCP?psc=1&ref=ppx_yo2ov_dt_b_product_details
- M3 Screw Kit (had all the screws I needed and more for future projects); https://www.amazon.co.uk/dp/B08789D7M5?psc=1&ref=ppx_yo2ov_dt_b_product_details
- CR Touch 10cm cable (10cm 5pin) This is the one I used; https://www.aliexpress.com/item/4001291279517.html?spm=a2g0o.order_list.order_list_main.5.21ef1802bJC7rY
- CR Touch 10cm cable (This one is probably better but I havent tried it); https://www.aliexpress.com/item/1005005090614513.html
- Molex PicoBlade Cable; https://thepihut.com/products/adafruit-1-25mm-pitch-2-pin-cable-matching-pair-40cm-long?variant=32463312322622¤cy=GBP&utm_medium=product_sync&utm_source=google&utm_content=sag_organic&utm_campaign=sag_organic
Uses the same instructions as https://www.printables.com/model/619049-ender-3-v3-se-dual-4010-shroud however when you print it, align the model face down like this without support; Then the new ducts get printed on the face where the outlet is, like this (you may need supports and a brim for this print);
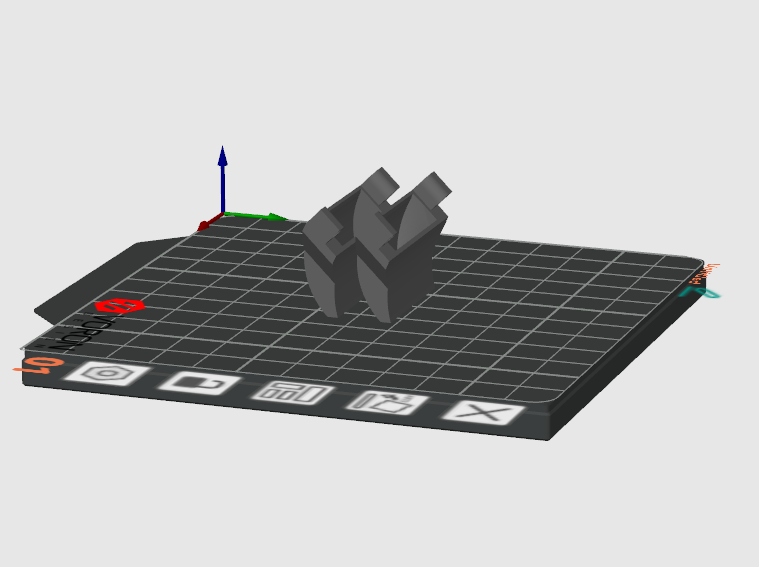
Auto align should do this for you in Orca slicer but I haven't tested on others
YOU WILL NEED AN EXTENDED CR TOUCH CABLE! 10CM IS FINE