
Long-reach M3 nutty spanner for box section x-axis gantry beam tube linear rail mounting
Obliczymy ostateczną cenę na podstawie wybranego pliku. Sprawdzisz ją i zaakceptujesz przed płatnością.
Zapisane na tym urządzeniu.

A nut-reinforced low-profile long-reach spanner to reach inside a long gantry beam tube when attaching a linear rail.
- Ocena
- 0 / 5
- Polubienia
- 13
- Pobrania
- 37
- Wydruki
- 0
- Wyświetlenia
- 559
- Oceny
- 0
Aktualizacja u źródła:
Informacje o modelu
- Źródło
- Printables
- Kategoria
- Tools
- Licencja
- Creative Commons — Attribution — Noncommercial — NoDerivatives
Design
This is what I call a “nutty spanner” - a hexagonal pattern of M3 nuts is used to provide a tough surface against which the target M3 nut can be torqued. This is longer-lasting than a simple printed spanner (at least with common materials). In my basic testing with the spanner printed in PLA, I was able to get around 1.7-1.8 N·m torque before slipping. Slipping did not damage the spanner. This torque exceeds the typical recommended maximum tightening torque for common M3 hardware, with the exception of grade 10.9 and 12.9 high tensile steel (around 1.9 N·m and 2.3 N·m respectively). With the band installed, the torque can increase to around 1.9-2.0N·m. Note that this will depend on the manufactured dimensions of both the spanner nuts and the target nut, as this will vary slightly from nut to nut.
The spanner was designed to work within the space inside a 20mm x 20mm box section tube with 1mm wall thickness. Thicker walls will reduce working space.
The optional band (vase mode) slips over the top of the spanner, and acts to resist the nuts spreading when a target nut is torqued. However, it increases the width of the spanner head by about 1mm, which may be a problem depending on the wall thickness of the beam tube or if the screw holes are off-centre.
Scaling down to 99% might increase torque, but my tests have been inconclusive. The torques involved are near the limit of regular M3 hardware and I'm seeing damage to the hex head of the screw from over-torquing.
BOM
6 of M3 6mm cap head screw
6 of M3 hexagon nut (DIN 934) (nominal 2.4mm thick, 5.5mm side-to-side (aka socket size))
NB: It was not possible to use the more common 10mm long M3 screws in this design because the head of the spanner must not be too thick otherwise it may not have clearance to be removed from the nut and then taken out of the beam tube.
Printing
Spanner
If the length you need is too long for your printer, please use the PrusaSlicer features for cutting parts and automatically creating connectors. I suggest a 6mm hex dowel 10mm depth, 0.1 tolerance, then join with CA glue (superglue) for PLA.
0.4 nozzle, 0.2 layers, 5 perimeters, 25% grid infill. PLA preferred. Perhaps ABS if you have no PLA, but ABS may need a brim, use your judgement. Other materials may work, but prefer stiff over tough. Avoid filled materials as there are thin sections which will likely be weak. A small brim is included around the head of the spanner to enhance printability.
Band
0.4 nozzle, 0.2 layers, 0.45 layer width, vase mode, zero top and bottom solid layers, zero elephant foot compensation.
Assembly
Clean out the sacrificial bridging so all the holes are clear:
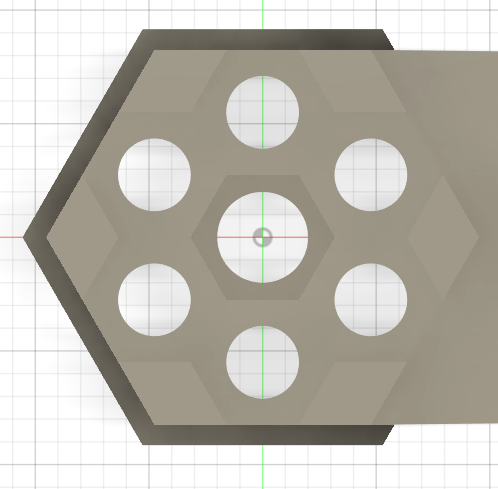
- Get all the M3 x 6mm screws started but not protruding. The screws are inserted from the underside of the spanner (as printed).
- Place all the M3 nuts in the hexagonal recesses.
- While holding all the nuts in place with a finger, screw in the screws. Do not tighten yet. Back off by half a turn.
- If you want to use the band, install it now. It is designed to be a snug fit. Carefully push it over the end of the spanner keeping it as level as possible.
- Thread a pair of M3 nuts onto the end of an M3 screw (any length), or partially thread an M3 nyloc nut. Insert the threaded nut(s) into the spanner:
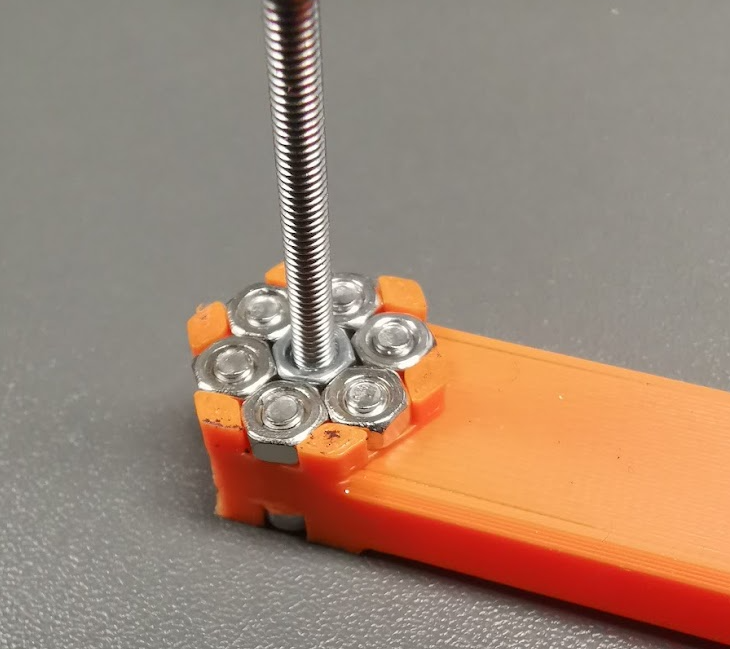
- Now gradually tighten the 6 x M3 screws. Lightly tighten them all, then go around again and make them all a bit tighter. Repeat for final tightness. They should be tight but don't over-tighten and crush the printed part.
Use
The spanner may be a snug fit for nuts. A slightly looser fit may be easier when disassembling so that the spanner can slip over a nut deep inside the tube. To ease the fit, with the spanner torque a nut tightened onto a screw; this should shift the nuts a bit and ease the fit:
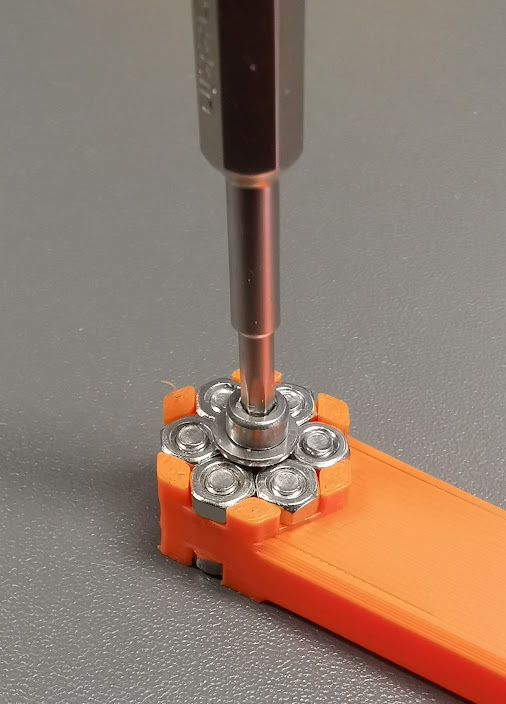
On the other hand, for maximum torque when tightening nuts during assembly, use the band if possible and ease and retighten the nuts around the target nut (step 6 above) so it is snugly held.
Replacing the band
If you need to replace the band, slacken the screws first, then follow steps 4-6 above.
Storage
If the tool will not be used for a long time, I suggest easing off the screws to avoid any risk of long-term compressive creep in the printed part. Re-tighten as above before use. For maximum torque you should consider installing a new band if the original was left in place as it will probably have stretched a bit.
Remixes
Please, no remixes for now while I refine the design from use and feedback. Message me if you need to remix now.