
Klicky PCB probe for Creality K1
We calculate the final price from your selected file. You review and accept it before payment.
Saved on this device.

This modification allows to install the Klicky PCB probe onto Creality K1, improving bed mesh speed and precision.
- Rating
- 5 / 5
- Likes
- 30
- Downloads
- 146
- Makes
- 0
- Views
- 2,021
- Reviews
- 1
Updated at source:
Model information
- Source
- Printables
- Category
- Creality Parts & Upgrades
- License
- Creative Commons — Attribution — Noncommercial
This modification allows to install the Klicky PCB probe onto Creality K1, improving bed mesh speed and precision.
Video of the probe in operation:
Compared to the stock load cells, it has about 10-15x higher precision (standard deviation 0.002 mm, vs 0.02-0.03mm for stock K1 load cells).
Here's the output of the PROBE_ACCURACY macro:
probe accuracy results: maximum 4.001562, minimum 3.994141, range 0.007422, average 3.996133, median 3.995703, standard deviation 0.002063
Bed meshing speed is also significantly increased, since bed movement speed does not affect Klicky probe operation. A 6x6 point bed mesh is completed in 30 seconds.
WARNING: Without drag chain or lid modifications, rigid filaments may break in the PTFE tube while attaching/docking the probe with the lid closed. If you print carbon or glass fiber filled filaments, it is recommended to print a lid riser, or keep the lid off until the print starts.
BOM:
1x Klicky PCB probe kit
4x M3x12 SHCS
2x M3x20 SHCS
2x M3 heat inserts, 4-4.5mm long
2x M3 washers, 1mm thick
1x JST 1.25mm 3-5 pin connector
Probe wiring and configuration is described here: https://pellcorp.github.io/creality-wiki/klicky/
Assembly instructions:
- Print each of the 4 files attached here.
- Assemble the Klicky probe using hardware included in the kit, “Microswitch cover” and “Klicky mount” printed parts.
- Install the probe assembly on the toolhead, using two M3x12 screws, and two M3 washers between the probe and the toolhead.
- Take the “Dock mount” and melt the heat inserts into its holes.
- Insert one of the magnets from the Klicky kit into the "Probe dock".
- Attach the “Probe dock” to the “Dock mount” using two M3x20 screws.
- Remove the two front screws holding the left XY axis motor.
- Attach the dock to the left motor and its mount using two M3x12 screws, as shown on the picture below.
- Connect the Klicky probe to the toolhead board.
- Modify the printer configuration.
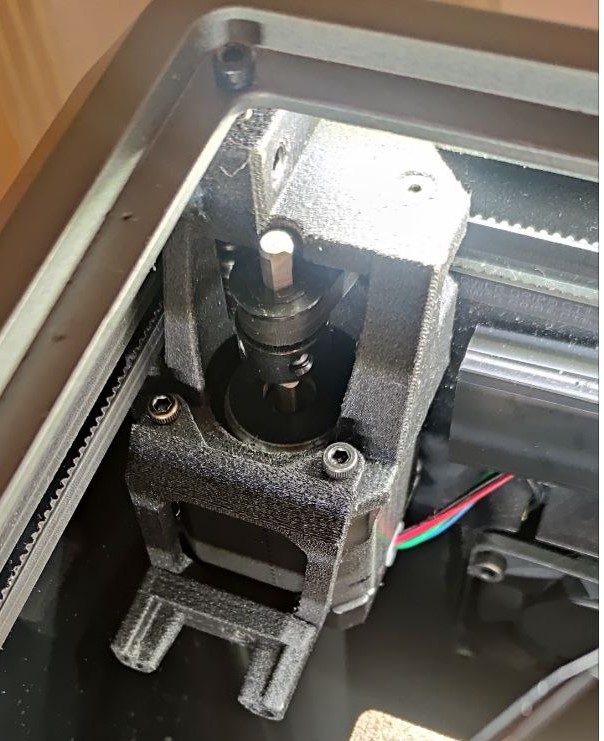
Assembled and installed dock