
1 / 4
7" Touchscreen case for Raspberry Pi 4 + internal fan
Order a print of this model
We calculate the final price from your selected file. You review and accept it before payment.
Saved on this device.

Case for Raspberry Pi 7" Touchscreen and Raspberry Pi 4 Features Internal fan mount (40mm x 40mm x10) Thread inserts…
- Rating
- 4.923 / 5
- Likes
- 478
- Downloads
- 3,778
- Makes
- 37
- Views
- 28,788
- Reviews
- 39
Updated at source:
Model information
- Source
- Printables
- Category
- Electronics
- License
- Creative Commons — Attribution
Case for Raspberry Pi 7" Touchscreen and Raspberry Pi 4
*** New case for Raspberry Pi Touch Display 2 ***
Updates
- Alternative top case part with additional slot for camera ribbon cable, see subfolder "case top v2".
Features
- Internal fan mount (40mm x 40mm x10)
- Thread inserts (pi case)
Alternative mounting brackets:
- Plate mounting bracket for 7" touchscreen case
- V-Slot profile 2020 mounting bracket for 7" touchscreen case
Required parts
- Raspberry Pi 4B
- Raspberry Pi 7-Inch Touch Screen Display
- Fan 40x40x10, 5V → Noctua NF-A4x10 5V incl. anti-vibration mounts
- 4x Anti-vibration mounts (See fan)
- 2x 1P Single Dupont connectors (For fan)
Mount Raspberry Pi case (top / botton parts)
- 4x M3 thread inserts → Ruthex RX-M3x5.7
- 4x Cylindrical head screw M3 x 12mm
Mount Raspberry Pi case (display / stands / botton parts)
- 4x Cylindrical head screw M3 x 12mm
Mount Raspberry Pi / fan
- 4x Cylindrical head screw M2.5 x 16mm
Print instructions
Supports: No
Pi image configuration
In the config.txt the screen orientation must be rotated.
lcd_rotate=2
Building instruction
- Install the threaded inserts in the bottom part of the case.
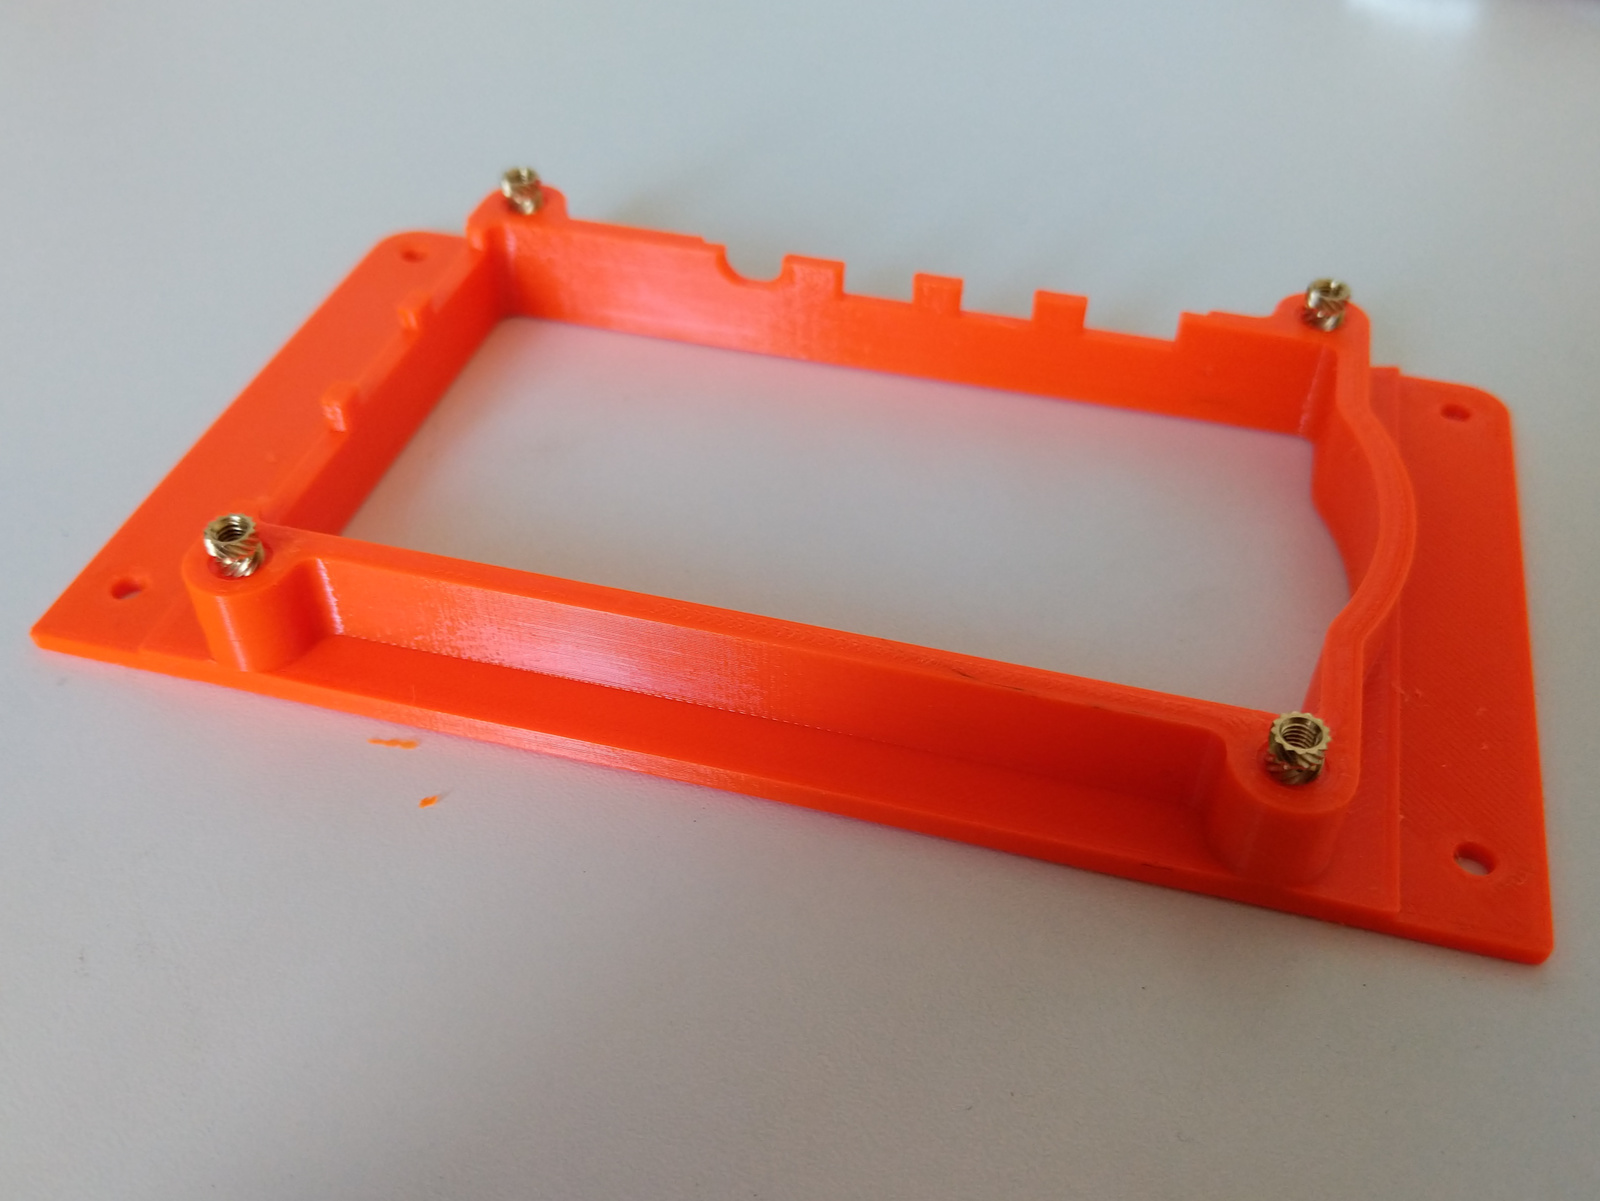
- Install the data cable (ribbon cable) and power (red/black wires) with the touch screen controller card. See Raspberry Pi - Documentation -> Physical Installation
- Assemble the touch screen, display case, bottom case and strands with M3x12mm screws. Attention do not tighten the screws yet!
- Place the Raspberry in the case. Do not forget the SD card with image!
- Connect the Raspberry with the touch screen.
- Data cable
- Red wire (+): 5V power pin e.g. GPIO 2
- Black wire (-): Ground pin e.g. GPIO 9
- Install the fan on the fanmount with 4 anti-vibration mounts.
- Install the fanmount on the Raspberry with M2.5 x 16mm screws. Tighten the screws.
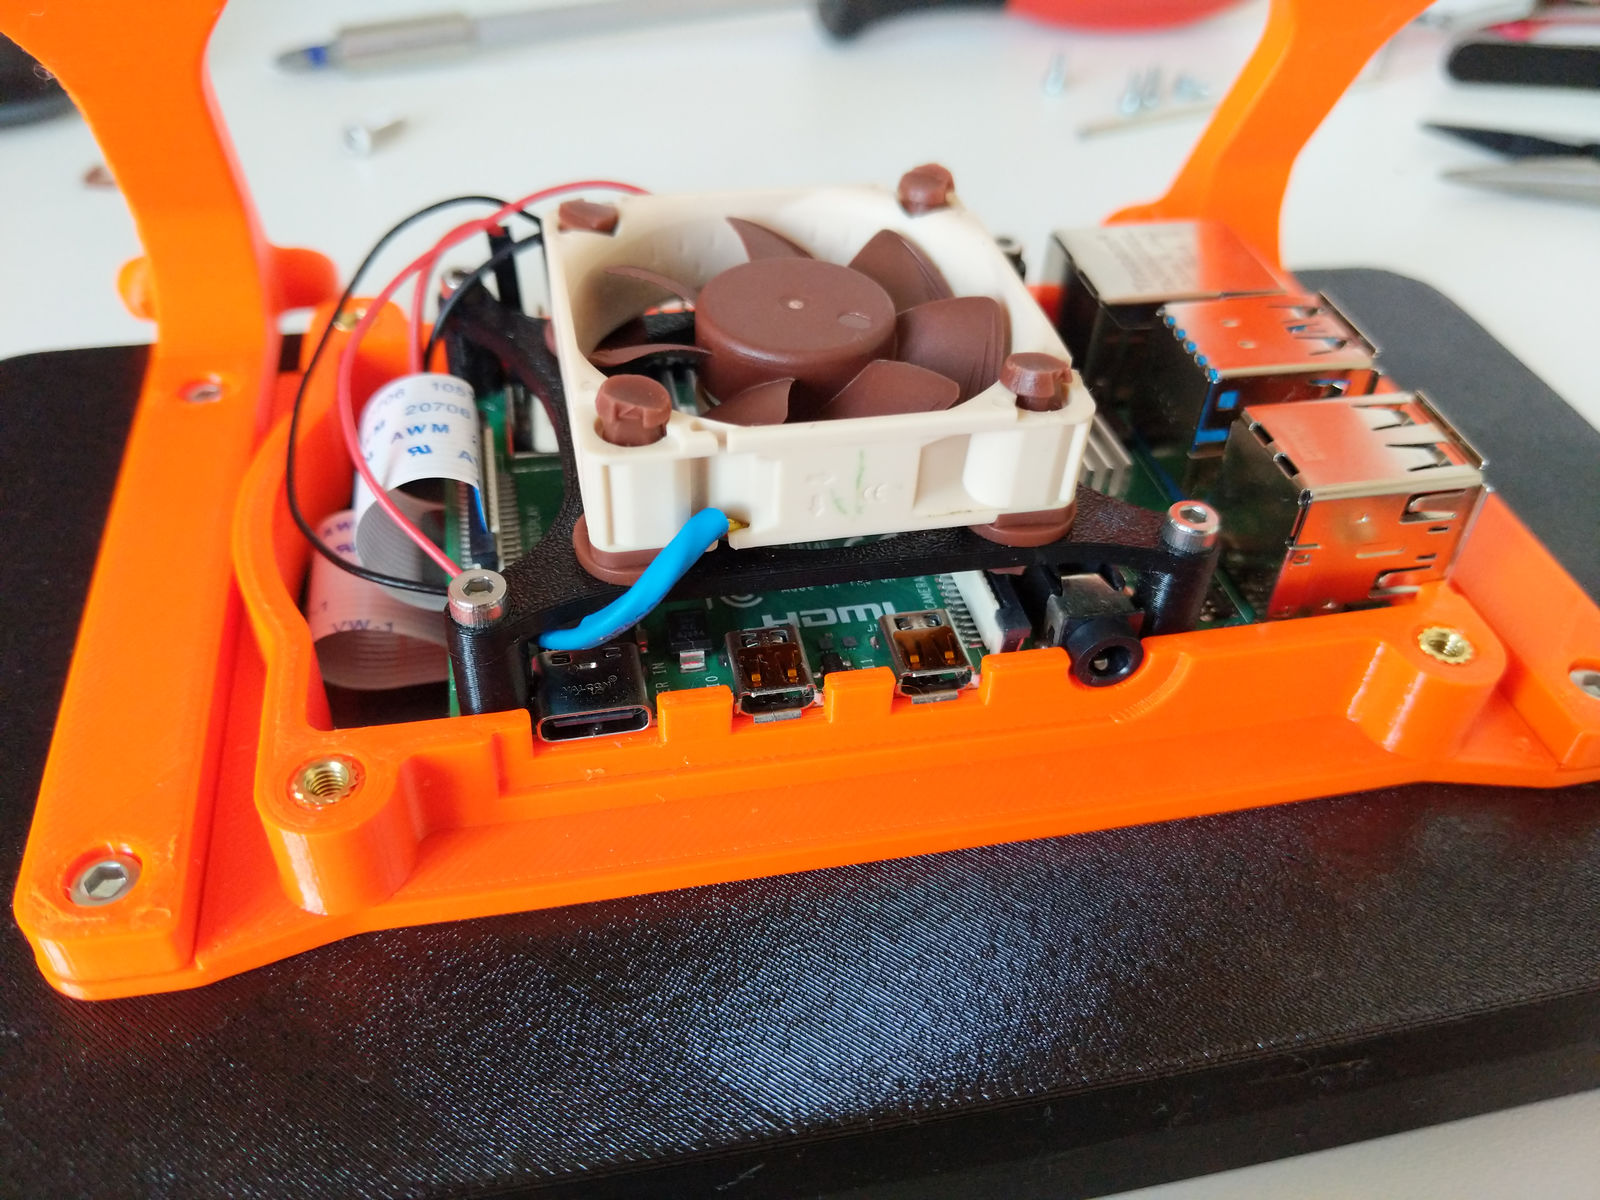
- Tighten the loose M3 x 12mm screws. (See Point 3)
- Connect the fan with the Raspberry.
- Red wire (+): 100% fan speed -> 5V power pin e.g. GPIO 4 or reduced fan speed -> 3V3 power pin e.g. GPIO 17
- Black wire (-): Ground pin e.g. GPIO 6
- Install the top part onto the bottom part using M3 x 12mm screws.