
1 / 4
7" Touchscreen case for Raspberry Pi 4 + internal fan
Zamów wydruk tego modelu
Obliczymy ostateczną cenę na podstawie wybranego pliku. Sprawdzisz ją i zaakceptujesz przed płatnością.
Zapisane na tym urządzeniu.

Case for Raspberry Pi 7" Touchscreen and Raspberry Pi 4 Features Internal fan mount (40mm x 40mm x10) Thread inserts…
- Ocena
- 4,923 / 5
- Polubienia
- 478
- Pobrania
- 3778
- Wydruki
- 37
- Wyświetlenia
- 28 788
- Oceny
- 39
Aktualizacja u źródła:
Informacje o modelu
- Źródło
- Printables
- Kategoria
- Electronics
- Licencja
- Creative Commons — Attribution
SzczegółyPliki (21)Wydruki i komentarze (Wydruki: 37) (Komentarze: 86)Remiksy (12)Kolekcje (772)Powiązane
Case for Raspberry Pi 7" Touchscreen and Raspberry Pi 4
*** New case for Raspberry Pi Touch Display 2 ***
Updates
- Alternative top case part with additional slot for camera ribbon cable, see subfolder "case top v2".
Features
- Internal fan mount (40mm x 40mm x10)
- Thread inserts (pi case)
Alternative mounting brackets:
- Plate mounting bracket for 7" touchscreen case
- V-Slot profile 2020 mounting bracket for 7" touchscreen case
Required parts
- Raspberry Pi 4B
- Raspberry Pi 7-Inch Touch Screen Display
- Fan 40x40x10, 5V → Noctua NF-A4x10 5V incl. anti-vibration mounts
- 4x Anti-vibration mounts (See fan)
- 2x 1P Single Dupont connectors (For fan)
Mount Raspberry Pi case (top / botton parts)
- 4x M3 thread inserts → Ruthex RX-M3x5.7
- 4x Cylindrical head screw M3 x 12mm
Mount Raspberry Pi case (display / stands / botton parts)
- 4x Cylindrical head screw M3 x 12mm
Mount Raspberry Pi / fan
- 4x Cylindrical head screw M2.5 x 16mm
Print instructions
Supports: No
Pi image configuration
In the config.txt the screen orientation must be rotated.
lcd_rotate=2
Building instruction
- Install the threaded inserts in the bottom part of the case.
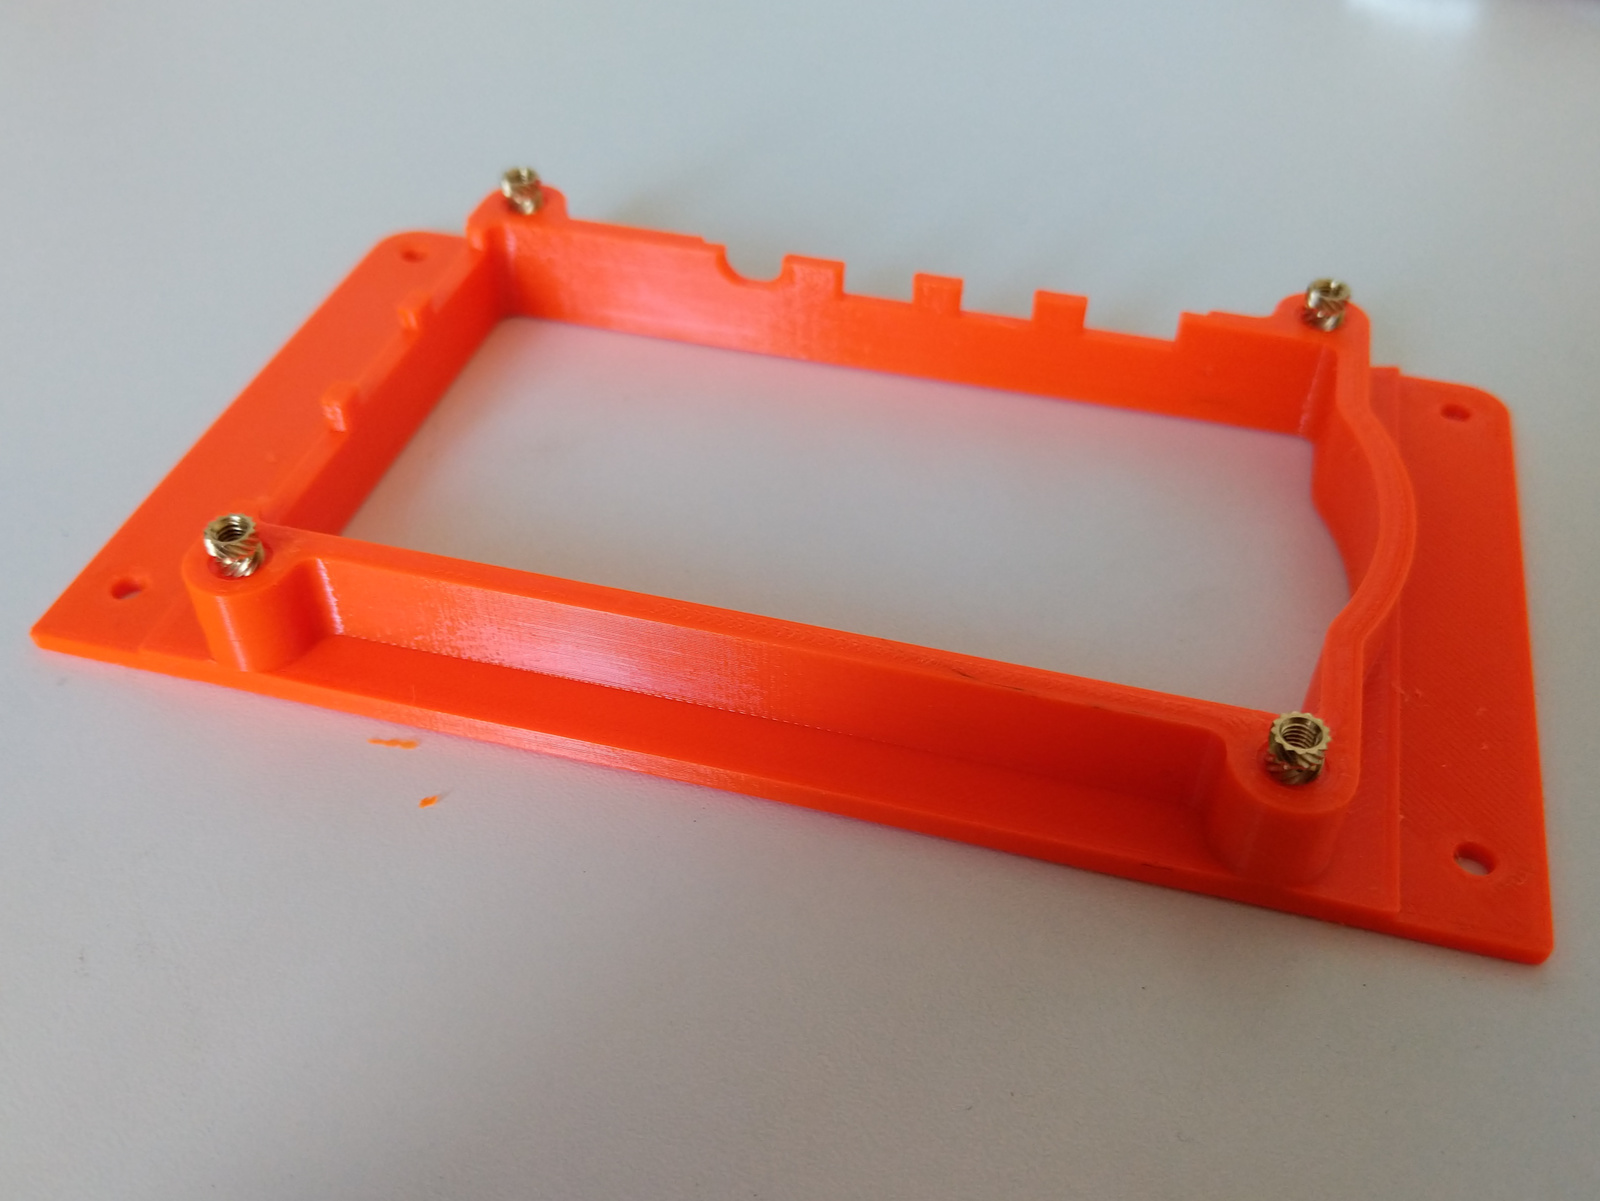
- Install the data cable (ribbon cable) and power (red/black wires) with the touch screen controller card. See Raspberry Pi - Documentation -> Physical Installation
- Assemble the touch screen, display case, bottom case and strands with M3x12mm screws. Attention do not tighten the screws yet!
- Place the Raspberry in the case. Do not forget the SD card with image!
- Connect the Raspberry with the touch screen.
- Data cable
- Red wire (+): 5V power pin e.g. GPIO 2
- Black wire (-): Ground pin e.g. GPIO 9
- Install the fan on the fanmount with 4 anti-vibration mounts.
- Install the fanmount on the Raspberry with M2.5 x 16mm screws. Tighten the screws.
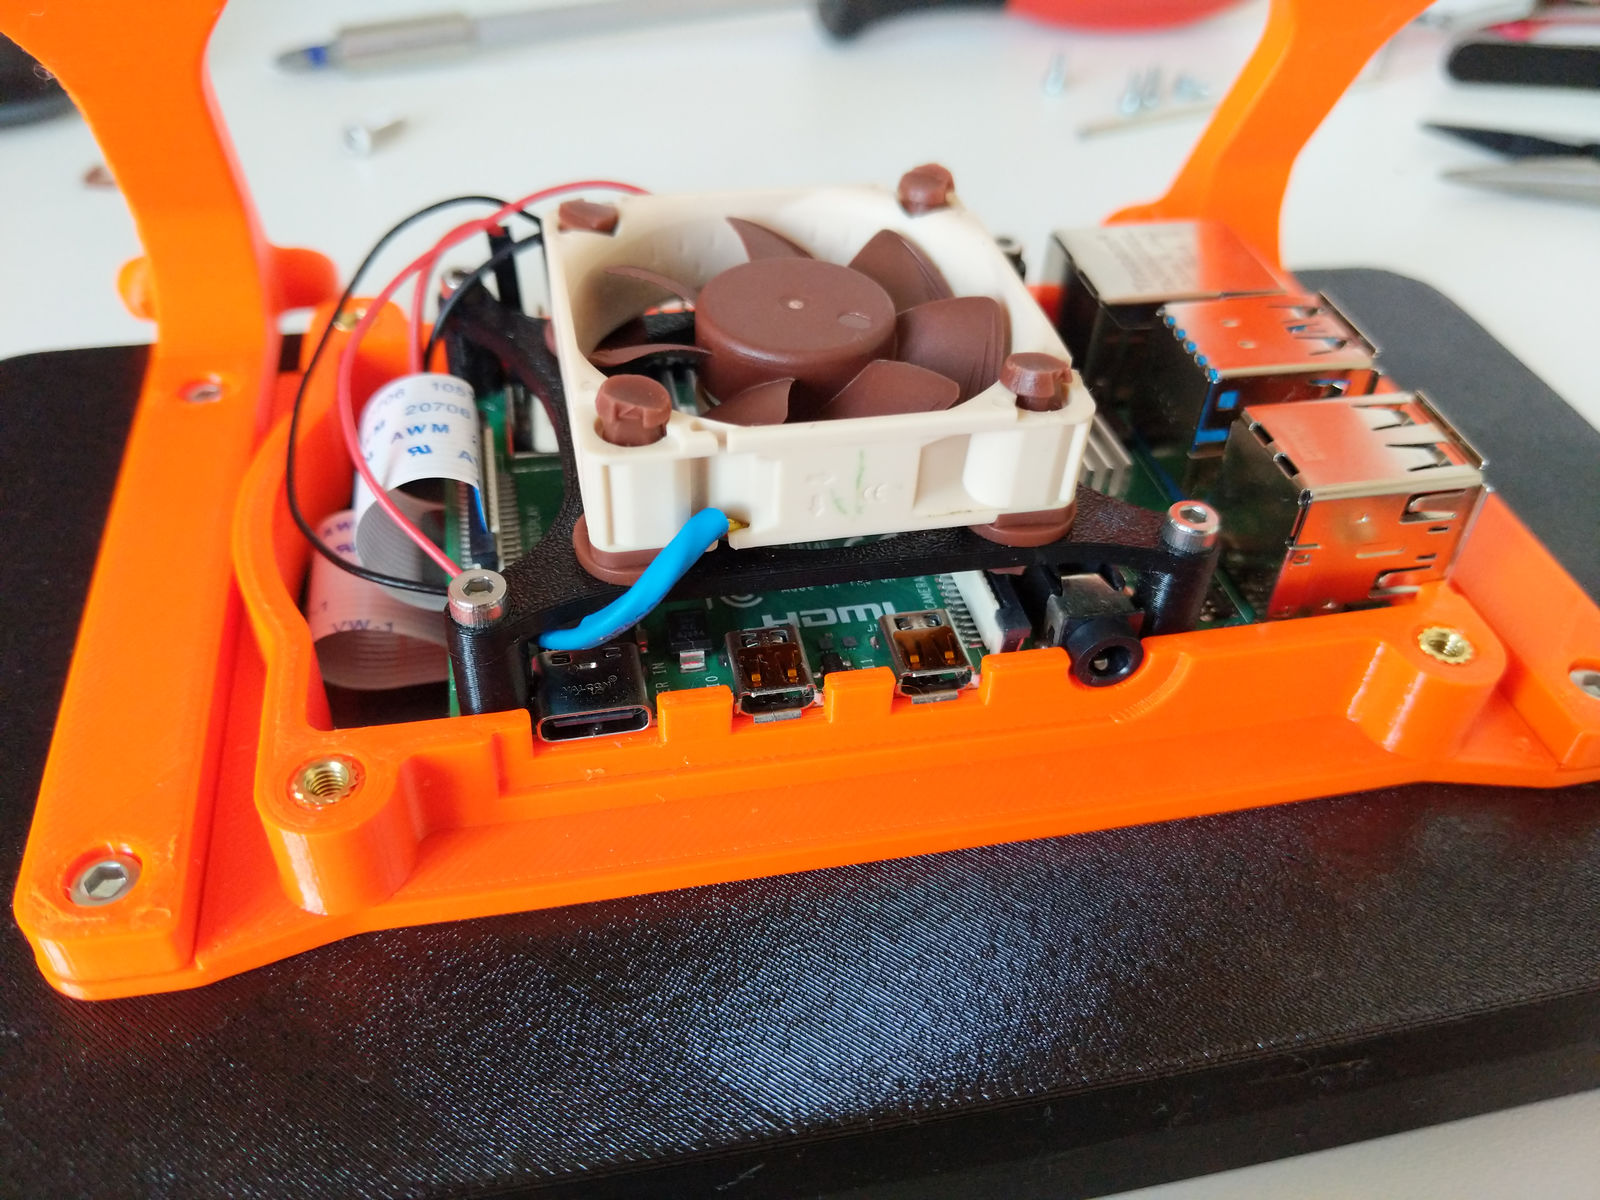
- Tighten the loose M3 x 12mm screws. (See Point 3)
- Connect the fan with the Raspberry.
- Red wire (+): 100% fan speed -> 5V power pin e.g. GPIO 4 or reduced fan speed -> 3V3 power pin e.g. GPIO 17
- Black wire (-): Ground pin e.g. GPIO 6
- Install the top part onto the bottom part using M3 x 12mm screws.