Parametric Ducting to Window Insert Connector
We calculate the final price from your selected file. You review and accept it before payment.
Saved on this device.

Attach and detach exhaust ducting to a window insert.
- Rating
- 0 / 5
- Likes
- 9
- Downloads
- 51
- Makes
- 0
- Views
- 633
- Reviews
- 0
Updated at source:
Model information
- Source
- Printables
- Category
- Tools
- License
- Creative Commons — Attribution — Noncommercial
Motivation
I needed to vent my laser cutter exhaust from a 6” inline fan to the outside using parts which were easy to install and uninstall in a double hung window.
Solution
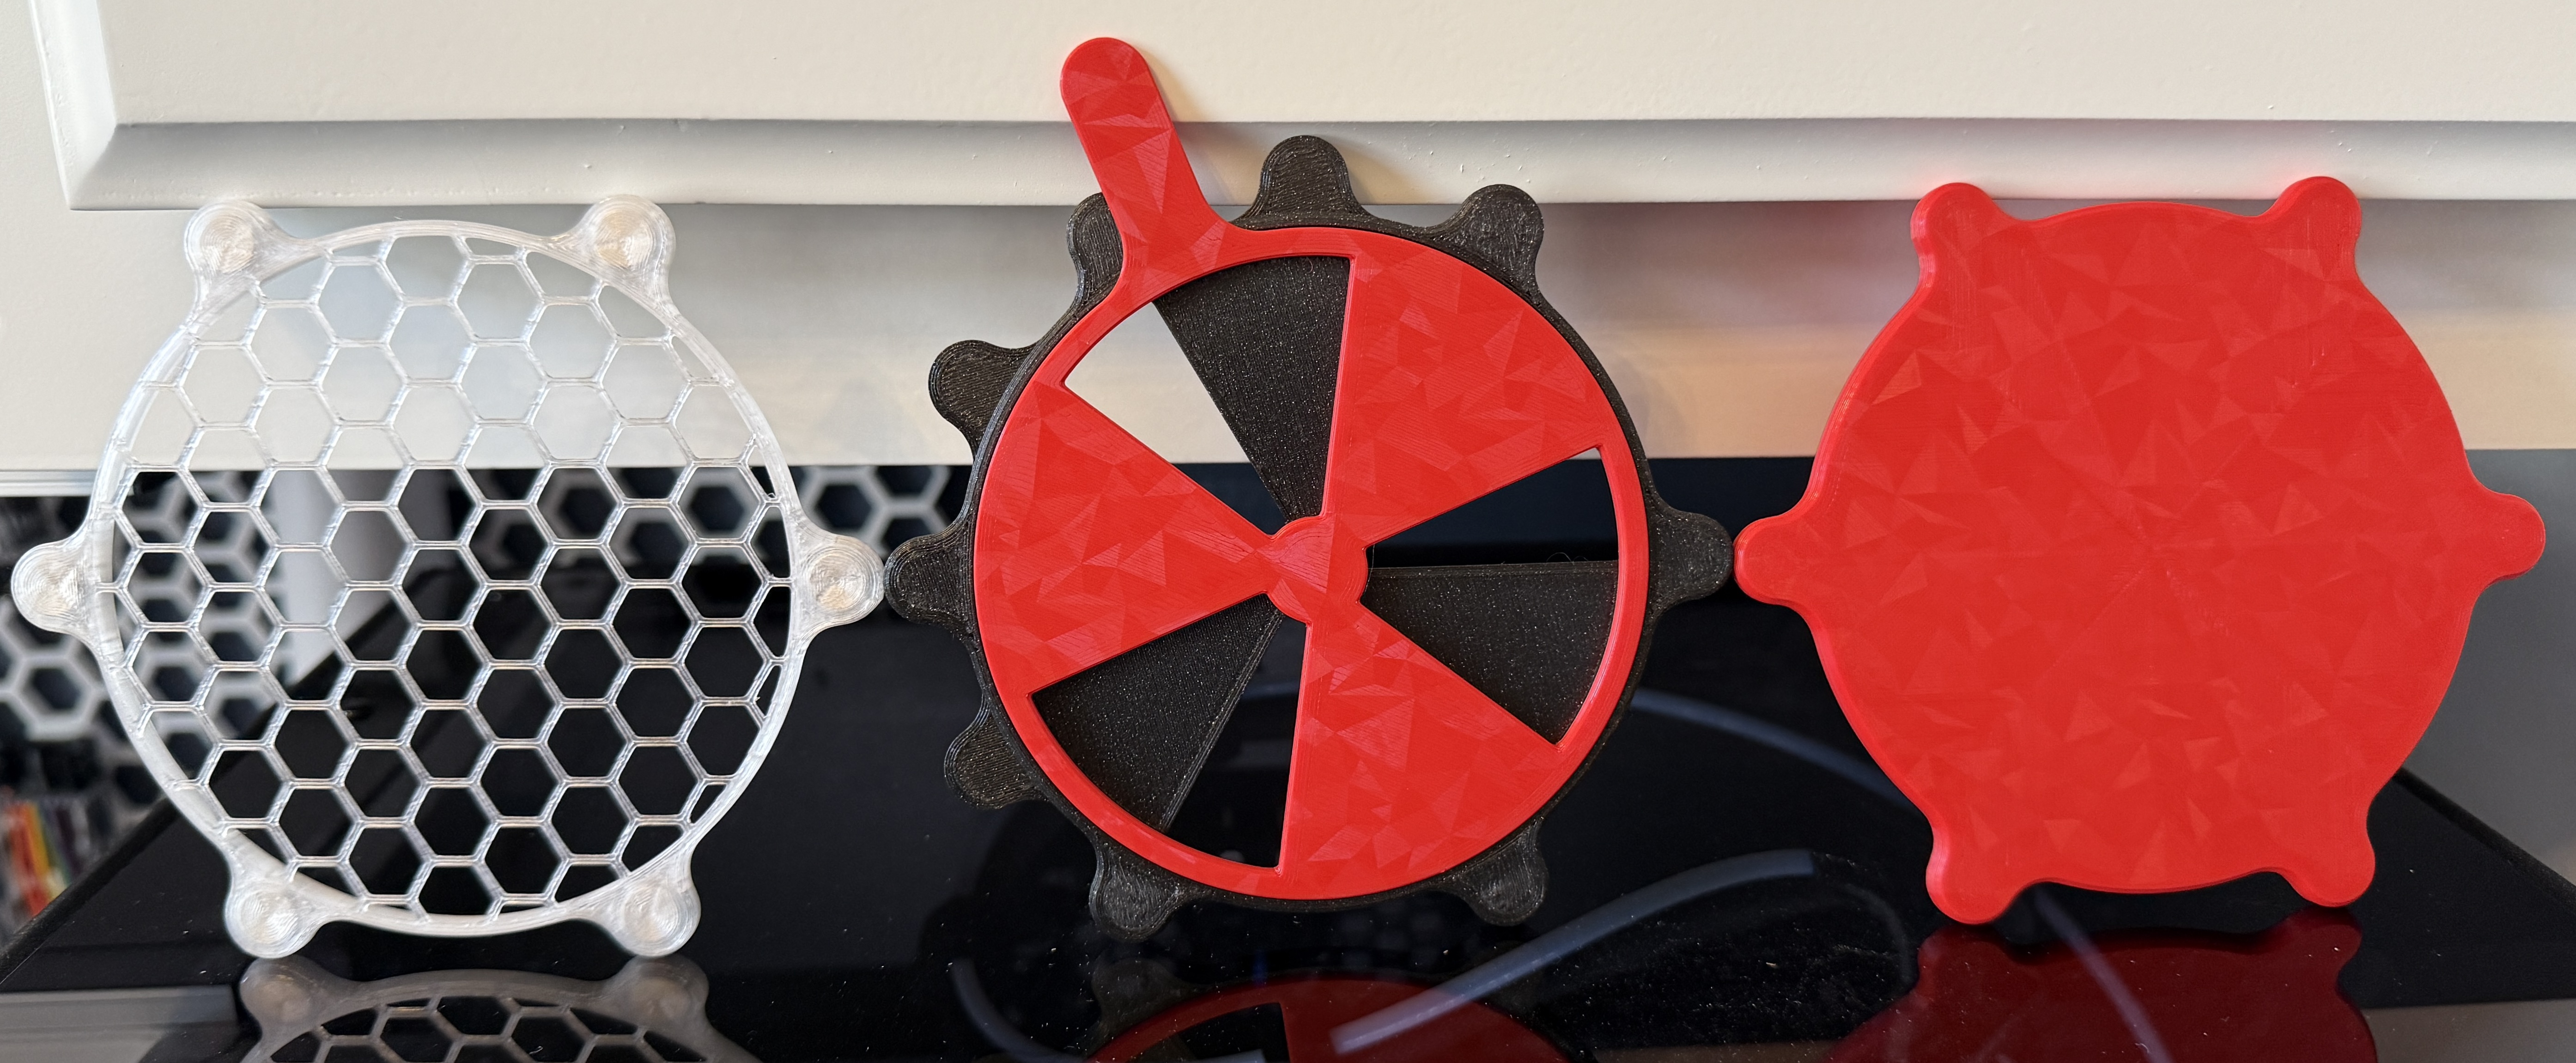
Design and print an exhaust port that could be attached to a piece of ~¼” thick acrylic (this can also be optionally inserted in and removed from the window’s channels). I have seen others implement such a solution in various laser groups but was not able to find a printable model that accomplished the following objectives:
Parametric allowing customization of the exhaust duct diameter, window insert thickness, wall thicknesses, tolerances, and basically any other design dimension
Easy to install/uninstall
Secure fit
Airtight as much as possible
(Optional) Grid to keep out all but the smallest insects (default of 4 mm diameter is too small for most bees)
Minimal supports required
Updates
v2.0
New! Simplified the design approach
New! A different in and out diameter parameter can be specified allowing for expansion (or reduction) right at the window insert.
Adjust the transition zone length as necessary
You may need to recompute the chamfer applied to the tabs
Customization
The included models fit my use case with these key parameters:
5.43 mm thick window insert
149.0 mm diameter for AC Infinity 6" Flexible Aluminum Ducting (Amazon.com)
72.5 mm diameter for the flexible ducting included with the xTool P2
The Fusion 360 file is included. You can customize the parameters (DESIGN | SOLID | MODIFY | Change Parameters | filter by keyword (e.g. “diameter”, “thickness”, “angle”, “chamfer”, ”kerf”, “tolerance”, etc.) to suit your personal preferences or 3D printer’s tolerances.
I designed and prototyped on a Prusa CORE One.
Let me know (Messenger | Printables.com) if you have any questions.
Printing
See the attached .3mf for my settings. Supports are only required under the retention tabs.
Consider slicing a small cross section of the exhaust port (including parts of the front and back retention tabs) to verify a proper fit on your window insert before printing the entire model.
I printed with Prusament Jet Black and it’s a good match to the AC Infinity Fan and Ducting.
Installation
Straightforward, but you can view the animated .gif as well.
The WindowInsertCutout.dxf can be used in your laser software to process the cutout in your window insert. You have a couple methods to accomplish this depending on any customizations you make to the exhaust port and the kerf of your laser, but make sure you properly account for your laser’s kerf (consider a test cut on a scrap piece then evaluating the fit using the printed exhaust port):
Use the WindowInsertCutout.dxf and scale the path in your vector editor or laser’s software to account for your laser’s kerf (e.g. if your laser’s kerf is .5 mm, you would reduce the size of the path by .5 mm with the aspect ratio locked)
In Fusion 360, edit the LaserKerfOffset parameter for your laser’s ½ kerf (this method applies the adjustment symmetrically all around the sketch, so ½ the kerf is the proper adjustment) and re‑export the .dxf from the CutoutOnly sketch in the WindowInsert component. Be careful using this method as there will be two paths in the export (the original non‑offset path and the offset path). Do not process the non‑offset path in your laser software or it will cut twice!
Of course, if you customize the model, you will probably also need to use method #2.
I do not recommend using the outline function of your laser software if it works like xTool Creative Space and rounds sharp corners. This would result in a cutout that blocks the exhaust port.
I chose to rotate my cutout by 45° as you can see in the pictures.
Shameless Plug
If this model helped you solve a problem, save some time, or in any way made your life a little easier then please consider clicking the Like button and posting your Makes! If it fell short after clicking on the title of the model, please let me know (Messenger | Printables.com). Either way, Thank you!
Related
Complete exhaust configuration
Adapters - Convert machine exhausts to ducting diameter and/or MagDuct
xTool P2 Exhaust Duct Adapter (configured as 4 in)
MagDuct xTool F2 Ultra UV Slip Adapter
MagDuct CORE One Exhaust Adapter and Gasket
Ducting
xTool pipe (included w/ xTool IF2 2.0 and xTool F2 Ultra UV)
xTool 72.5 mm ducting (included w/ xTool P2)
Couplers - Convert flexible ducting or pipe/rigid ducting to MagDuct
Connectors - Convert ducting for attachment to inline fan or external surface
Duct Expander (configured as 4 to 6 in expander)
Ducting to Window Insert Connector (attached to a piece of 1/4" acrylic inserted in the channels of my double hung windows which allows for quick installation/uninstallation (configured as 148.0 mm (6") and 72.5 mm exhaust port)
Inline Exhaust Fans
Mounts - Securely mount MagDuct components to a surface using a third-party mount
Accessories
MagDuct Fume Extraction Nozzle and Screen - Direct smoke and fumes (e.g., soldering) into exhaust ducting
MagDuct Generic Accessories - Control airflow volume and chamber temperature (e.g., enclosed 3D printers)