
Replacement Samsonite-Compatible Luggage Wheel
We calculate the final price from your selected file. You review and accept it before payment.
Saved on this device.

Replacement / upgrade for Samonsite suitcase luggage wheels. Replaces the bushing with a bolt and bearing setup.
- Rating
- 0 / 5
- Likes
- 27
- Downloads
- 93
- Makes
- 0
- Views
- 1,034
- Reviews
- 0
Updated at source:
Model information
- Source
- Printables
- Category
- Other House Equipment
- License
- Creative Commons — Attribution — Noncommercial
Overview
I struggled to find the correct replacement rollers for my Samsonite suitcases. The wheels had worn out in such a way that the axles had carved an arc through the coaster forks, as seen below.
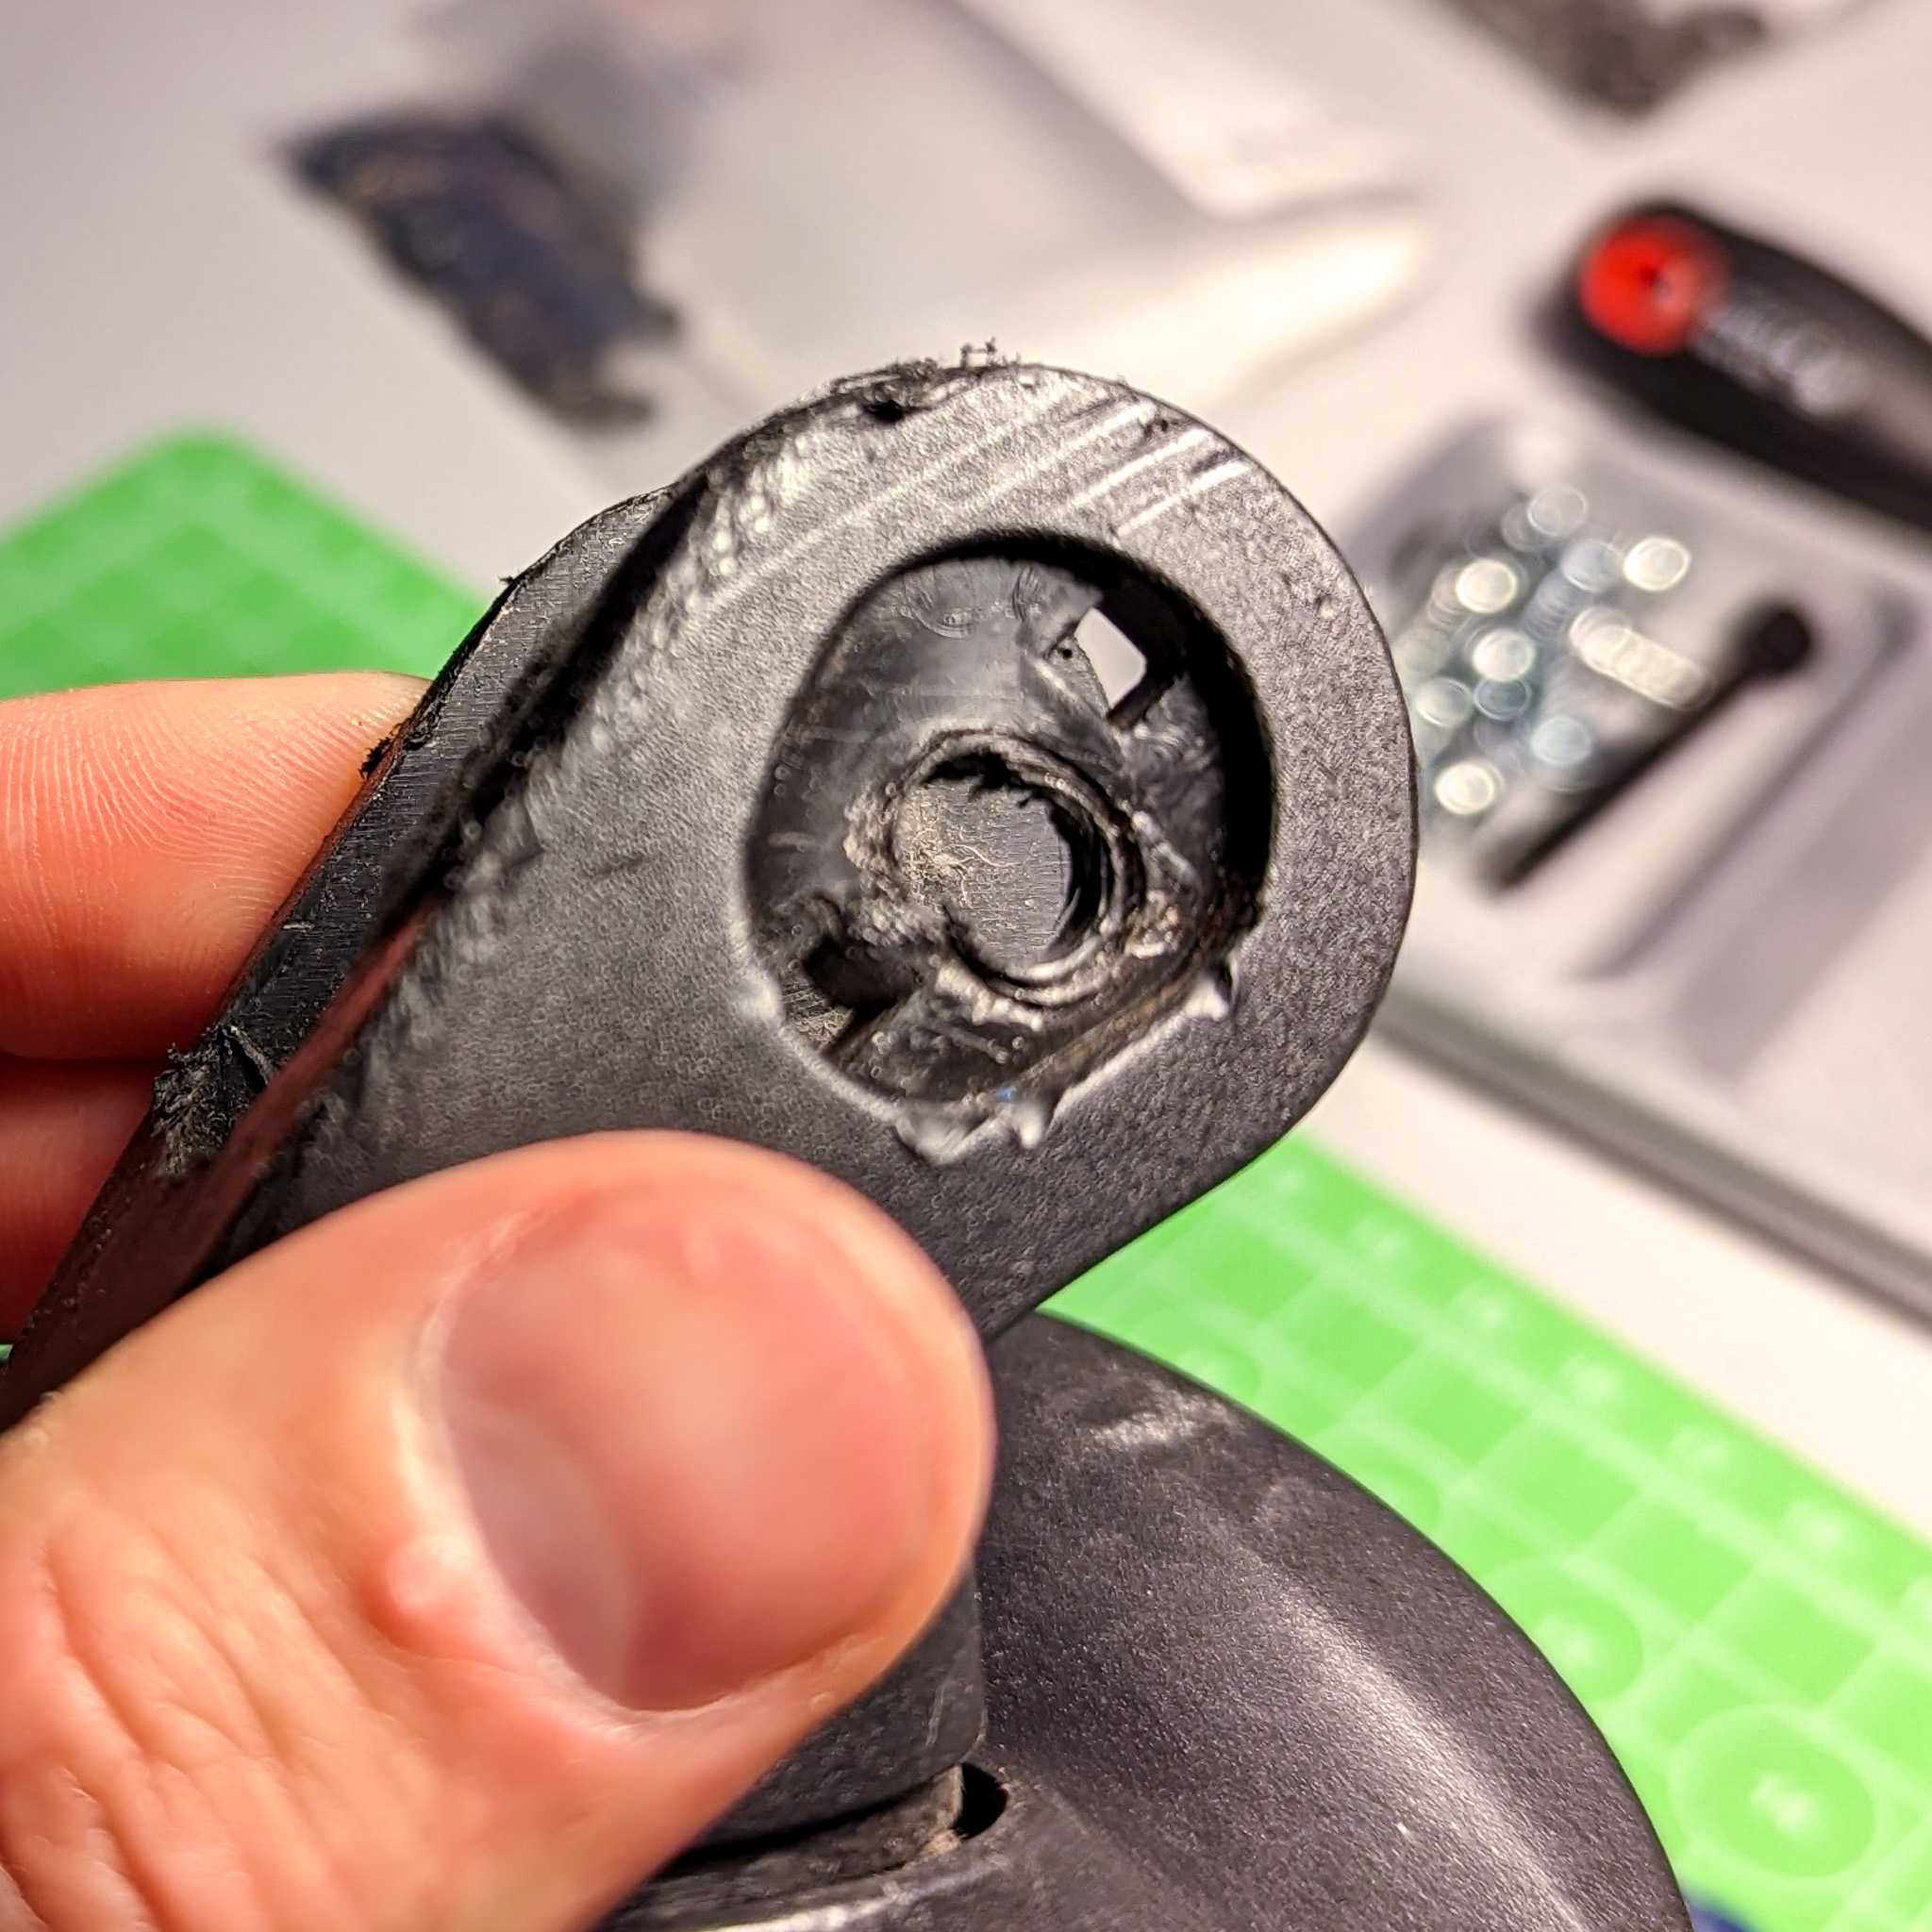
To address this issue, I designed bracket inserts to fit within the "teardrop" recess for the original snap covers. These two parts locate the bolt and threaded insert around the original wheel axis. The wheel itself utilizes F695-2RS bearings for the load bearing parts, a solid central hub, with wear-resistant TPU the slips over as a tire. Spacers keep the bearing shims from slipping into the worn out forks, and together they keep the wheel firmly centred. See the parts stack-up here:

The replacement wheel itself weighs the same as the original (28 g), but the bolt may add several grams to the overall weight of each coaster.

Four of these wheels have so far survived a trip from ZRH to JFK on a 23 kg suitcase without damage. One such wheel is pictured in the gallery above.
Update (2024/07/30): all original wheels still going strong after another flight (checked baggage) and dragging it through the streets and subways of New York and Toronto. The TPU shows little sign of wear, and all ABS parts are intact.
Bill of Materials (BOM)
| Part | Number (per wheel) | Material | Source |
|---|---|---|---|
| M5-40 mm Socket Head Cap Screw | 1 | Stainless Steel | Amazon (US) |
| M5 x D7.5 x L7.0 Threaded Insert* | 1 | Brass | AliExpress |
| 5 x 10 x 1.0 mm Shim | 2 | Stainless Steel | Amazon (US) |
| F695-2R2 Bearing | 2 | - | Amazon (US) |
| “spacer” | 2 | ABS or similar | Printed |
| “bracket_head” | 1 | ABS or similar | Printed |
| “bracket_thread” | 1 | ABS or similar | Printed |
| “wheel_hub” | 1 | ABS or similar | Printed |
| “wheel_tire” | 1 | TPU | Printed |
* easily adapted to different spec threaded inserts. Requests are welcome.
Instructions
Printing: Slicing Recommendations
Print the TPU tires 100% solid by increase the perimeter count.
Print the ABS parts with at least 5 perimeters (~2 mm thick w/0.4 mm extrusion width), and >40% gyroid or cubic infill.
Printing: Built-In Supports
The “wheel_hub” and “wheel_tire” both feature built-in supports. If you would like to use auto-generated supports instead or different print settings for the supports, they can be split out using PrusaSlicer's “split to parts” feature.

Assembly
- Drill out the original axle. This can be tricky. I found a 5 mm drill bit on the hollow-ish side worked well, then the rim could be peeled away with pliers.
- Remove support materials from the “wheel_x” parts.
- Press the bearings into the “wheel_hub”. These should seat flush and fit very snug.
- Slip the TPU “wheel_tire” part over the “wheel_hub” part. This step may be difficult by hand depending on the TPU you used, but a smooth metal part can held lever it on. I printed mine with Fiberlogy FiberFlex 30D, for reference.
- Insert an M5 heatsert into the “bracket_thread” part.
- Assemble the parts stack as pictured in the overview section, starting from the bolt head side.