Orbitool O2S RatRig V-Core 4 Mount
Obliczymy ostateczną cenę na podstawie wybranego pliku. Sprawdzisz ją i zaakceptujesz przed płatnością.
Zapisane na tym urządzeniu.
Informacje o modelu
- Źródło
- Printables
- Kategoria
- Other Printer Parts & Upgrades
- Licencja
- Creative Commons — Attribution
This is a remix of the LDO O2S WirerestrainBody for mounting the Orbitool O2S toolboard on the RatRig V-Core 4. The original LDO model interferes with the endstop PCB and fan grill on the VC4 toolhead, preventing proper mounting. This model has been combined with the fan grill to accommodate the toolboard position and provide an anchor point for the lower bolt on the toolboard.
Required Hardware
Required hardware for each mount (double this for IDEX setups)
1x Short M3 heatset insert (3mm x 4.5mm)
1x M3x5 Cap Head Screw
1x M3x8 Cap Head Screw
2x M3x10 Counter Sunk Cap Head Screw
2x M3x35 Cap Head Screw (from original kit)
1x 14mm hex standoff (from the Orbitool O2S kit)
Recommended Print Settings
Material: Something high temp capable, and ideally rigid. I used PPA-CF. ASA, ABS, PC etc would work well. PA will work but is lower rigidity.
Dial in your bridging settings to achieve good quality on the grill.
Nozzle : 0.4
Layer height : 0.1-0.2
Walls count : 3
Top/bottom layers : 4
Infill : 30% Cross-Hatch
Recommend limiting print speeds on the fan-grill section to 50mm/s max to ensure it prints as flat as possible.
Recommended Orientation & Support Settings
The stl model is pre-orientated, and will require a small support underneath the lower toolboard mounting point (pictured). I used 0.1mm Top Z-distance.
Your cooling settings will need to be fairly well dialed in, as the grill obviously has a lot of bridging sections that you want to be neat.
Installation Instructions
Install the short M3 heatset insert in the lower toolboard mount.
Attach the 14mm standoff from the Orbitool O2S kit to the right hand stepper motor bolt.
Install the mount to the toolhead using the original M3x35 cap head screws at the back, and the two M3x10 countersunk cap head screws at the front.
If using the Orbiter Filament Sensor, insert the bridge connector from the Orbitool O2S kit through the slot on the toolboard mount onto the sensor pins.
Install the Orbitool O2S by aligning the pins on the back of the board with the bridge connector and pressing it into place. Secure using the M3x8 cap head screw to the top mounting hole into the 14mm hex standoff, and the M3x5 cap head screw into the heated insert in the lower mounting hole.
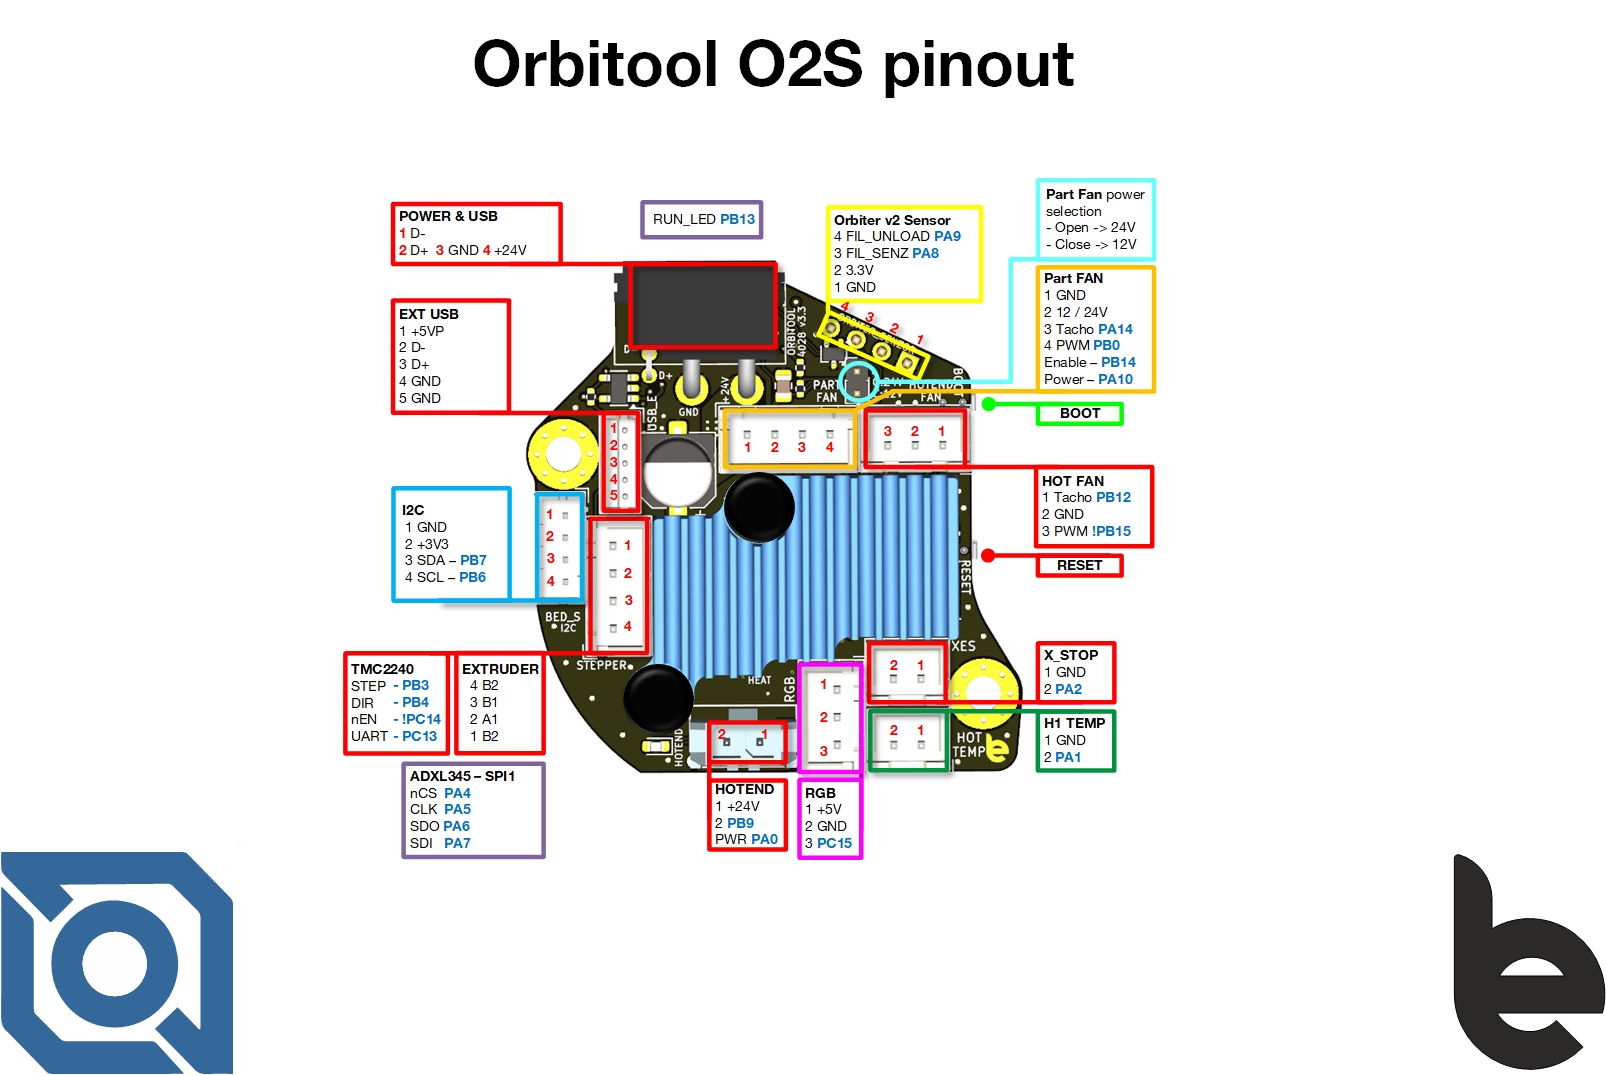
Proceed to wire up the toolhead according to the LDO pinout: