
1/3rd Scale ACA Banshee 115 Siren
Obliczymy ostateczną cenę na podstawie wybranego pliku. Sprawdzisz ją i zaakceptujesz przed płatnością.
Zapisane na tym urządzeniu.
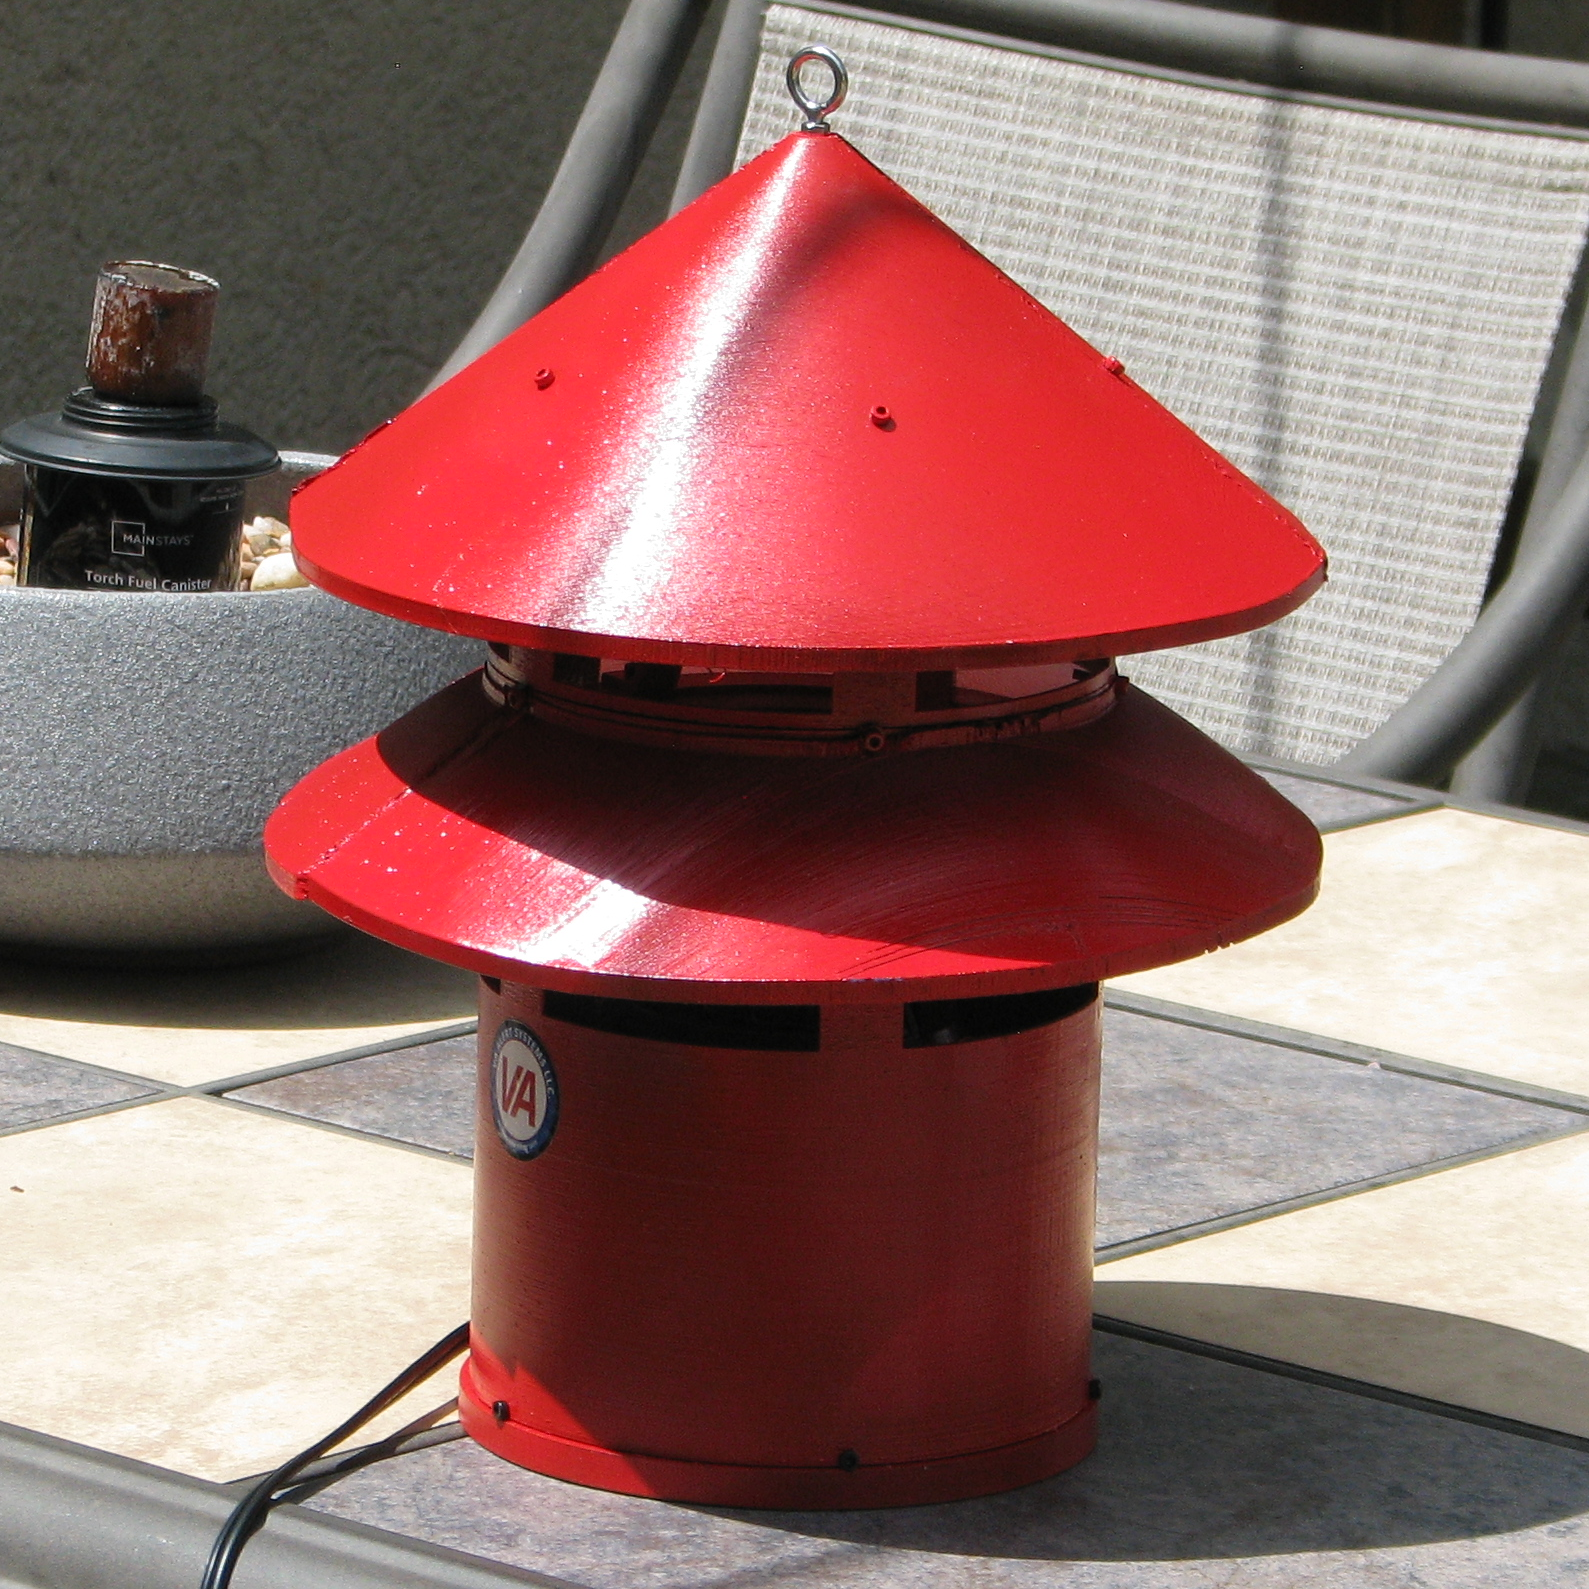
1/3 scale fully functional ACA Banshee 115!
- Ocena
- 5 / 5
- Polubienia
- 8
- Pobrania
- 75
- Wydruki
- 2
- Wyświetlenia
- 475
- Oceny
- 1
Aktualizacja u źródła:
Informacje o modelu
- Źródło
- Printables
- Kategoria
- Mechanical Parts
- Licencja
- Creative Commons — Attribution — Noncommercial
Big thank you to NorthDakotaSirens and jackwilliamson54 for helping beta test the siren! Credit to Demetrius P. for making the intake and 8/12 Rotors!
UPDATE 9/4/26: Added fictional 8/12 core (Rotors by Demetrius P.)
This is my new 1/3rd scale ACA Banshee 115 Siren! This is a completely new model compared to the original. This version MUCH more realistic and modular. It is also easier to assemble!
NOTE: THIS MODEL IS STRICTLY FOR 3D PRINTING. DO NOT PUT THIS MODEL IN ANY VIDEO GAMES LIKE ROBLOX!
Minimum print bed size 220x220x250 (stock ender 3 printer)
If you want a stand or pole mount for this siren, I'd recommend looking at Demetrius' Printables. All of his 1/3rd scale ACA mounts fit my Banshee's intake!
Link to his 1/3rd scale type 1 ACA Allertor 125 for the mounting:
Also from Demetrius is the 8/12 rotors! The ACA Banshee 115 did not come with an 8/12 option but I thought it would be cool to make one anyway. Yes I know the Banshee 110s had 8/12 hint hint...
If you wish to make the 8/12 assembly you will need an 8mm shaft coupler and 18 slotted weights.
MOTOR:
This model uses a Samsung microwave blower motor. DE31-00029H, DE31-00029K, and DE31-00029J are the best options. The best deals for motors are found on eBay for around 30-40 dollars.
For the Capacitor, 8uF to 15uF is recommended. (I recommend 10uF the most)
Cable I use/recommend:
https://www.amazon.com/dp/B0BSBSKQTM?ref=ppx_yo2ov_dt_b_fed_asin_title&th=1
Capacitor (10uf)
https://www.amazon.com/uxcell-Capacitor-Metallized-Polypropylene-47x34x18mm/dp/B0983L1731?crid=2NDS0RFZZIYQI&dib
Capacitor (8uf)
https://www.amazon.com/dp/B0143VJN40?ref=ppx_yo2ov_dt_b_fed_asin_title
Capacitor (15uf)
https://www.amazon.com/uxcell-Capacitor-Metallized-Polypropylene-47x34x22mm/dp/B0983LFYH1?crid=19M3P6M1IHTGD&dib
Weights
https://www.amazon.com/dp/B0D2Q2QW43
Shaft Coupler (for 8/12 core specificly)
https://a.co/d/0anfRpOi
HARDWARE:
Eyebolts:
https://www.amazon.com/dp/B0FHD5WGS2 Buy X2 M3x8 specifically
M3 screws and inserts are needed. If you wish to print a stand/mount from Demetrius, M5 screws and nuts are needed.


Printing and assembly:
STATOR:
The first thing I would recommend printing is the main core of the siren. This is the rotor, stator, stator connector, and motor cover.
Hardware list:
- Samsung motor screws x3
The stator should be the first thing you print. I would advise that you print it at a higher infill, around 50% or higher. I also strongly advise you print this with tree supports. To attach the stator use the hardware that came with the Samsung motor. Put the stator on the opposite side of where the wire comes out.
STATOR CONNECTOR:
Hardware list:
- M3 screws X7
- M3 inserts X4
After the stator is done, the stator connector should be next. This part basically just connects the stator to the hat. It screws to the stator with M3s. The bobs that connect the hat require threaded inserts.

Photo Credit NorthDakotaSIrens
ROTOR:
Once you have that done, the rotor is should be your next print. I would recommend printing the rotor at a very high infill. 90% or higher is strongly advised. if your printers tolerances are not great, you may need to edit the shaft hole tolerance on the rotor or cooling fan to whatever fits your printer. THIS IS A REQUIRED STEP! Supports are optional for the rotor part.
If you are using the slotted weights, the rotor uses a total of 16 and they should just press fit in. If you choose to do wheel weights, DO NOT USE THE ADHESIVE! Glue them in to make sure they don't fly out. SUPERGLUE IS REQUIRED!! Once you have the weights in if you use them, you can put the rotor on and hear it scream!
MOTOR COVER:
The motor covers are the last parts of the "Core" and definitely help with the realism of the siren. These parts are purely cosmetic. First print the main cover, then the end bell. This is also when the cooling fan is printed.
Hardware list:
- Long M3 Screws X4
- Samsung Motor Screws X3
The main cover is basically a sleeve that goes over the motor. Use the hardware that came with the Samsung to attach it. then print the cooling fan and put it in the top part of the main cover. Then finally, print the end bell. This simply screws to the main cover with 4 longer M3 screws. Once this is all done, the core is fully done!
INTAKE:
Hardware list:
- M3 screws and inserts X5
- (Optional) M5 screws and nuts X6
Now it’s time for the intake. This part is pretty self explanatory. Print with tree supports and do it at higher infill. It screws onto the stator with M3 screws. The stator does need inserts for the intake.
If you print a stand/mount from Demetrius, you will need M5s. I would strongly suggest you do this step!
Bottom Louver:
The bottom louver is an easy print. Minimum bed size for the full louver is 345X345. If you are interested in plastic welding or have a smaller printer, you can print the cut louver. The minimum size for the split louver is 220X220. Tree supports are also required for this part.
Print X1 of sections 1 and 2 and X2 of section 3

Diagram showing the pattern of the louver

Photo Credit NorthDakotaSIrens

Photo Credit NorthDakotaSIrens
Hat/Top Louver:
Hardware list:
- M3 screws X2
- M3 eyebolts X2
Similarly to the bottom louver, the hat is also a large print. The minimum bed size for the full hat is 345X345. And much like the bottom louver there is an option for smaller printers. If you choose to do the split hat, plastic welding is required. minimum bed size for this part is 220x220. Tree supports are also required on the hat.
Print X3 of section 1 and X1 of section 2

Photo Credit NorthDakotaSIrens
Once its printed and welded together you can now attach it to the stator. Take two M3 screws at screw them on opposite of each other. Then do the same with the eyebolts.
After all of this is done, your mini ACA Banshee 115 is complete! Post a make of your siren to show it off!

Photo Credit NorthDakotaSIrens