
Modular Adjustable GPU Support Stand
Obliczymy ostateczną cenę na podstawie wybranego pliku. Sprawdzisz ją i zaakceptujesz przed płatnością.
Zapisane na tym urządzeniu.
Modular GPU support stand with adjustable height, magnetic base, and interchangeable contact pads.
- Ocena
- 0 / 5
- Polubienia
- 2
- Pobrania
- 8
- Wydruki
- 0
- Wyświetlenia
- 101
- Oceny
- 0
Aktualizacja u źródła:
Informacje o modelu
- Źródło
- Printables
- Kategoria
- Office
- Licencja
- Creative Commons — Attribution — Share Alike
Modular Adjustable GPU Support Stand
A modular GPU support stand with adjustable height, a magnetic base, and interchangeable contact pads. This support stand is designed to support long or heavy graphics cards. The model consists of separate modular parts in different lengths: a base, an adjustable top section, and a contact pad. A magnetic holder for the base is also included, along with 3D-printable nuts and bolts in case metal nuts and bolts are not available.
Information about the model
Height ranges:
50-60 mm
70–95 mm
Different combinations of parts may result in other height ranges.
Included contact pad options:
Flat round pad
Pad with cushion insert recess
90° corner pad
The stand uses an M6 nut and bolt for adjustment and support. Metal nuts and bolts are recommended for strength and durability. Printed nuts or bolts should only be used for testing, mockups, or very light use. Use printed nuts and bolts at your own risk.
Printing
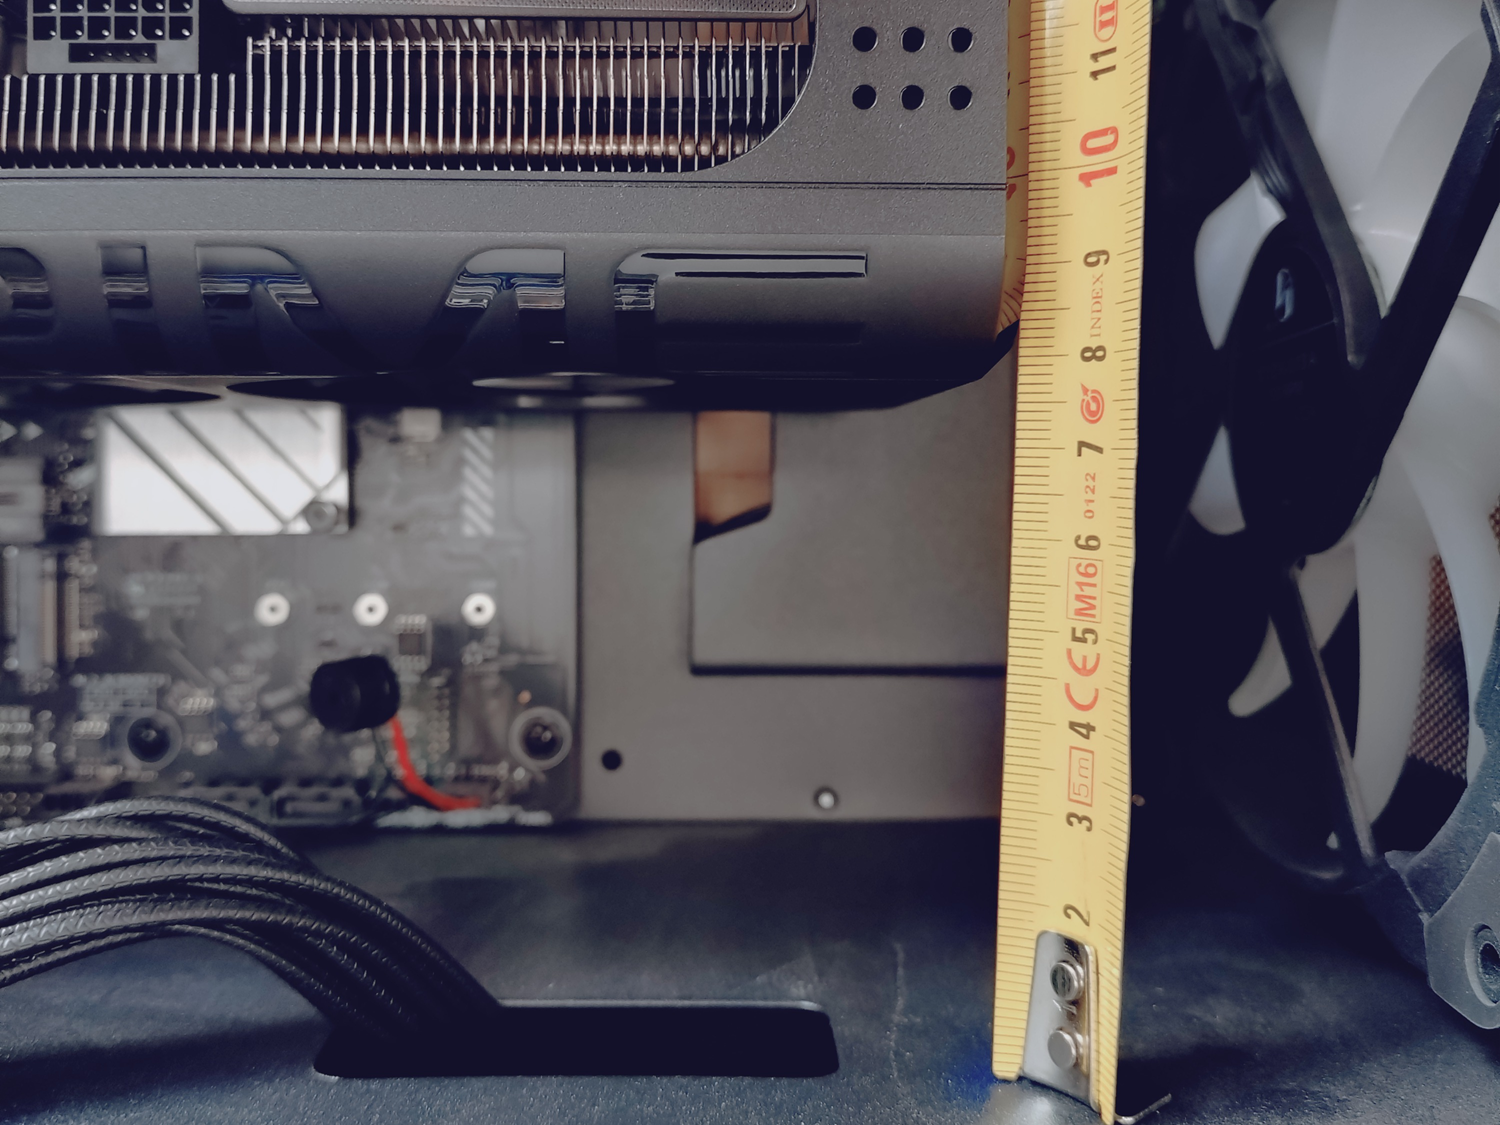
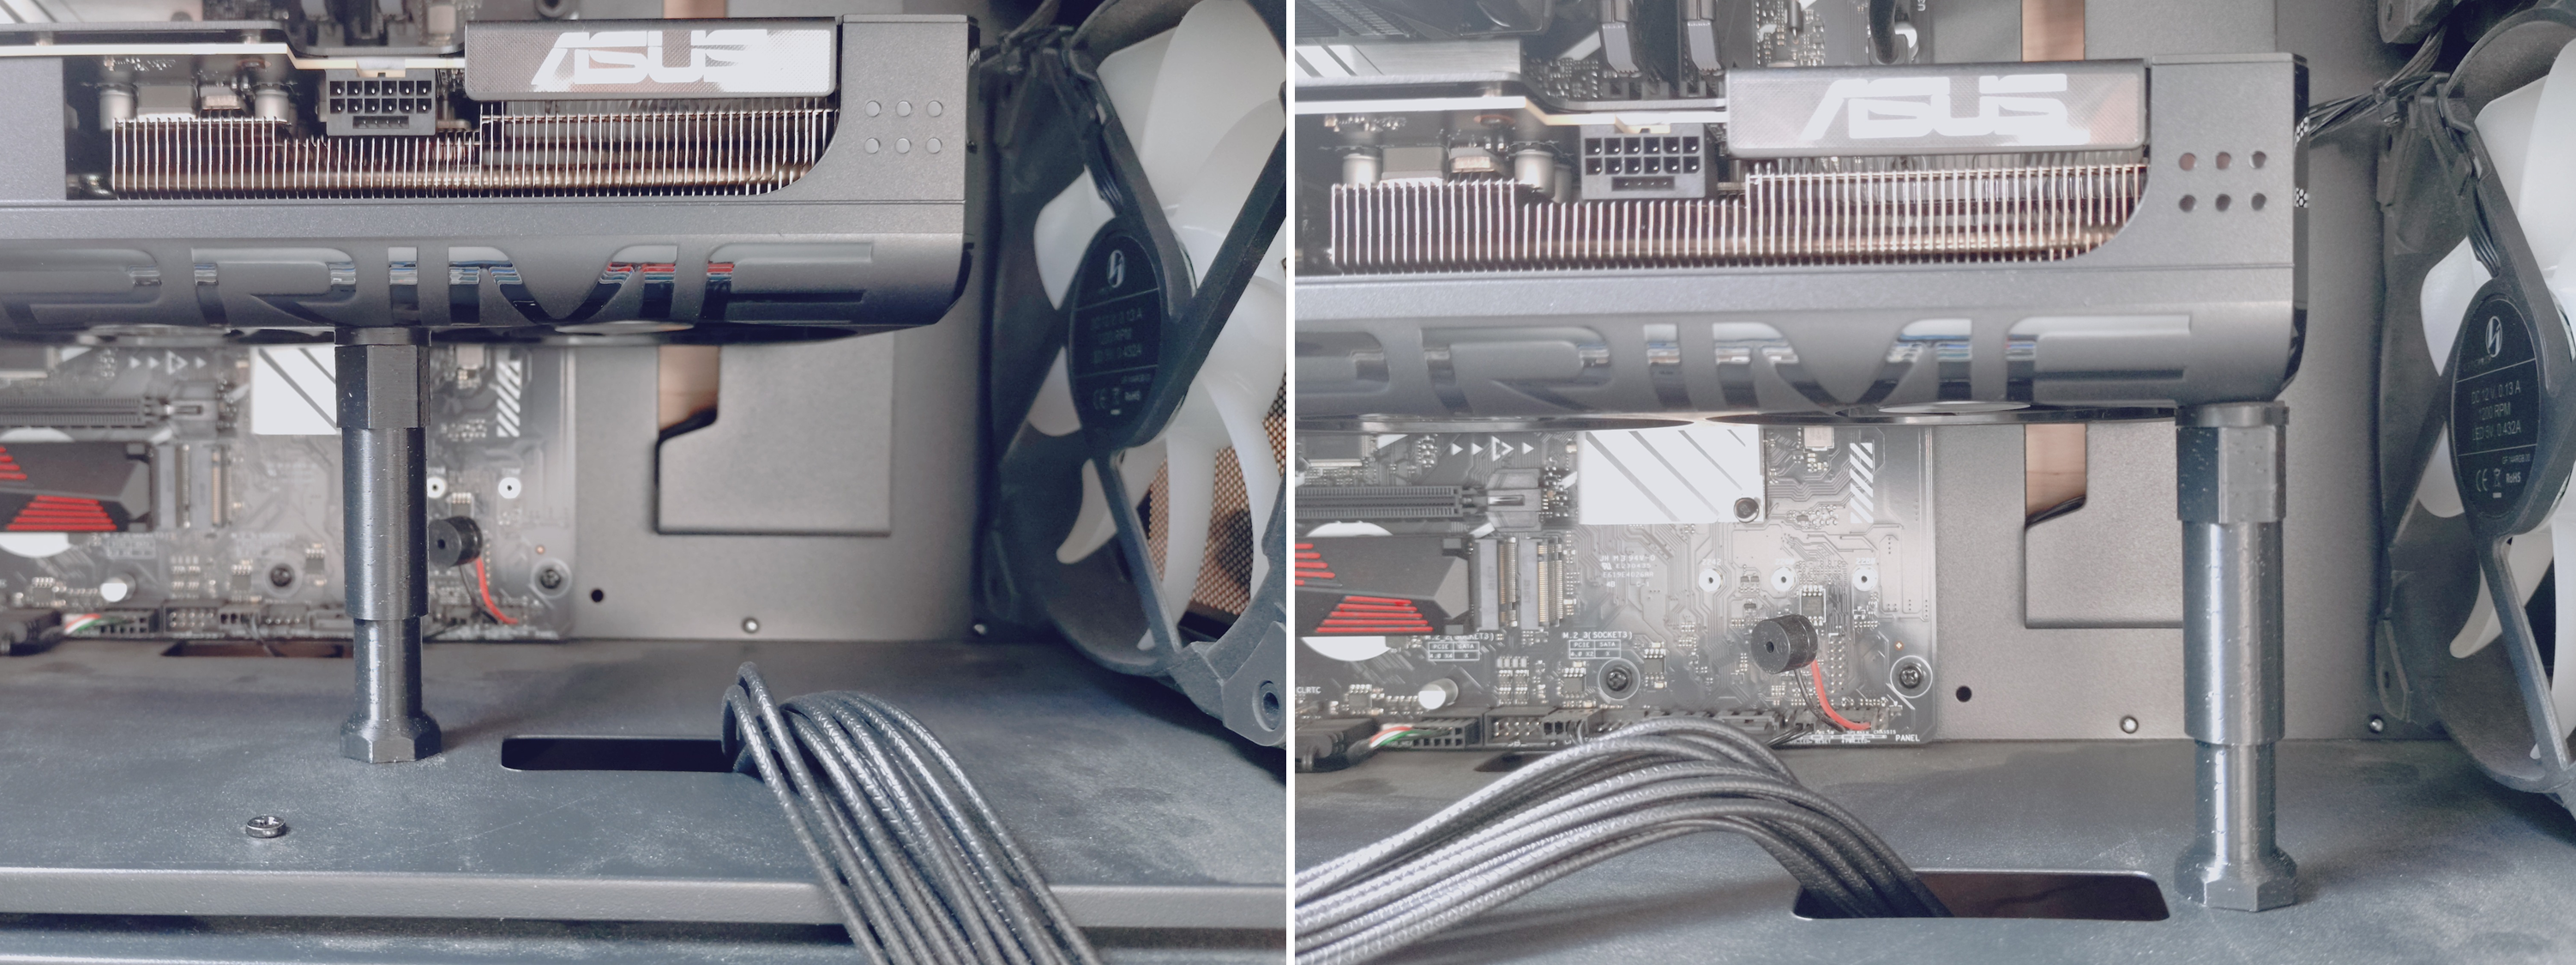
Measure the distance from the bottom of the PC case to the graphics card (see picture).
For the GPU stand, you need the following parts (see picture):
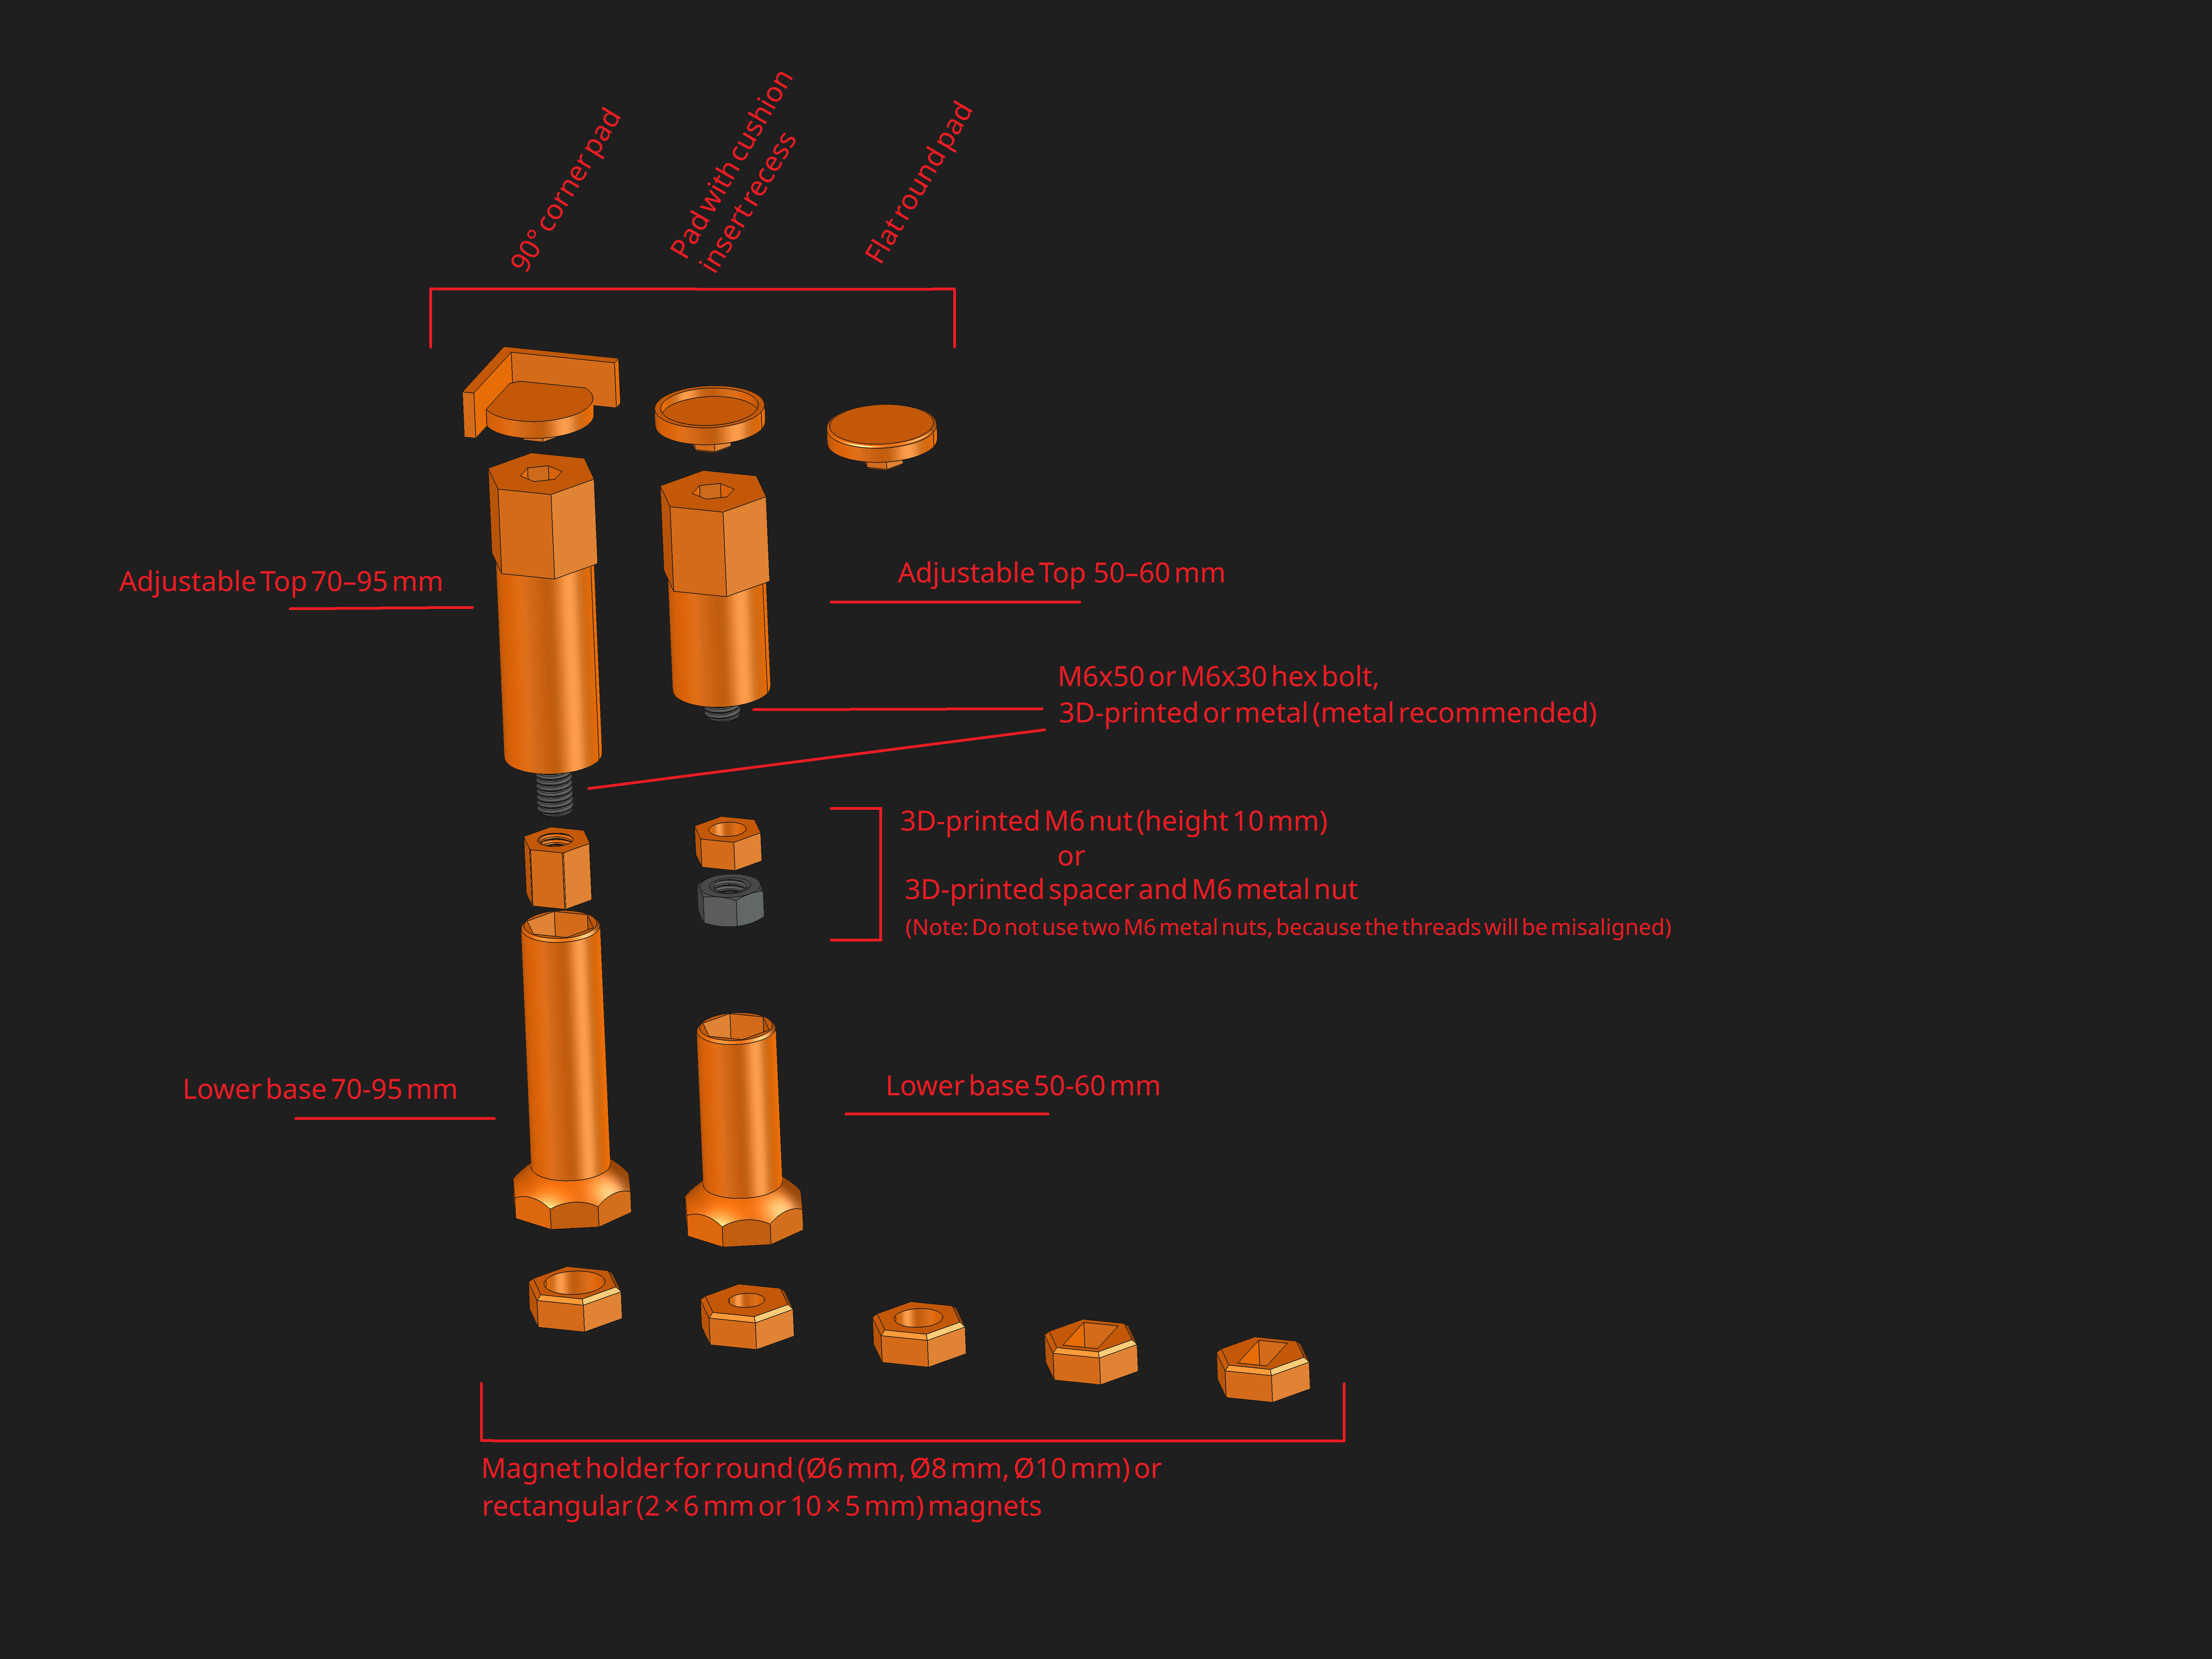
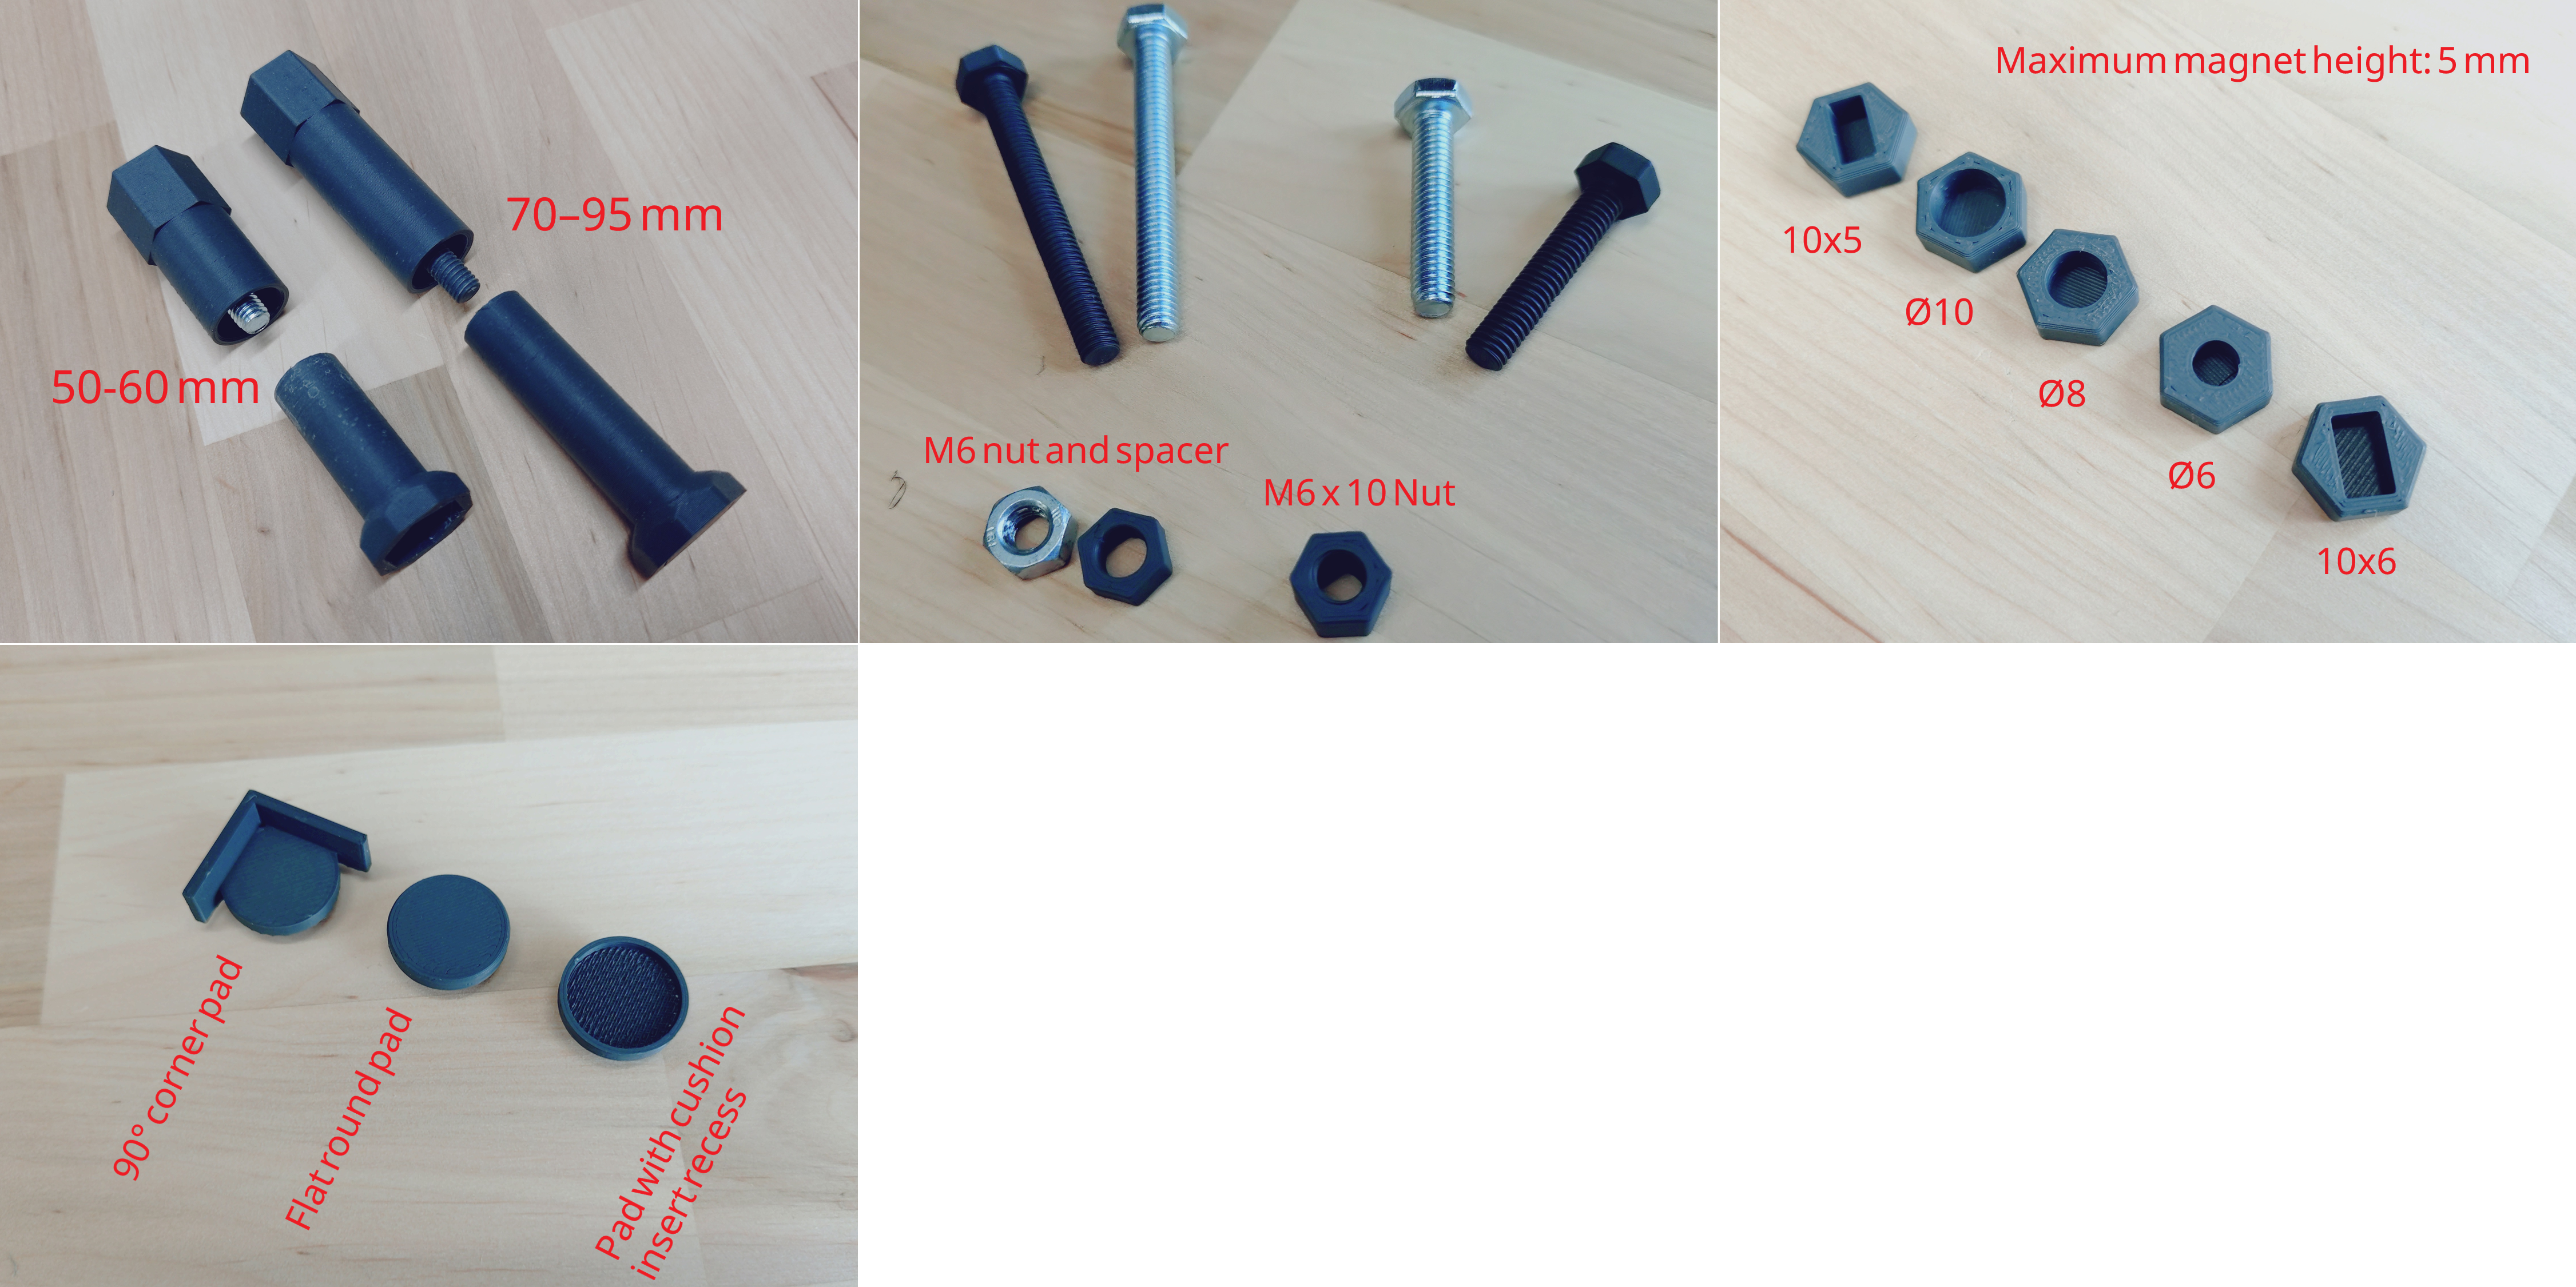
Magnetic holder (optional)
Base (choose the required length or try different variations)
Adjustable top (choose the required length or try different variations)
M6 × 30 mm bolt for the 50–60 mm stand, or M6 × 50 mm bolt for the 70–95 mm stand
M6 nut
Spacer for M6 metal nut (optional)
Pad (choose one)
Recommended print settings:
80%+ infill for 3D-printed nuts and bolts
20%+ infill for other 3D-printed parts
Strong material such as PETG, PC, ASA, or similar
The STL files are already oriented for printing. Use standard support settings where needed.
Note: Temperatures inside a PC case may get quite high, so PLA is not recommended. Use PLA at your own risk.
Assembly
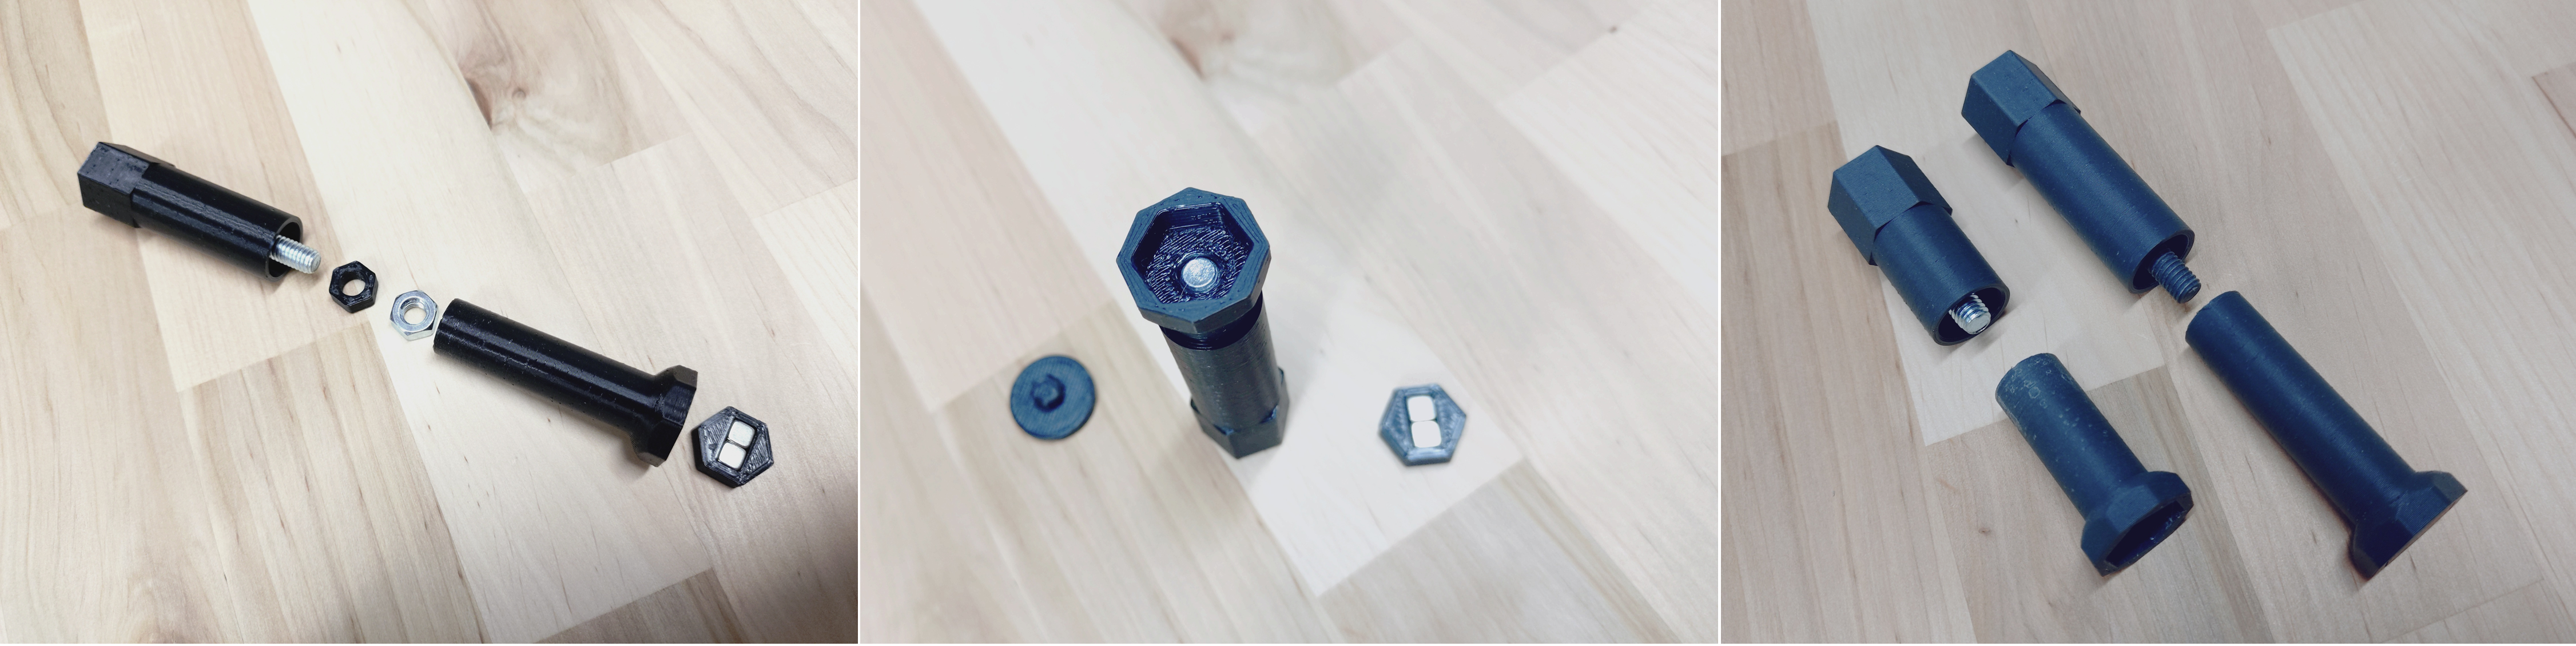
Install the 3D-printed nut, or the metal nut and spacer, into the base
Install the 3D-printed bolt or metal bolt into the adjustable top
Check the minimum and maximum height. Pay special attention to when the bolt starts to come out from the bottom of the base.
Install the magnets and/or the magnetic holder into the base
Attach the selected contact pad to the top
Place the GPU support stand under the graphics card
Note
The same version of this model is also available on Thingiverse. For documentation, printing instructions, updates, and the changelog, visit: https://www.thingiverse.com/thing:7371841
License
Creative Commons Attribution-ShareAlike 4.0 International (CC BY-SA 4.0)
You are free to:
Share — copy and redistribute the model in any medium or format
Adapt — remix, transform, and build upon the model
Use commercially
Under the following terms:
Attribution — You must give appropriate credit to the original author
ShareAlike — If you modify the model, you must distribute your contributions under the same license
This model is provided as-is, without warranty. Use at your own risk.