
The D3vil Burner
Obliczymy ostateczną cenę na podstawie wybranego pliku. Sprawdzisz ją i zaakceptujesz przed płatnością.
Zapisane na tym urządzeniu.

Voron Stealth Burner redesigned for the Rapido UHF longer nozzle and to make it better, adding 2 custom logos and 4 LEDs
- Ocena
- 0 / 5
- Polubienia
- 61
- Pobrania
- 171
- Wydruki
- 0
- Wyświetlenia
- 4906
- Oceny
- 0
Aktualizacja u źródła:
Informacje o modelu
- Źródło
- Printables
- Kategoria
- Other Printer Parts & Upgrades
- Licencja
- GNU General Public License v3.0
This is my 1st remix of the original Stealth burner from Voron to suit the Rapido UHF with the extension


UPDATE 29th Jan 2023:
STEP FILE UPLOADED, for anyone interested to play around with the design or to add your own logo… Keep in mind the logo size and if you are printing the cover with light color filament .. use a marker to black it out from the inside, just making it a simple, easy, and lighter solution :) .S
Too many have been built and tested … The Demon Burner might follow soon 😬
[ Please contact me if you need a specific logo added to the design or feel free to remix it]
why make it in the 1st place?
The problems I was trying to solve :
1- when fitting the Rapido UHF extension nozzle it extends around 8mm lower than the Rapido HF nozzle.
- cooling ducts are directed toward the heating sock instead of the parts. For this issue, i have used a product here that was already SOLVED by TX_Ryan (https://www.printables.com/model/246799-stealthburner-phaetus-rapido-uhf) Thank you very much u saved me a lot of time. ( i wish there was a Steps file to play more with your design. )
- The rear bracket is the original from Voron here is the link if needed (https://github.com/VoronDesign/Voron-Stealthburner)
- The front cover was not fitter properly and was shorter
- the LEDs were not directed toward the nozzle ( was higher projecting shadow toward the nozzle.
2- The original Front cover of the stealth burner had some points that needed change:
- Extra fat to be trimmed because the new design is longer and will add a few extra grams so needed to be lighter
- the part-cooling airflow felt restricted, so I thought why not experiment with that? keeping in mind that the Voron community has put a huge effort into making this 🙏 THANK YOU ( i dont claim that i have done it better )
- the back-pressure from the hotend fan felt too much even when running the fan at 60%
- also thought why not make it looks more aggressive in the process :)
- The original LED logo was made in a very tight space, fitting the pieces was hard and i kept damaging the LED soldering.
- It hard to add a bigger custom logo if needed, ok how about adding 2 logos?
3- the latch mechanisem and design :
- I notice when trying to change the filament I had to use 2 hands to open and close the filament latch, or else I would have moved the tool head in the process
- also sometimes the latch is tightly closed, making it hard to lift open with one finger.
- the top design of the latch is not symmetrical … ( i know am crazy )
4- The hood ( wire cover )
- The gap between the latch and the rear wire cover on top of the extruder was giving me anxiety :S
The solution:
- Build an 8mm Longer Front cover for the D3vil Burner allowing a more original look and better LED positioning
- Adding extra ram air ducts swirling toward the airflow suction of the part cooling fan. ( Experimental )
- and extra grove to collect and direct the extra air efficiently. ( Experimental )
- Redesigned the Hotend fan duct to be hexagonal to keep the edges of the fan hidden reducing some backpressure ( feels that there is less back pressure, not sure tho… looks cool anyway.)
- adding an area of [ 27.5 x 15.5 ]mm, for a custom bigger main logo.
- adding an extra LED and lower logo area of [ 26 x 10.5 ]mm .. why?! … I mean why not! ( Optional )
- The D3vil Latch system is made to be operated with one hand, adding a counter lever to support and assist in both opening and closing.
- the latch moves 35 degrees which is enough to allow the filament in and out ( didn't test it with the PCB on )
- Make the whole burner look symmetrical, The D3vil horns
- change the rear wire cover to close the gap on top and smoothly open and close without touching the new D3vil Horns.
The Slicing and Printing:
- The Voron setting is overkill, so I tested it at 0.2 Layer height with 3 walls and 3 top and bottom layers ( printing PA-CF at 260 to 280 no issues for me yet ) and printing ABS+ at 300mm and 8000 acceleration. I do believe it is more than capable to handle this and reducing the weight slightly.
- The prototype was printed with Prusament ASA white. very good to block the light from the logo LED ( but I had to use a black Marker to Paint the logo from the back to totally block the light )
- The light diffuser I printed with Esun PETG both the projector and the diffuser give me better lighting all the way to the edges of the logo.
- I made the size to be a tight fit for the diffuser and the projector is held in place by the Hotend Fan.
- assembly is very easy. Slide in the main logo diffuser and projector, and the diffuser for the 2nd logo ( optional), and then fit the Fan in place which will keep them both tight in place.
- Adding the extra LED is optional also easy to connect it to the 3rd LED and don't forget to edit the sb_leds cfg file.
- VERY IMPORTANT TO REMEMBER ( removing the smalt edge on the extruder ( explained below )
The Parts :
I am in no way associated with any affiliate program with the following and I receive no financial from the suppliers below … I just like their products and prices, and I am thankful to them for supporting my crazy projects that help the community.
The hotend is Rapido UHF kit with PT1000 from Triangle lab, CLICK HERE
The Stealth Burner Kit from MakerPanda, my favorite supplier. CLICK HERE
There is a dedicated STL file for D3vil MakerPanda Burner design. (#10)
Filament White ASA from Prusament ( excuse the draft quality print ) still didn't master the ASA yet.
Filament Black ABS+ and clear PETG from Esun via my supplier CLICK HERE if you live in the UAE or GCC
---------------------
The Original Vs D3vil ….. the part cooling duct designed by TX_Ryan


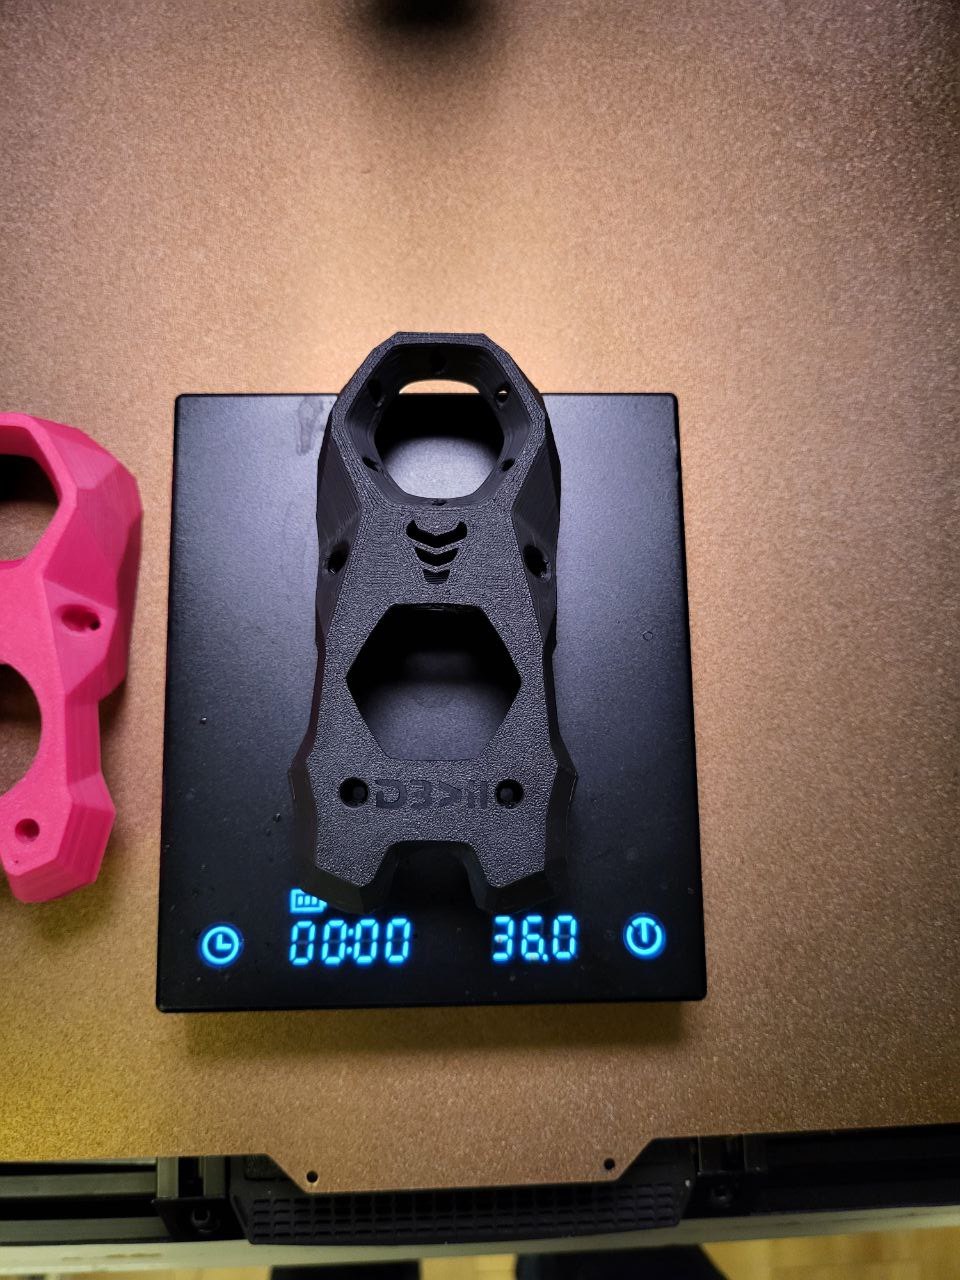
the weight: original Latch and cover … and the D3vil Latch and cover 1.1 grams heavier


The original front cover is 35.9 Grams … The D3vil Front cover is 0.1 grams heavier

Make sure to brake the support here

The diffuser slid in place easily ( if very tight you can sand the it slightly)


VERY IMPORTANT: Before fitting the Latch, remember to cut the rear wire cover stopper on the extruder as in the pic below ( this will allow the latch to move freely ).. to do so you can fit the Wire cover, close it and mark where it needs to be trimmed ( it is easy to cut. better than redesigning and printing a fully new piece … nevertheless I will update the design with a new piece later anyways)

A Small Video I made for my social media just for fun:
I hope I didn't forget anything.
Excuse me if there are any mistakes in this post, and feel free to contact me if you need any explanation.
Support
The link below for those who wish to donate or become one of my Patrons , please don't feel pressured.
If you like my designs and find them useful, a simple comment would be a great support 🙂
Thank you 🙏