Flirc Raspberry Pi Case Mount for Prusa MK3, MK3S, MK3.5
Obliczymy ostateczną cenę na podstawie wybranego pliku. Sprawdzisz ją i zaakceptujesz przed płatnością.
Zapisane na tym urządzeniu.

A Prusa i3 mount for the Flirc Raspberry Pi case. Works with RPi 3B, RPi 3B+, RPi 4, and RPi 5 cases.
- Ocena
- 0 / 5
- Polubienia
- 17
- Pobrania
- 79
- Wydruki
- 0
- Wyświetlenia
- 654
- Oceny
- 0
Aktualizacja u źródła:
Informacje o modelu
- Źródło
- Printables
- Kategoria
- Prusa Parts & Upgrades
- Licencja
- Creative Commons — Attribution — Share Alike
This is a back plate for the Flirc Raspberry Pi Case to mount it to a Prusa i3 frame. It works with the Raspberry Pi 3B, 4, and 5 versions of the case. There are different versions of the back plate depending on the case variant.
Note that this might not work with the new MK4 frames with the hexagonal pattern. Please try it and let me know. You might have to print a plug for the hexagon or use longer screws.
Required Hardware
| Qty | Description | Sourcing |
|---|---|---|
| 1 | Flirc Case (with included M2.5x10mm screws) | |
| 2 | M3x10mm Socket Head Cap Screw | Prusa spare parts, Aliexpress |
Printing
Print the part in the original orientation. All STLs are pre-rotated for printing.
Recommended Settings
- Material: PETG, ASA, ABS, etc. (anything that can withstand warm RPi temperatures)
- Layer height: 0.2mm
- Extrusion width: 0.4mm - 0.45mm
- Perimeters: 3-4
- Infill: 25%
- Top & bottom solid layers: 4-5
- Supports: No
Assembly & Installation
Step 1
Insert the Raspberry Pi into the case and install the printed Back Plate with the four M2.5x10mm screws that came with the case.

Step 2
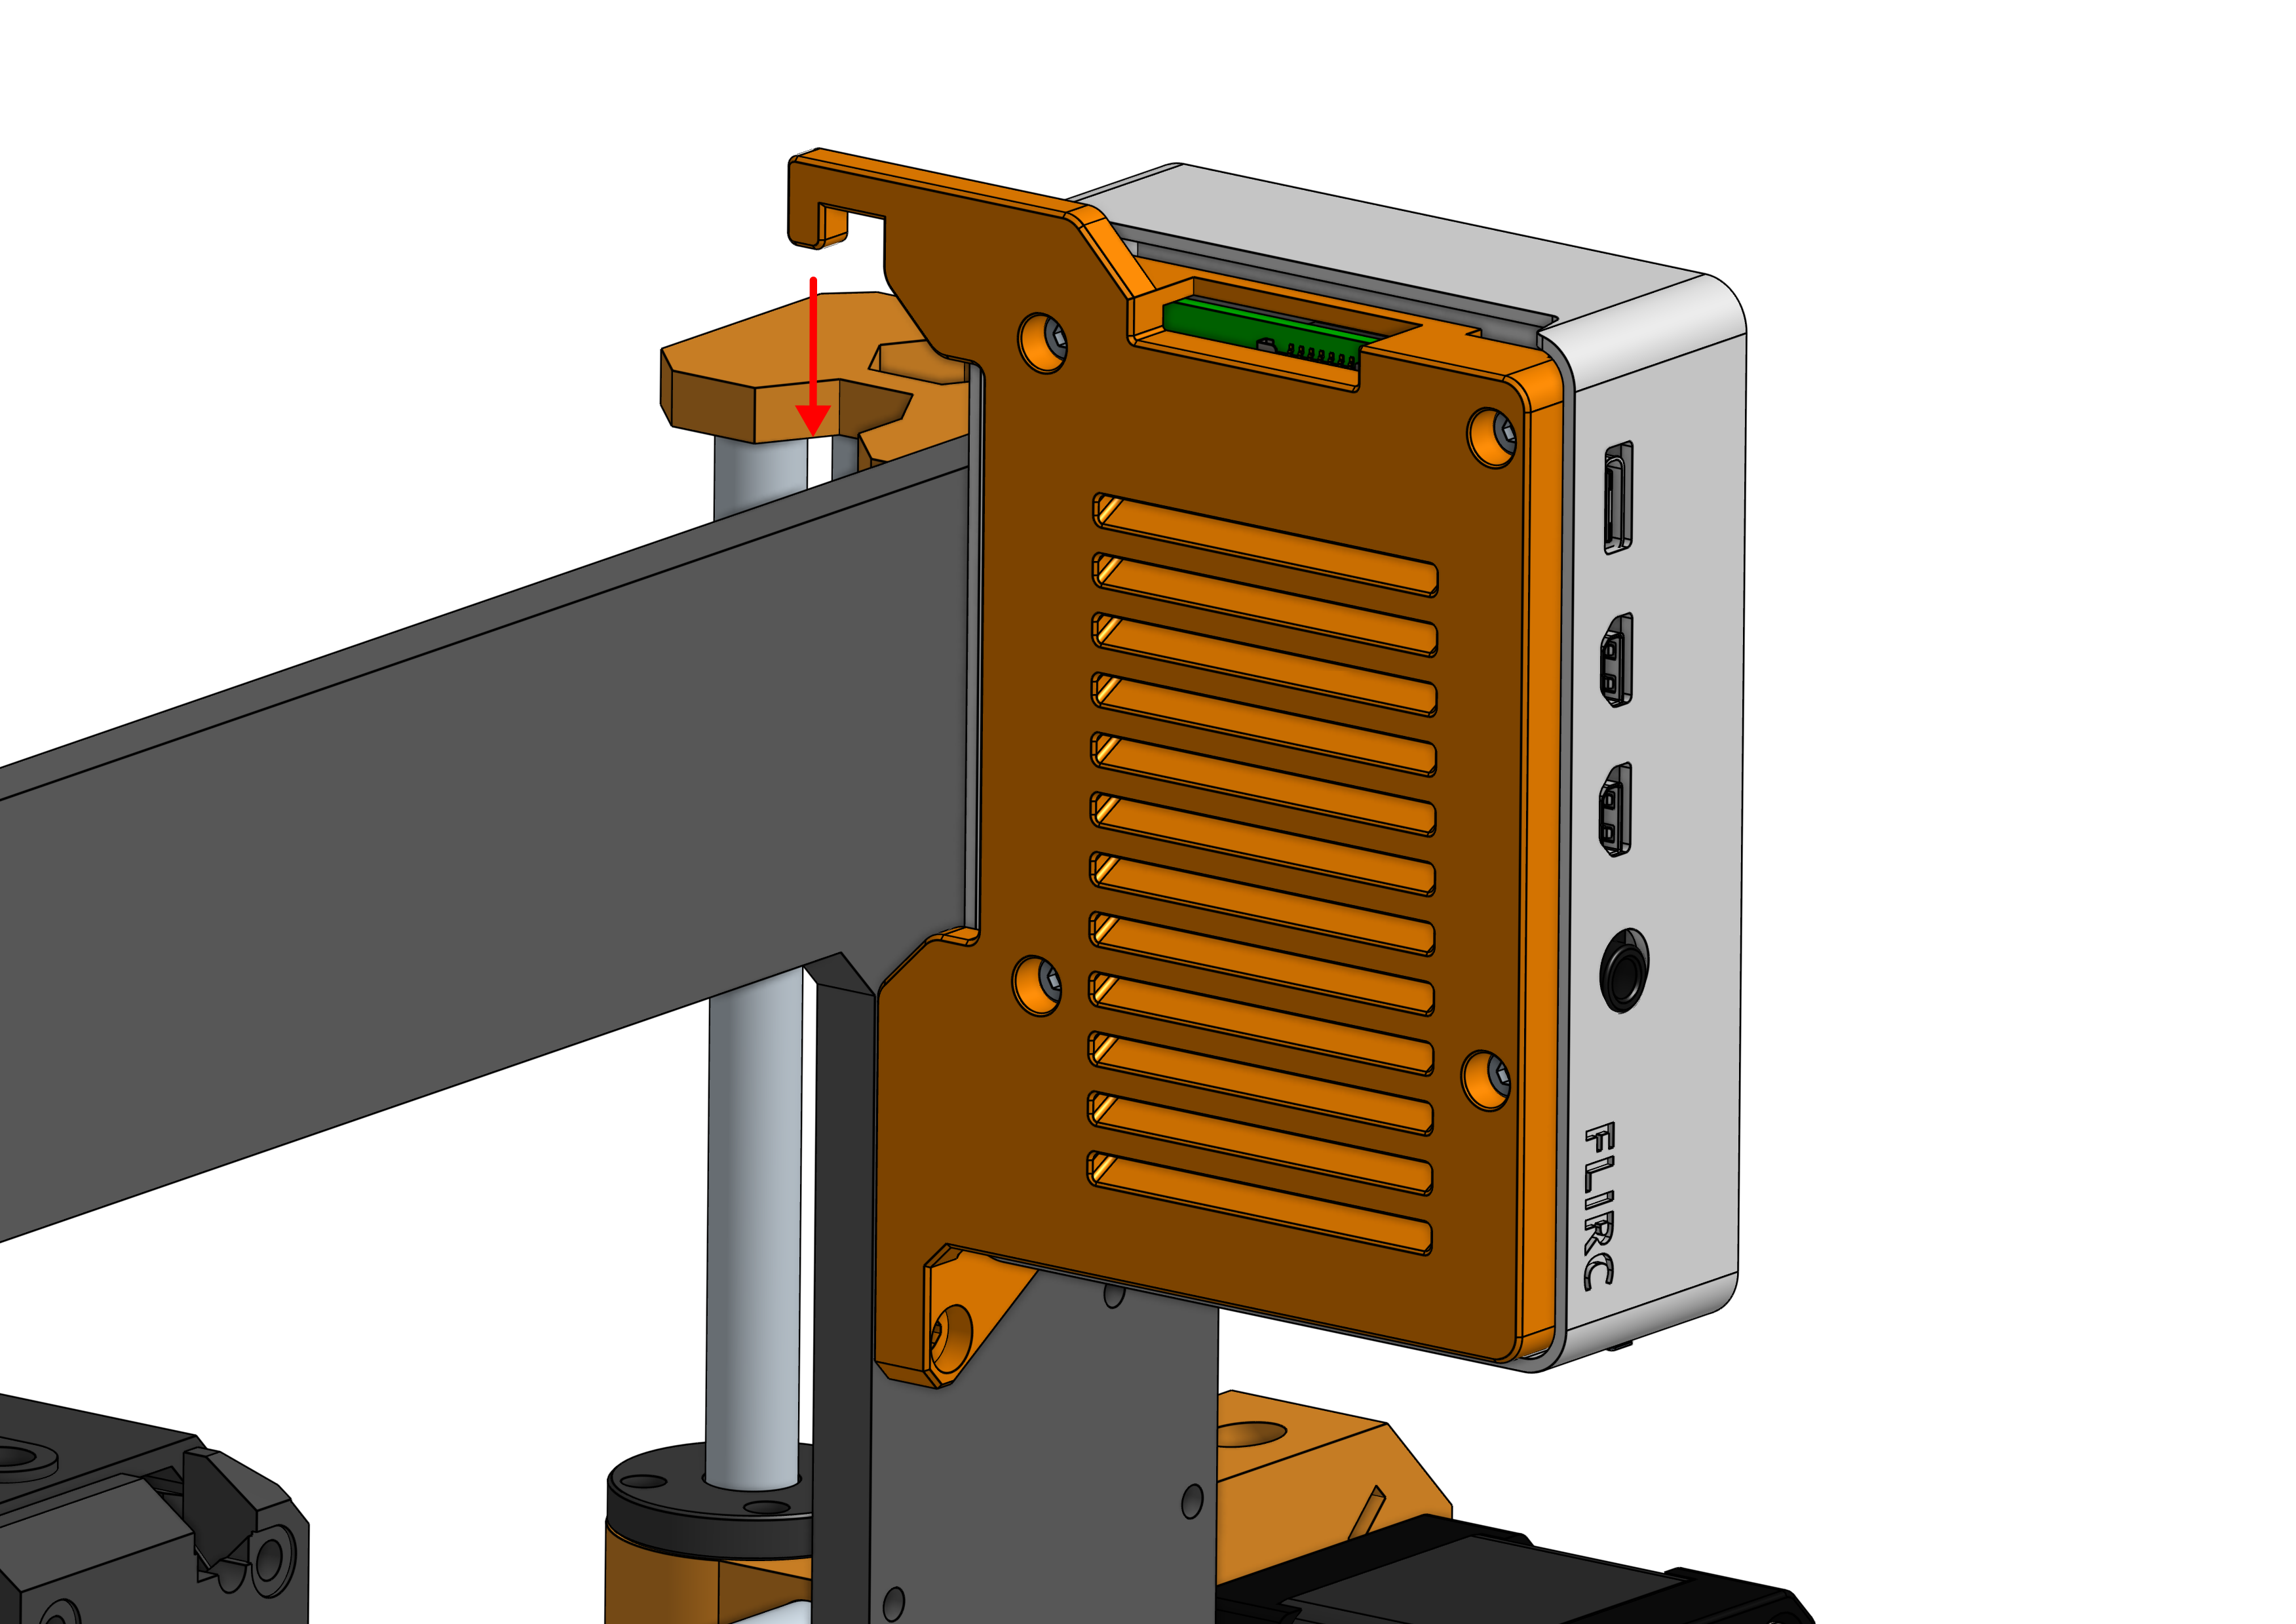
Hook the case assembly over the frame and position it so that the left side of the assembly (looking from the back of the printer) is flush with the inner part of the frame.
 |  |
Step 3
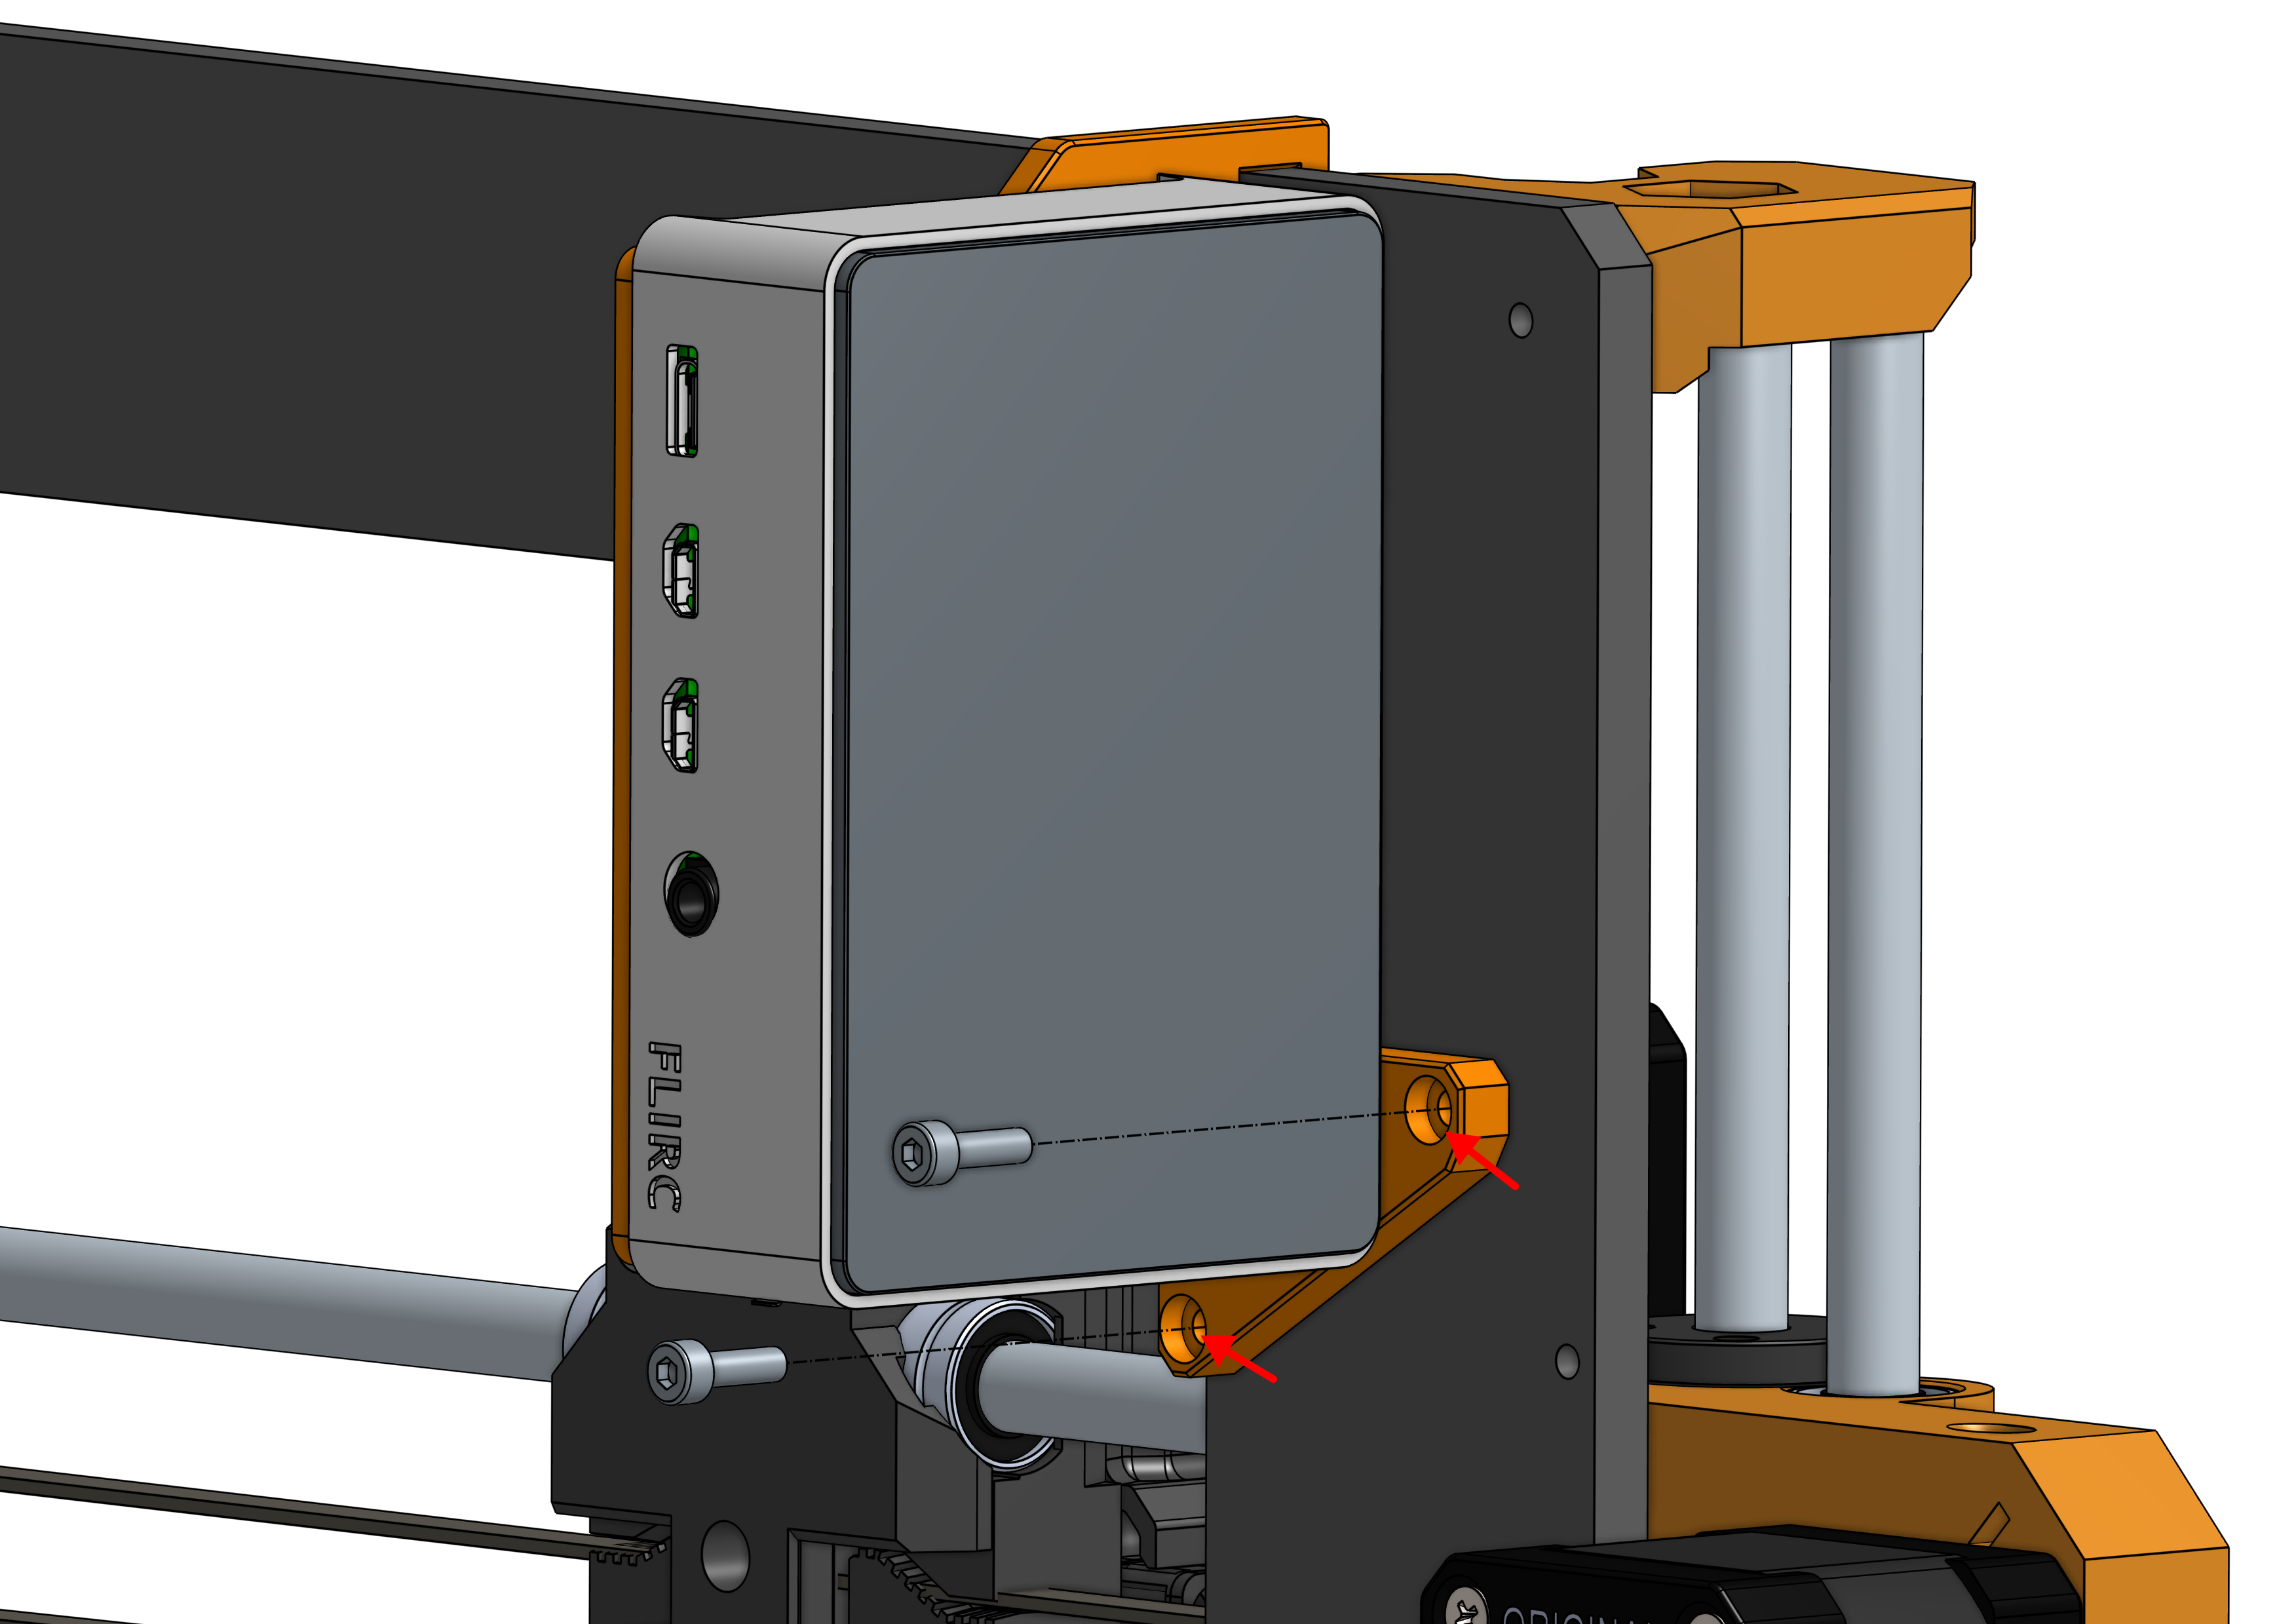
Secure the assembly onto the frame with M3x10mm screws.