
All-Wheel Drive (AWD) Mod for Sovol SV08 3D Printer
We calculate the final price from your selected file. You review and accept it before payment.
Saved on this device.

AWD mod for Sovol SV08: Adds 2 A/B motors for better speed, torque & stability. Advanced install required! 🚀
- Rating
- 0 / 5
- Likes
- 58
- Downloads
- 129
- Makes
- 0
- Views
- 2,614
- Reviews
- 0
Updated at source:
Model information
- Source
- Printables
- Category
- Other Printer Parts & Upgrades
- License
- GNU General Public License v3.0
Our members will get early access as a thank-you for their support, which helps us continue creating upgrades, designing innovations, testing, and improving for the entire community. release to public 10-April-2025
All-Wheel Drive (AWD) Mod for Sovol SV08 3D Printer
Introduction
We created this AWD mod based on community requests. We are committed to listening and improving the 3D printing experience. This project is completely FREE for the community, and our members will have early access as a token of appreciation for their support. This enables us to continue developing new modifications and improvements for everyone.
This modification requires advanced knowledge compared to other mods. Proper installation and tuning are crucial for optimal performance.
Credits: Special thanks to Simon VZ / Simon from VZ Bot and aTinyShellScript /
aTinyShellScript for their inspiring work that influenced this mod!
Why Install This Mod?
- Faster Printing: Potential for increased speed with reduced vibrations.
- Improved Stability: Torque is distributed better across four motors, reducing belt slack and increasing accuracy.
- Compatible with Existing XY Joints: if you have our 3D printed Version of the 3D printed Gantry you can reuse the X Beam holders ;)
- Reduced Belt Length per Motor: Each motor moves less, leading to improved torque and fewer vibrations.
- Aesthetic Upgrade: Let's be honest—it looks cool!
Cons:
- Increased Cost & Complexity: Additional components are required.
- Extra Components: More stepper drivers, screws, and bearings, new belts
- More Tuning Required: Proper alignment and belt tensioning are crucial.
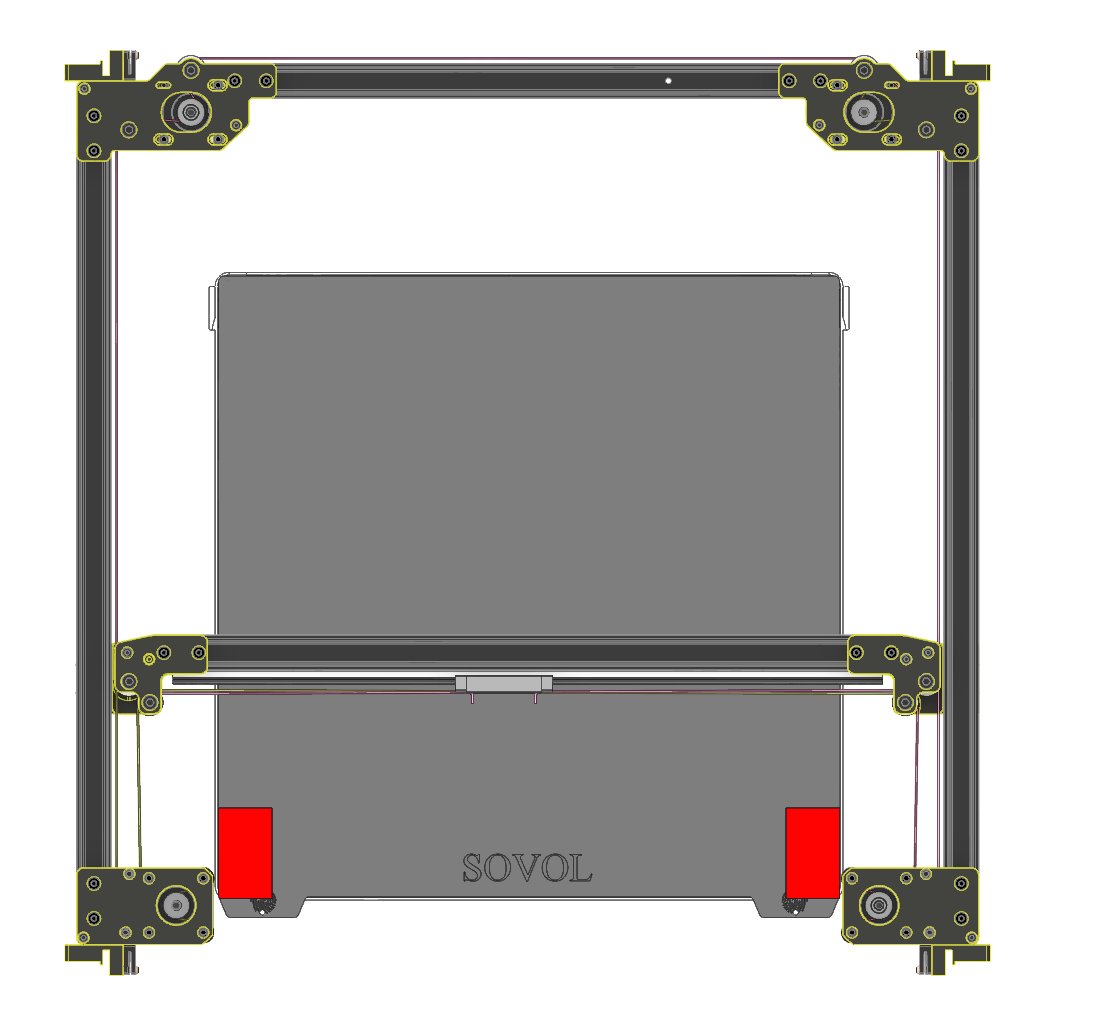
- Reduced Build Area: You will lose approximately 3 cm in Y and 5 cm in X, which translates to a 2.38% loss in total build volume.
How It Works
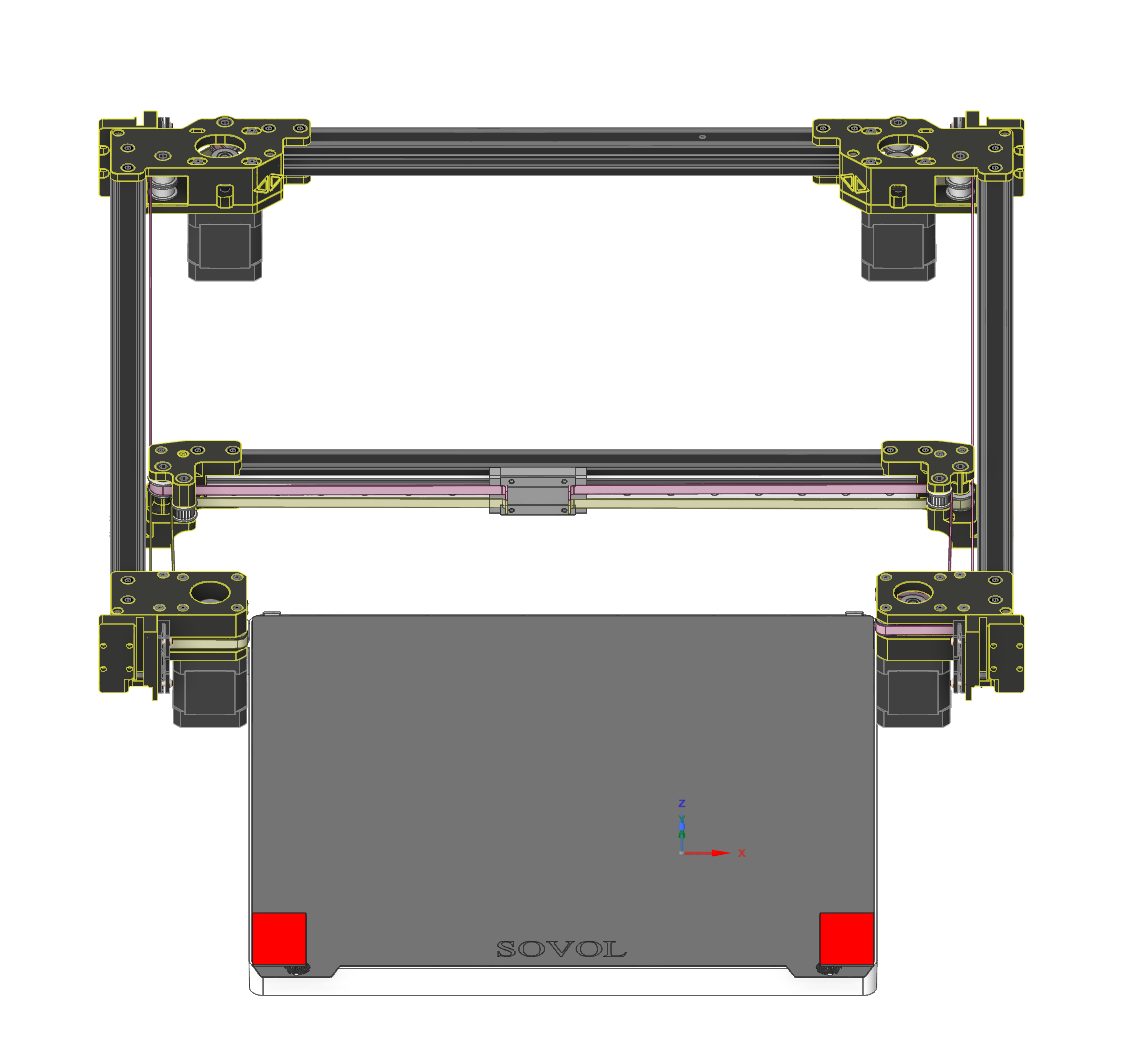
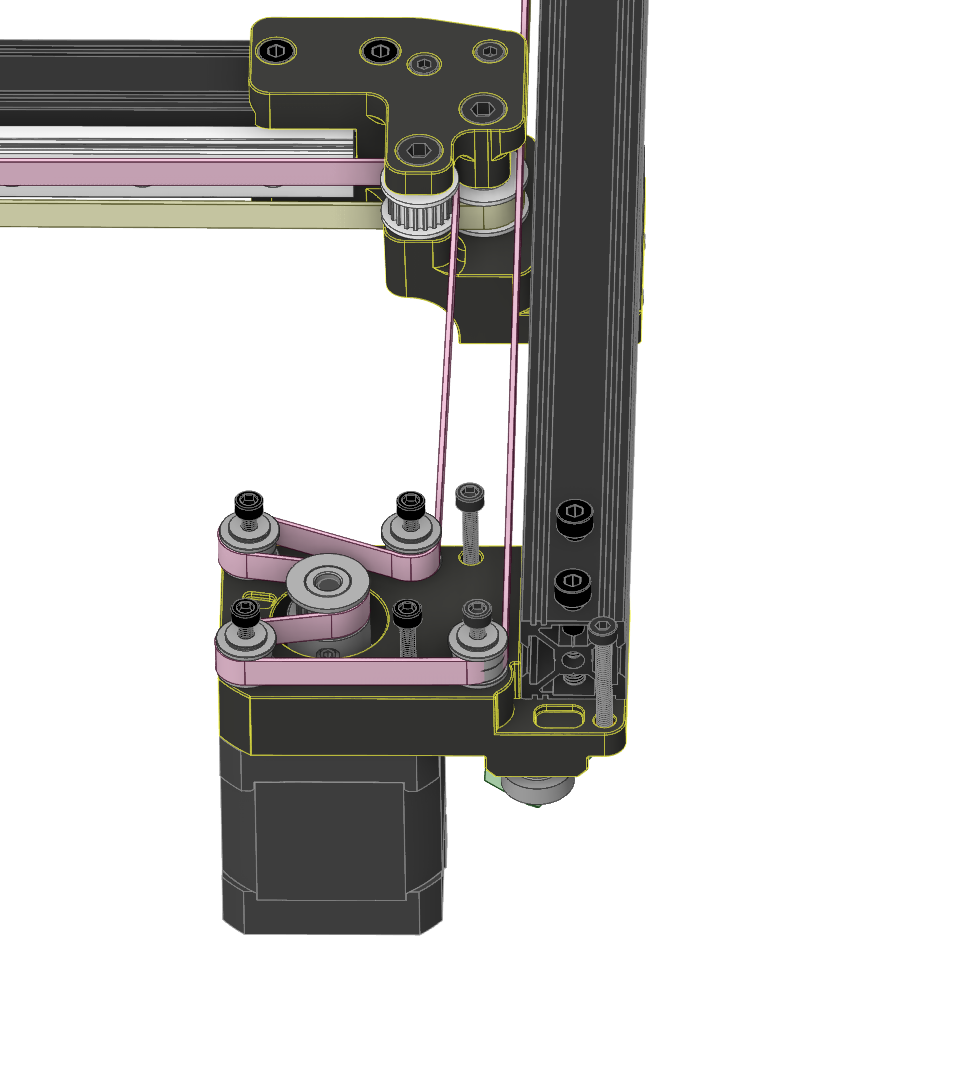
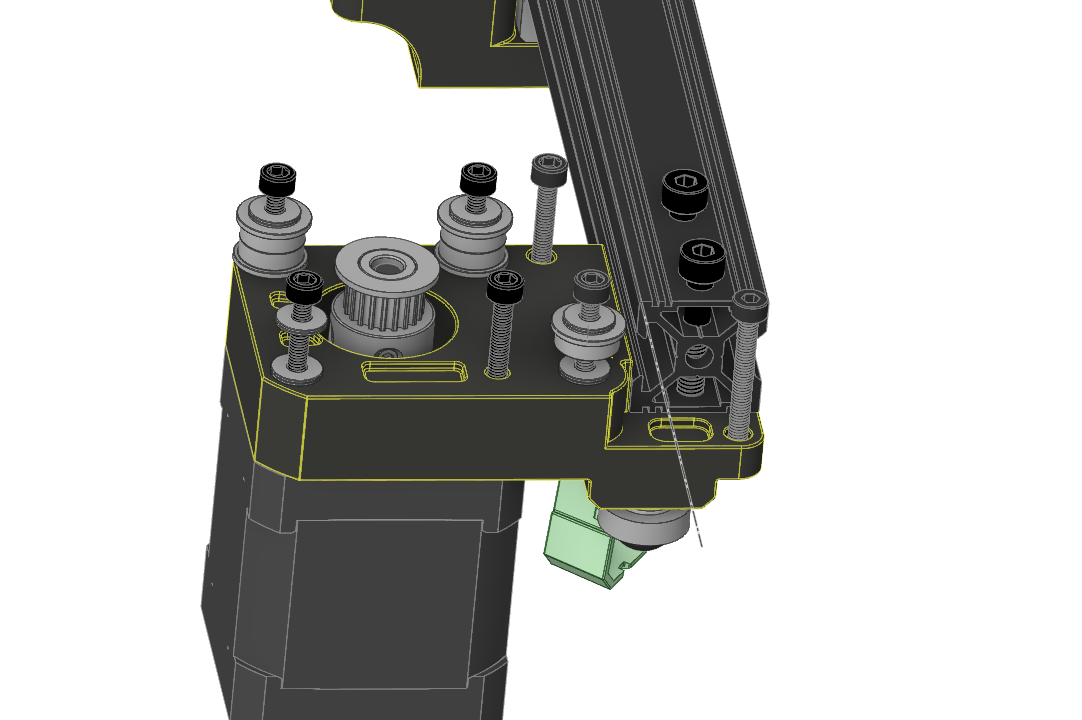
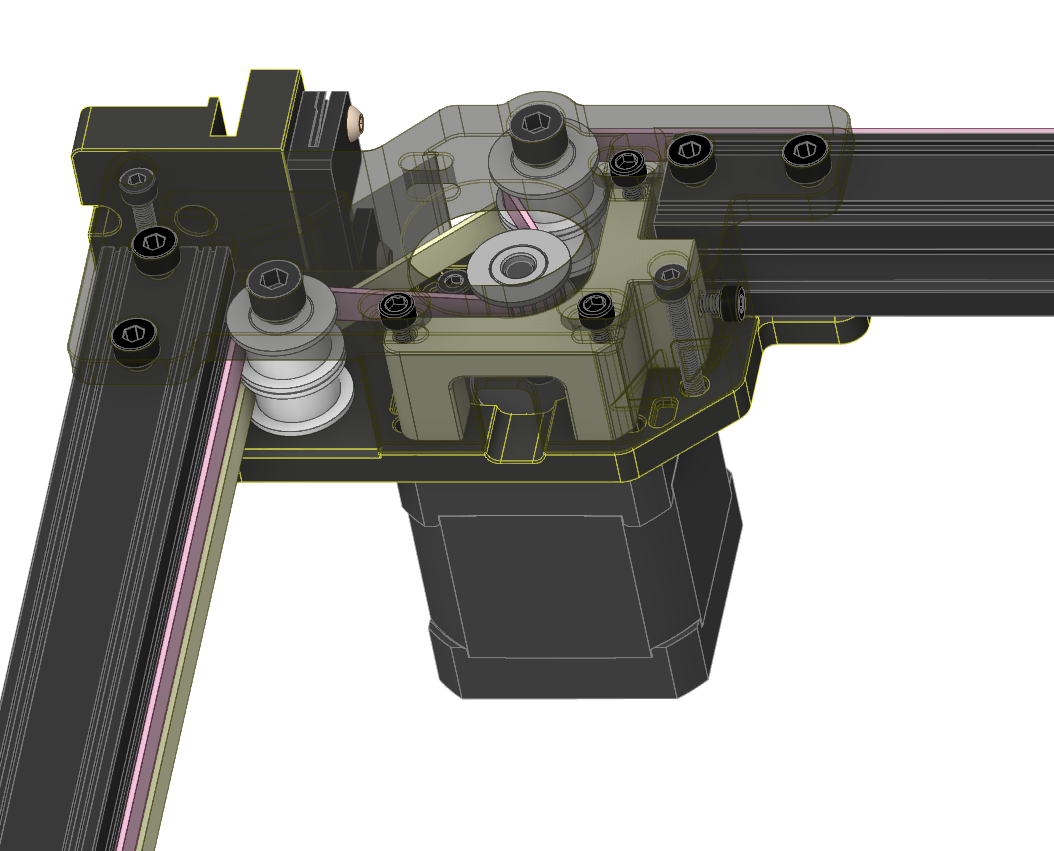
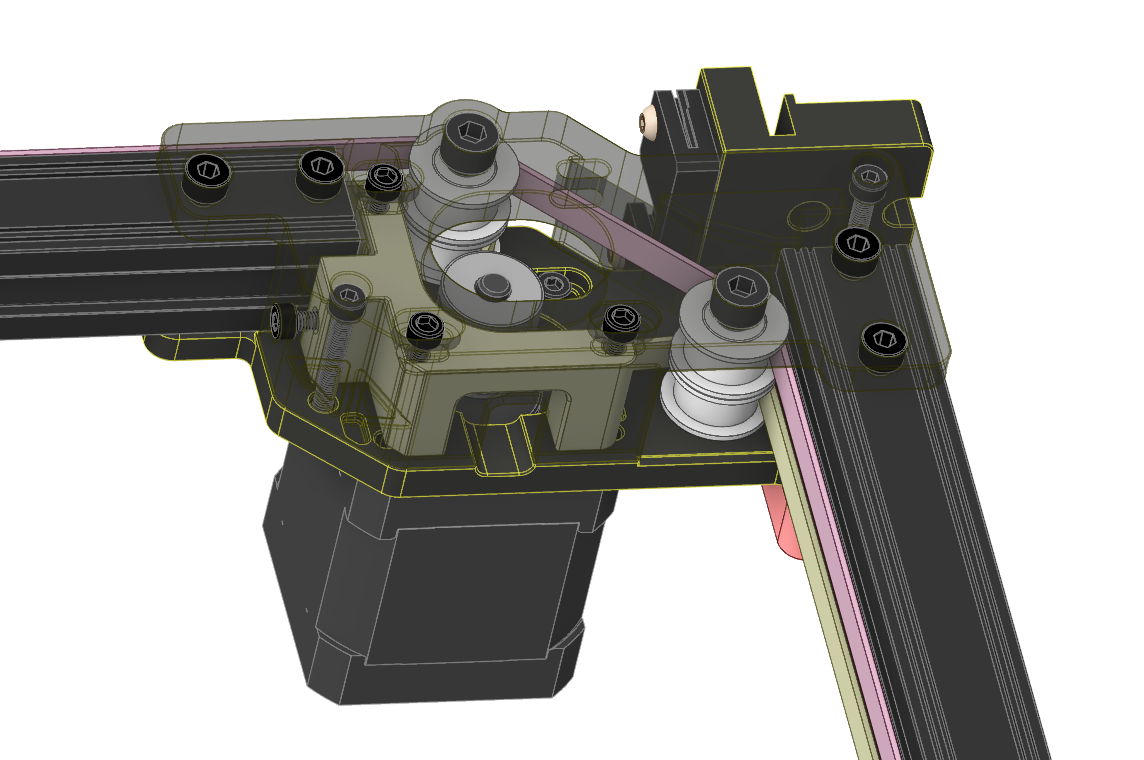
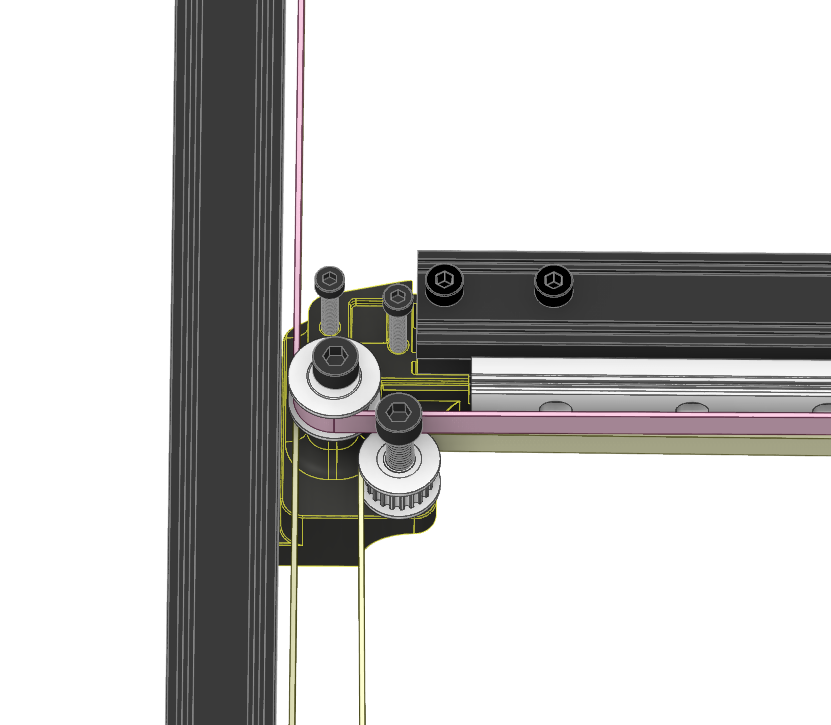
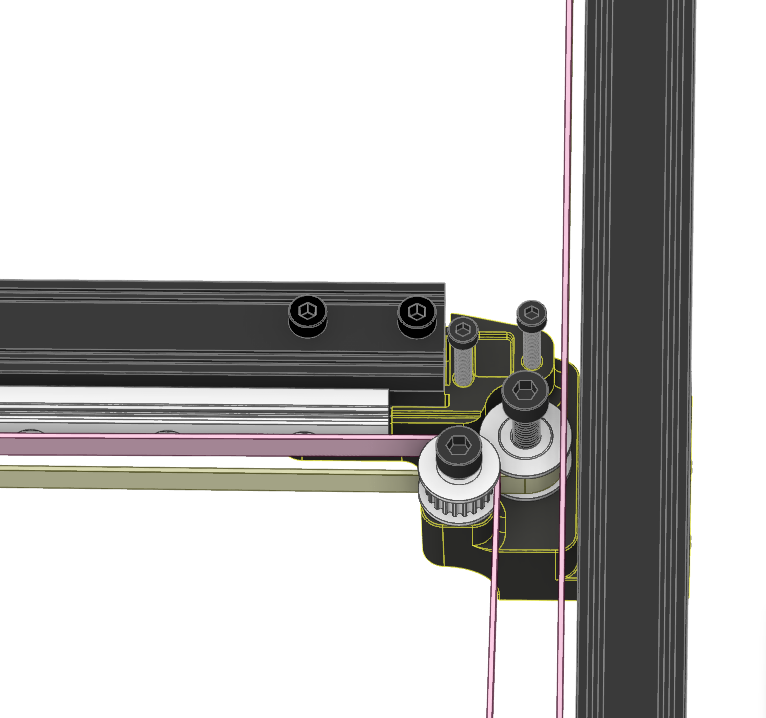
This AWD system for the Sovol SV08 adds two additional A/B motors to the front, where the front idlers were previously located. The belt path it is flipped so the motors that are in diagonal are on the same belt.
- If you are using our 3D Printed Gantry, the existing X Beam Holders remain unchanged.
- No need to replace all the pulleys and motors—simply add two (same) additional A/B motors and a few bearings.
- Compatible with all MGN12 toolheads and 6mm belts.
Print Settings
- Walls: 5
- Top Layers: 5
- Bottom Layers: 5
- Infill: 20-30% (Gyroid)
- Layer Height: 0.2mm
- First Layer Height: 0.3mm
- Supports: Required, especially for the lower back lower A/B motor holder DO NOT USE TREE SUPPORT on this 2 parts!
Mechanical Components:
- 16x F623RS Bearings https://s.click.aliexpress.com/e/_okK5Tth
- 32x M3 Washer (OD: 8mm, ID: 3mm, Thickness: 1mm) https://s.click.aliexpress.com/e/_opvgAQX M3x8x1
In the design we have used 2x0.5 but since we found washers that have 1mm in thinness is better to use only 1. - 2x 2050mm 6mm GT2 Belt https://s.click.aliexpress.com/e/_opf97yX 5M
- 50x M3x4.5mm OD, 4mm Long Heat Set Inserts https://s.click.aliexpress.com/e/_DkePBDt
- Long M3 bolts https://s.click.aliexpress.com/e/_o2bIHtp or https://s.click.aliexpress.com/e/_oksHWYF
- 14x M3x35 Screws
- Front Motors: Held in place by 4x M3x35 screws each
- Back Motors: Held in place by 3x M3x35 + 1x M3x8 screws each
- Tensioning System: Uses M3x16 + M3 Nut (one per side)
- Motor Holders (each):
- Front: 1x M3x25mm + 2x M3x30mm
- Back: 1x M3x25mm + 1x M3x30mm
Electrical Components:
- 2x Additional Stepper Drivers (Recommended: same type as existing A/B motors) http://shrsl.com/4uw08
- Upgraded Power Supply (Stock PSU is at its limit)
https://s.click.aliexpress.com/e/_oBz7HtZ
Installation Guide
Preparation:
- Start by removing the old gantry.
- Replace the front idlers/belt tensioners with the new front motor mounts and pulleys.
- Assemble everything together, ensuring proper alignment before proceeding.
- Ensure your belts are equal in length!
- Synchronizing the Stepper Motors:
- Remove the old pulleys from the stepper motors.
- Purchase new pulleys that allow free movement on the shaft.
- Align and synchronize the motors before tightening the pulleys onto the shafts.
- If using new motors, skip the pulley removal step, as new motors come without pressed pulleys.
- Choosing New Motors:
- You can either buy two additional motors with pre-pressed pulleys or buy four new motors without pre-mounted pulleys.
- Recommended Motors: LDO Super Power motors (avoid Speedy ones due to noise issues).
- If using LDO motors, choose the long shaft version for better performance.
- Loosen the 4 mounting bolts on the back stepper to free the tensioner and move it to the slackest position.
- Secure and align the belts at the toolhead.
- Turn the M3 bolt to adjust tension to the desired amount.
- Check gantry alignment at the front. If one corner is misaligned, adjust belt tension accordingly.
- Tighten all stepper motor screws.
🔗 Watch Simon VZ’s video on how to synchronize the A/B motors:
Firmware Configuration (Klipper)
Configuring Klipper is straightforward, as you are simply adding two additional steppers for X and Y.
- Name the new steppers in Klipper:
Stepper_X1Stepper_Y1
- If you only have X and Y endstops, only X and Y should have endstops declared.
- Test one stepper at a time to verify movement direction.
- Never plug/unplug stepper motors while the printer is powered on!
- Use
STEPPER_BUZZto confirm stepper direction:
STEPPER_BUZZ STEPPER="Stepper_X"
STEPPER_BUZZ STEPPER="Stepper_Y"
STEPPER_BUZZ STEPPER="Stepper_X1"
STEPPER_BUZZ STEPPER="Stepper_Y1"
Slicer Configuration
Each slicer has different settings for printable space. In Orca Slicer, navigate to:
Printer Settings → Basic Information → Printable Area → Custom Shape
Final Notes
- If you have any questions, join our Discord server! https://discord.gg/AG8ksQjdfR
- We are not responsible for any damage caused to your printer—install at your own risk!
- Handling electronics can be dangerous. If unsure, seek assistance from an experienced user.
By following this guide, you can successfully install the AWD mod on your Sovol SV08 and enjoy a more stable, faster, and cooler-looking printer!
Visual Guide
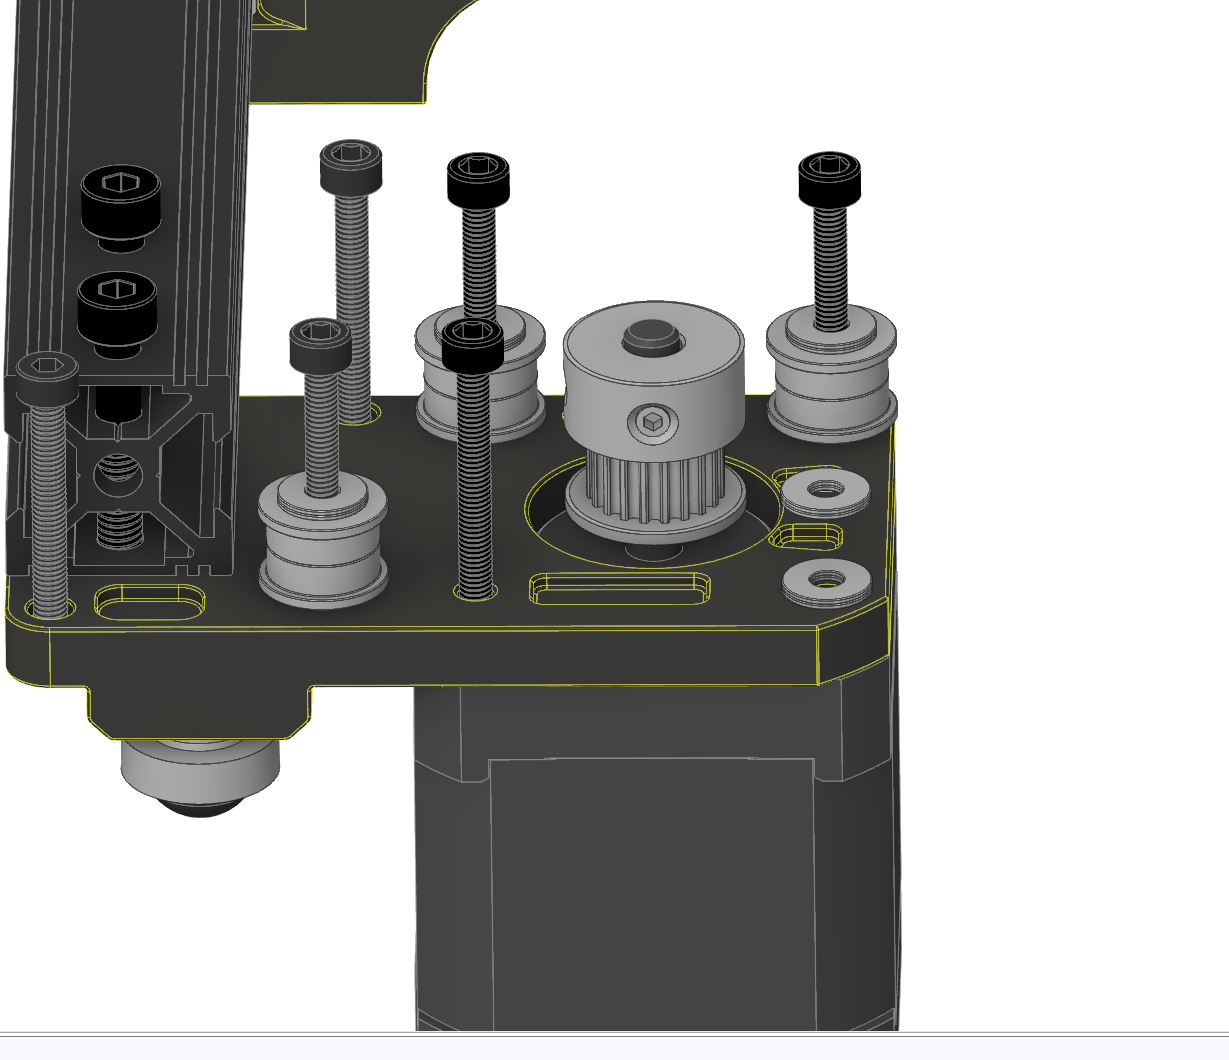
They say a picture is worth a thousand words, so I’ll let these screenshots light up your understanding of how everything fits together!
In the design we have used 2x0.5 but since we found washers that have 1mm in thinness is better to use only 1. so where you see 2 washers in the pictures put 1 if you bought the correct one listed in the BOM above!
The RED rectangles below are the print volume that it will get lost with this mod! 30mm on X and 50mm on Y on each of the front corners 
 |  |  |  |
 |  |  |  |
 |  |  |  |
 |  |  |  |
 | |||
 |  | ||
 | |||
 |  | ||
 | |||