
Twisted Lamp Shade
We calculate the final price from your selected file. You review and accept it before payment.
Saved on this device.

An organic lamp shade generated using the python library CADQuery
- Rating
- 0 / 5
- Likes
- 48
- Downloads
- 121
- Makes
- 0
- Views
- 981
- Reviews
- 0
Updated at source:
Model information
- Source
- Printables
- Category
- Home Decor
- License
- Creative Commons — Attribution — Noncommercial
Are you getting sick of your minimalist home decoration or is your appartment missing a little color? Then this might be something for you! This organic curly swirly twisty lamp shade is definetly catching the eye.
Safety advice: Don't stare too long.

Description
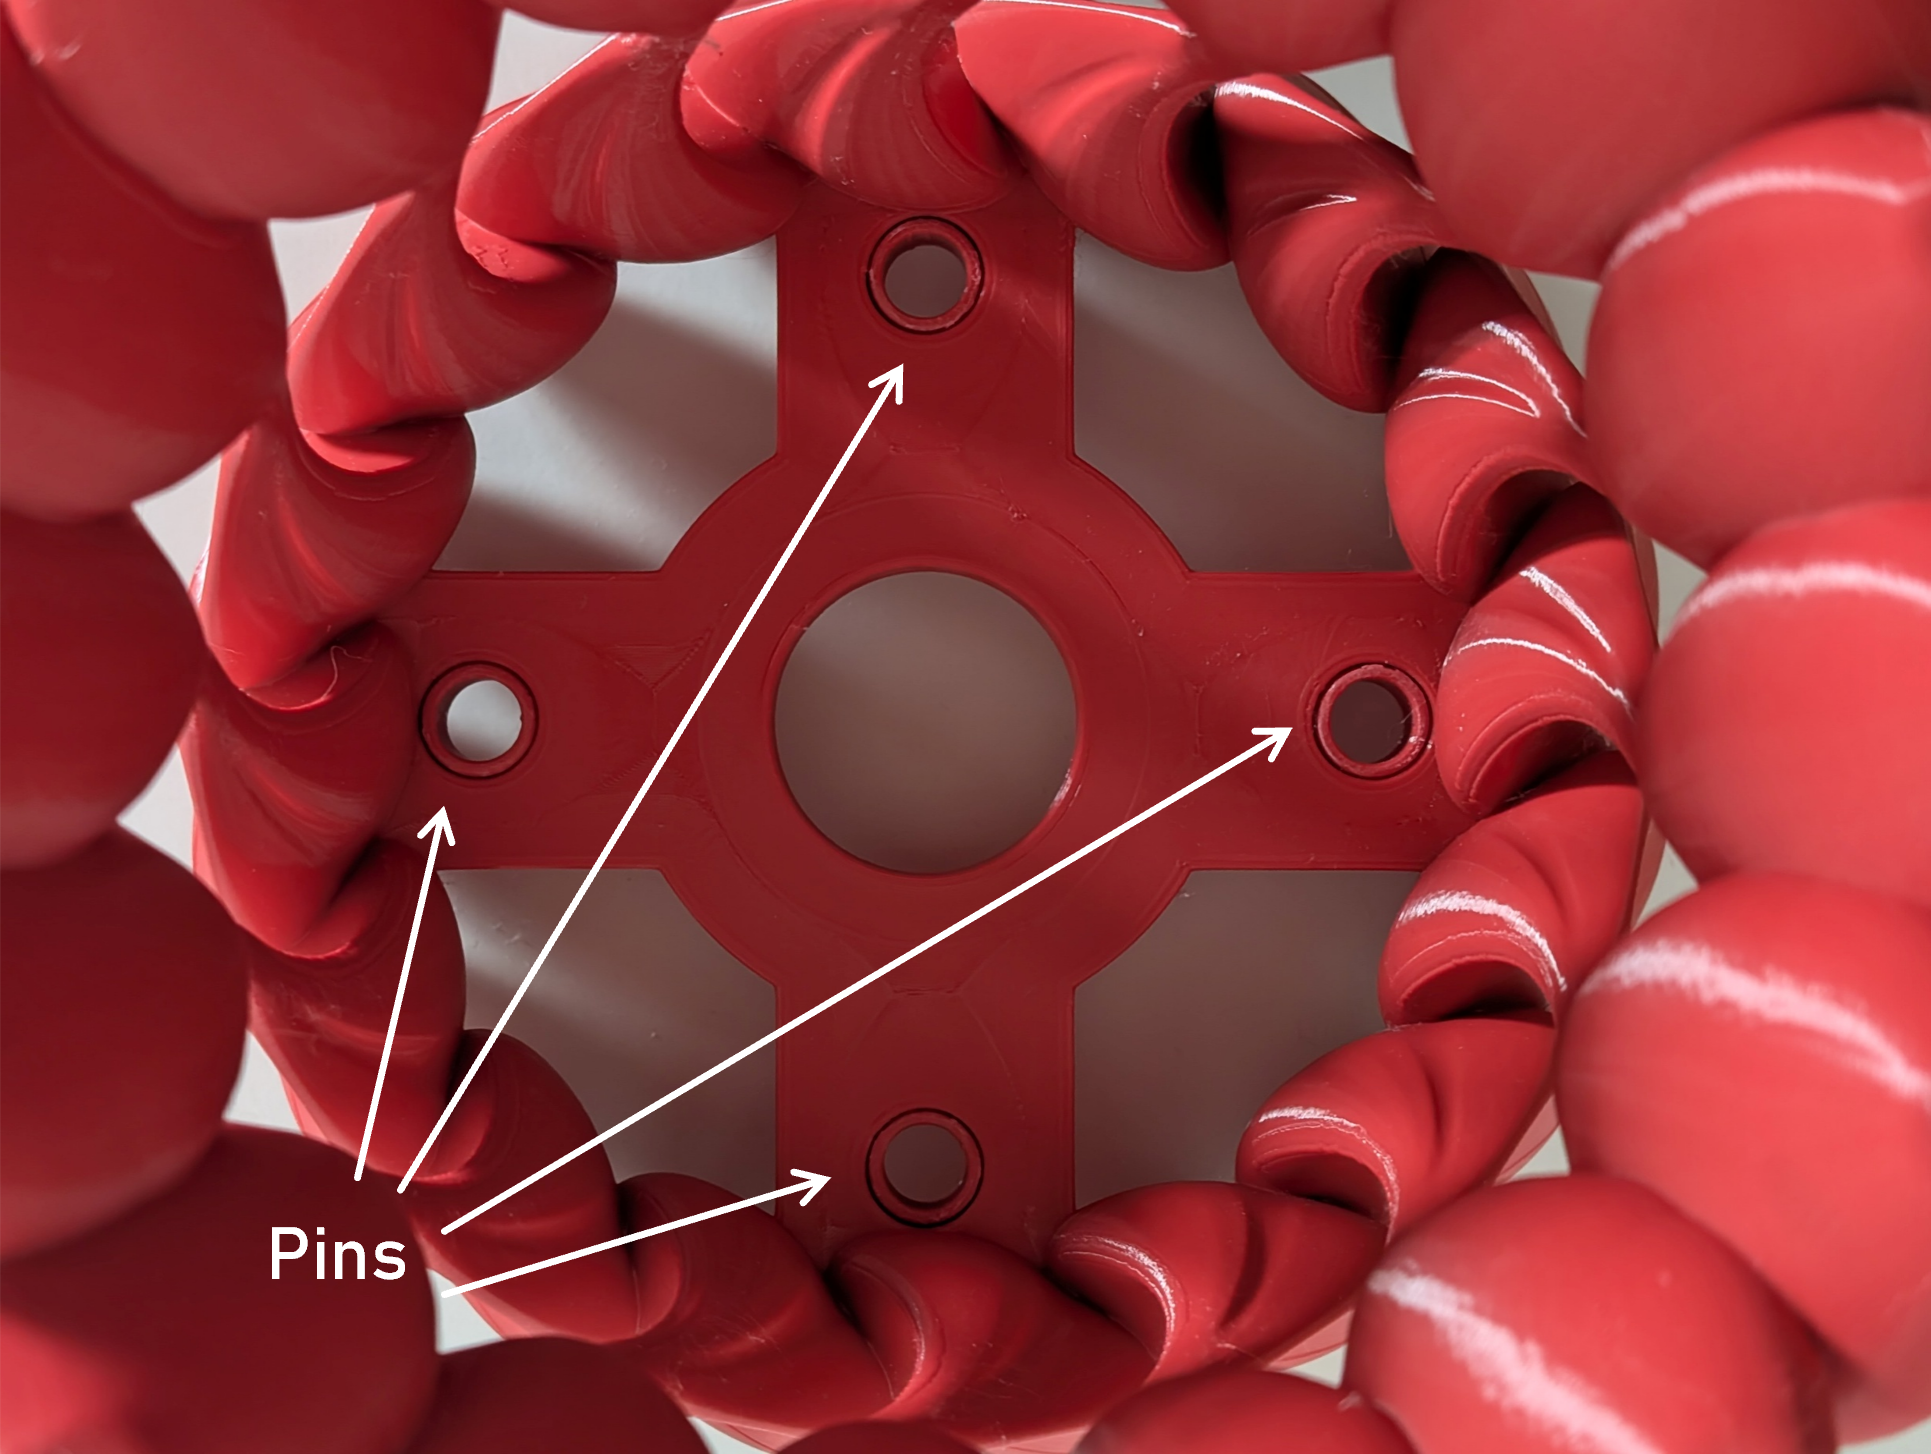
This lamp shade is meant to be fit for an E27 lamp socket similair to this one here. It is printed as two parts whereas both parts are connected using separatly printed sleeve pins. Glueing both parts together is optional. The holes of the sleeve pins can be used to attach further components (e.g. legs).
The models have been generated using python and the CADQuery library. If you want to change the size or the shape of the lamp shade you can do it on your own as well. The python files can be found in the appropriate folder.
The model is created by
- Creating a base surface which looks almost like a hyperbola
- Defining an extrusion path for the “S” or “C” shape of one of the spokes
- Projecting the extrusion path onto the base surface
- Defining sketches along the projected extrusion path to get the variation in thickness
- Performing the extrusion
- Create a polar pattern of the spokes
- Adding the cross-shaped base with holes for the pins and the lamp socket
- Splitting the lamp shade in the middle of the cross base (according to the z-direction)
- Exporting the result

Furthermore, pins and a modifier for the slicer is created and exported. Additionally, there is a script which can create a basic model for the feet of the lamp shade. But these are optional.
Printing Advice
I printed the models on a Creality Ender S1 Pro using “Dragon Red” PLA-filament (Spectrum). The slicer settings in the Cura Slicer were:
- Temperature: 210 °C (Nozzle), 60 °C (Printing Bed)
- Printing Speed: 80 - 100 mm/s, except for the first layer (15 - 20 mm/s)
- Layer height: 0.12 - 0.20 (dynamic)
- Number of top and bottom layers: 3
- Number of perimeters 3
- Infill: Lightning, 20 %, (modifier mesh: Lines, 20%)
- Supports: None
Please note that printing the model using lightning infill is highly recommended to save material. Even with these settings around 400 - 500 gramms of filament are required. I recommend using the modifier mesh to use a different infill pattern for the cross-shaped base.

Please drop a comment on what worked best for you. Happy Printing!