
SOLVED w/ Vented and Hygrometer options! Snapmaker U1 Side Filament Cover + Desiccant System (Airtight Dry Box Upgrade) Simple Build!
We calculate the final price from your selected file. You review and accept it before payment.
Saved on this device.
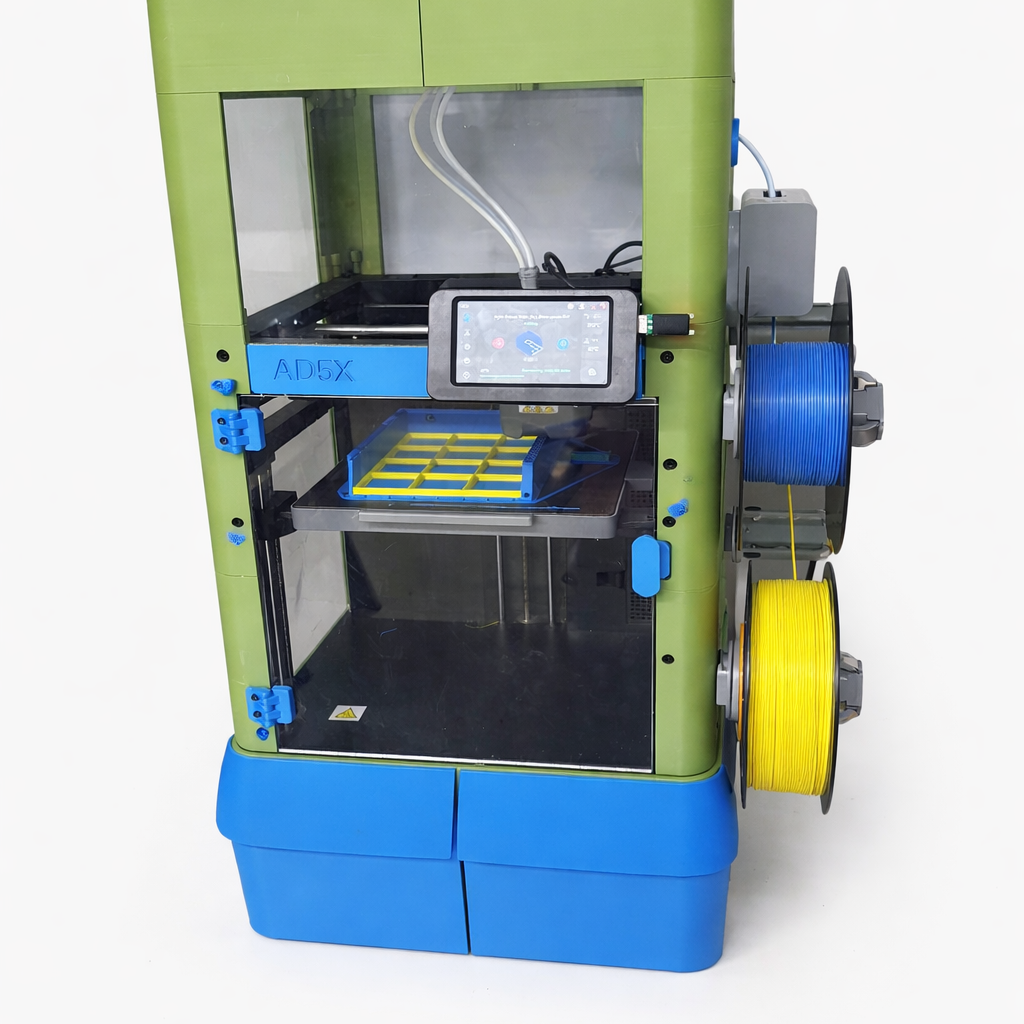
With Vented Option! Seal out humidity. Snapmaker U1 side cover with built-in desiccant for cleaner, more reliable prints
- Rating
- 5 / 5
- Likes
- 212
- Makes
- 3
- Views
- 8,385
- Reviews
- 4
Updated at source:
Model information
- Source
- Printables
- Category
- Other Printer Parts & Upgrades
- License
- Standard Digital File License
UPDATED: The Vented Version is considered the current version and can be used for vented or non vented but it's a little easier to assemble. The reversed thread knob is for for the right side of the non vented files so you probably will not need it unless you print that old version. Let me know if you need anything else. I started to had a hygrometer option but there are so many options on amazon it's just as easy to cut a hole to fit after the print is done for whatever you have/buy. Good luck, have fun!
Best way to say thanks? Post a make.
Overview
This is a drop-in side cover system for the Snapmaker U1 that converts the exposed filament area into a sealed, low-humidity environment—with zero modification required.
Designed to look like a factory upgrade, this system improves print consistency while giving your machine a clean, finished appearance.
What Makes This Different
✅ Zero Printer Modification Required only - 1060 Grams per side
No drilling. No cutting. No permanent changes.
Unlike other designs that require modifying your machine, this installs using:
0.4" 3M double-sided tape
Strong, clean, and fully reversible
✅ Integrated Desiccant System
Built-in chamber keeps filament dry at the source
Easy to access and refill
Compatible with silica gel or reusable desiccants
✅ Hygrometer built in(optional)
Built-in hygrometer design, buy on amazon for 1.50 each link below
Easy print and snap in
Dropped my humidity from 43% to 20% in two hours(see pics)
✅ Two Build Options (Flexible for Your Setup)
Full Version (Best Experience)
Prints as one complete piece
No assembly required
Cleanest look and strongest structure
Successfully printed in one piece on the Anycubic Kobra 3 max
Split Version (Fits Smaller Beds)
Sized to fit on the U1 build platform
Assembles using M3 hex screws
Maintains strength and alignment after assembly
Why This Matters
Moisture is one of the most common causes of print issues:
Stringing
Poor layer adhesion
Surface defects
This system helps stabilize your filament environment, leading to:
More consistent extrusion
Cleaner prints
Fewer failed jobs
Print Recommendations
- 1060 Grams total, only one spool if you use JAYO 1100g spools. per side
The split up version is for printing on the U1, I have to admit it is very nice to print the cover in one go on a kobra 3 max but the split version is still very nice.
Material: PLA, PETG, or ABS
Layer height: 0.2 mm
Walls: 2 is fine except for the part with the part with the treaded posts, that one should be 5 walls so the threads are printed solid.
Infill: 10-15 but the design is thing .08 so it pretty much prints solid anyway with few exceptions.
Supports: Minimal, I painted them onto a couple obvious places that they are needed.
Brim: Optional for large parts, probably helpful for petg but not so much for pla
Installation
Print selected version (full or split)
Insert desiccant into chamber
Apply 0.4" 3M double-sided tape to base and the foam seal around square opening for the filament input.
Mount onto printer side panel
If desired use the self adhesive foam gasket(link below) to form and air tight seal around the base of the cover.
Load filament and cover/close the system, secure with the knobs
If you want an airtight seal, cover the vent slots on the printer case with masking tape. If you want it exposed to the inside just leave it. Once they release the active heated cover I'm going to leave mine exposed to the inside.
It's that clean, that easy.
Notes
Designed specifically for the Snapmaker U1
Compatible with standard 1kg filament spools
Optional: TPU gasket can be added for enhanced sealing
MATERIALS I LIKE AND USED FOR THIS BUILD
Desiccant: https://www.amazon.com/dp/B0F1Y5KP4V?ref_=ppx_hzsearch_conn_dt_b_fed_asin_title_1&th=1
Bags i use for Desiccant: https://www.amazon.com/dp/B073J4RS9C?ref=ppx_yo2ov_dt_b_fed_asin_title&th=1
M3 Screws: https://www.amazon.com/dp/B0D1R21JRR?ref_=ppx_hzsearch_conn_dt_b_fed_asin_title_2&th=1
Attachment Tape: https://www.amazon.com/dp/B0CPVGLY4D?ref_=ppx_hzsearch_conn_dt_b_fed_asin_title_3&th=1
Foam Seal: https://www.amazon.com/dp/B07L6L2KJP?ref=ppx_yo2ov_dt_b_fed_asin_title&th=1