
Split Binder Ring: Print in Place
We calculate the final price from your selected file. You review and accept it before payment.
Saved on this device.

Split binder ring that has a functioning hinge and prints in place without supports
- Rating
- 5 / 5
- Likes
- 144
- Downloads
- 2,084
- Makes
- 5
- Views
- 6,181
- Reviews
- 5
Updated at source:
Model information
- Source
- Printables
- Category
- Office
- License
- Creative Commons — Attribution
This model is for a split binder ring that can be used to attach things like notecards together. They latch well enough for regular handling, but are not as secure as metal rings.
The rings have a diameter of ~24.5mm and a thickness of ~3.6mm
This print is pretty fiddly and may require some printer tuning or playing with the slicer settings. Here are my recommended settings.
Material: PLA (PETG might work as well)
Layer Height: .12mm
Nozzle/Line Thickness: .4mm
First Layer Speed: 20mm/s
Print Speed: 60mm/s
Infill: 100%
Fan: 100%
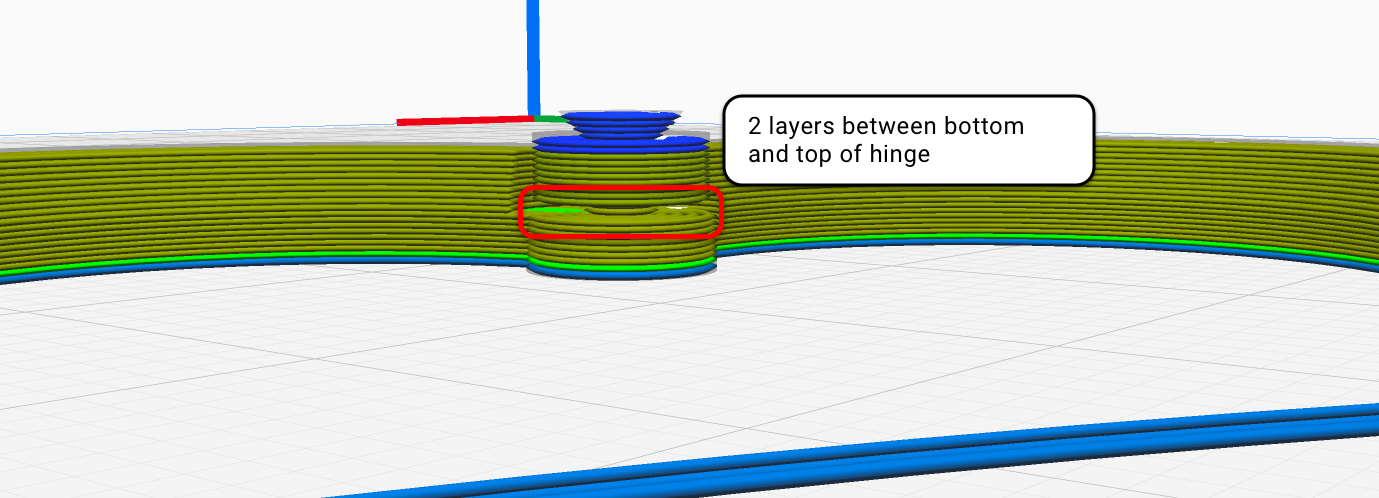
In the slicer I found it best to ensure that there are 2 empty layers between the bottom hinge and the start of the top hinge to ensure it releases. You can sometimes get away with 1, but it fused together more often for me.
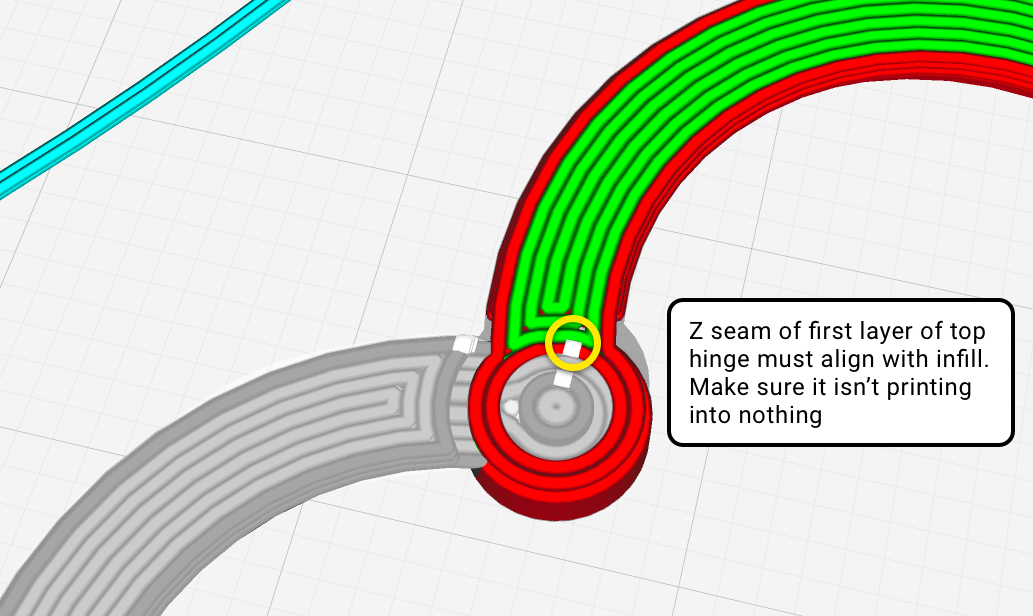
For the Z seam you'll want to ensure that the start of the line for the top hinge aligns with the existing infill.
Important: Let the parts completely cool before trying to close the hinge. If the plastic is still at all soft you will most likely tear the hinge.
I usually print batches of 8, and have a pretty high success rate (7/8 close without breaking)
After printing, if you want a tighter hinge, you can use a hot piece of metal to press down on the top of the hinge post, creating more of a rivet.