PZ Probe PCB Mount for Stealthburner and LDO Nighthawk 36
Obliczymy ostateczną cenę na podstawie wybranego pliku. Sprawdzisz ją i zaakceptujesz przed płatnością.
Orientacyjna cena wydruku pliku
0,09 € – 0,11 € netto (bez VAT)
Dla pliku: PZ Probe PCB Mount.bgcode
To wstępna wycena jednego pliku. Dokładną cenę poznasz przed zamówieniem.
Plik i założenia wyceny
Plik użyty do wyceny
Średnia wycena orientacyjna: 0,10 € netto (środek widełek).
- Masa podana przez autora
- 1 g
- Czas druku podany przez autora
- 6 min
- Materiał u źródła
- ABS
- Materiał wyceny
- ABS
- Drukarka wyceny
- Bambu Lab X1 Carbon - 0.4 nozzle
- Proces wyceny
- 0.20mm Standard
Orientacyjna wycena wyłącznie wybranego pliku, oparta na masie i czasie druku podanych przez autora. Warianty plików nie są sumowane. Ostateczna cena zostanie obliczona po analizie pliku.
Zapisane na tym urządzeniu.

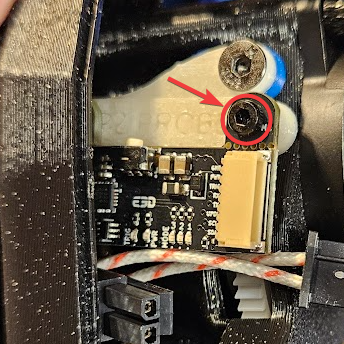
A PZ Probe PCB Mount for anyone using a LDO Nighthawk 36 on their Voron Stealthburner
- Ocena
- 0 / 5
- Polubienia
- 7
- Pobrania
- 17
- Wydruki
- 1
- Wyświetlenia
- 542
- Oceny
- 0
Aktualizacja u źródła:
Informacje o modelu
- Źródło
- Printables
- Kategoria
- Voron Parts & Upgrades
- Licencja
- Creative Commons — Attribution — Share Alike
This is a simple little model that works with the Clockwork 2 Extruder for the Stealthburner.
I'm using a E3D PZ Probe on my Voron, and wanted to keep everything within the toolhead, since I'm using a Nighthawk 36, the PCB for the toolhead is behind the extruder motor, so this allows me to mount the PZ Probe PCB on the original PCB mount. This is a small spacer that makes it possible.
The hardware I used is 2x M2x4 SHCS and 2x M3x10 FHCS, print this in ABS/ASA
Install Instructions;
1. Attach the first M2 screw to the left terminal. This cannot be reached once installed.
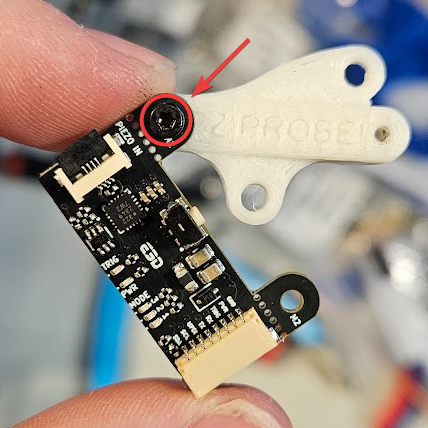
2. Pivot the PCB to prepare the Original PCB Mount, and sandwich them.
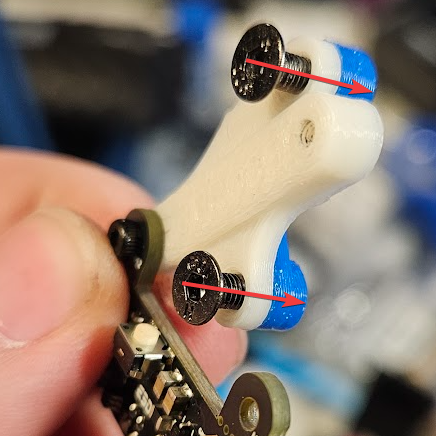
3. Install the spacer onto the Clockwork Extruder

4. Pivot the PCB into place and install the last M2 Screw