
PrintDry Desiccant Tray
Obliczymy ostateczną cenę na podstawie wybranego pliku. Sprawdzisz ją i zaakceptujesz przed płatnością.
Zapisane na tym urządzeniu.

Large tray that fits in your PrintDry machine to quickly dry/recharge desiccant.
- Ocena
- 5 / 5
- Polubienia
- 23
- Pobrania
- 200
- Wydruki
- 3
- Wyświetlenia
- 1134
- Oceny
- 2
Aktualizacja u źródła:
Informacje o modelu
- Źródło
- Printables
- Kategoria
- Accessories
- Licencja
- Creative Commons — Attribution
Large tray that fits in your PrintDry machine to quickly dry/recharge desiccant by allowing it to be distributed in a thin layer with lots of ventilation.
It Really Works!

Want a PrintDry filament Dryer?
https://amzn.to/3TMjGsW (affiliate link)
Looking for a more affordable Dryer that works well?
I also use this one and have had a great experience. It dries well and has a proper vent hole that many small dryers are missing! https://amzn.to/3NaYCZf (affiliate link)
-------------------------------------------------------- V2 ---------------------------------------------------
Update: V2 Now Prints in half the Time!
V2 relies on your slicer to create the mesh at the bottom of the tray. This also allows you to customize the size of the mesh if your desiccant is smaller or larger.
I've provided a test piece as well that prints super fast, so you can try a hole size before printing the whole tray. My recommendation is 24% rectilinear infill as this will hold desiccant down to 1.5mm in diameter.
Recommendations & Tips
- Print in PETG or other material that is more tolerant to heat.
- When using the tray, you can use just one half at a time or both. Optionally, the two halves can be glued together.
- Try 65c as your temp setting on the PrintDry (their recommendation for desiccant drying).
Slicing Instructions (for Prusaslicer or Bambu Studio)
- Load the tray halves (Desiccant Tray V2 Solid - Right and Desiccant Tray V2 Solid - Right) or sample piece into your slicer.
- Select one of the halves and choose “Split to Objects”
- With both objects selected, right click and select “Assemble”
- Now in the left menu, you can go to process → then “objects” and see both objects in the assembly
- From there, you can choose the center part of the model and choose different slicer settings for it vs the other object in the assembly.
- Set this object to have 3 walls, rectilinear infill at 24%, 0 top and 0 bottom layers. It should now look like this when sliced.
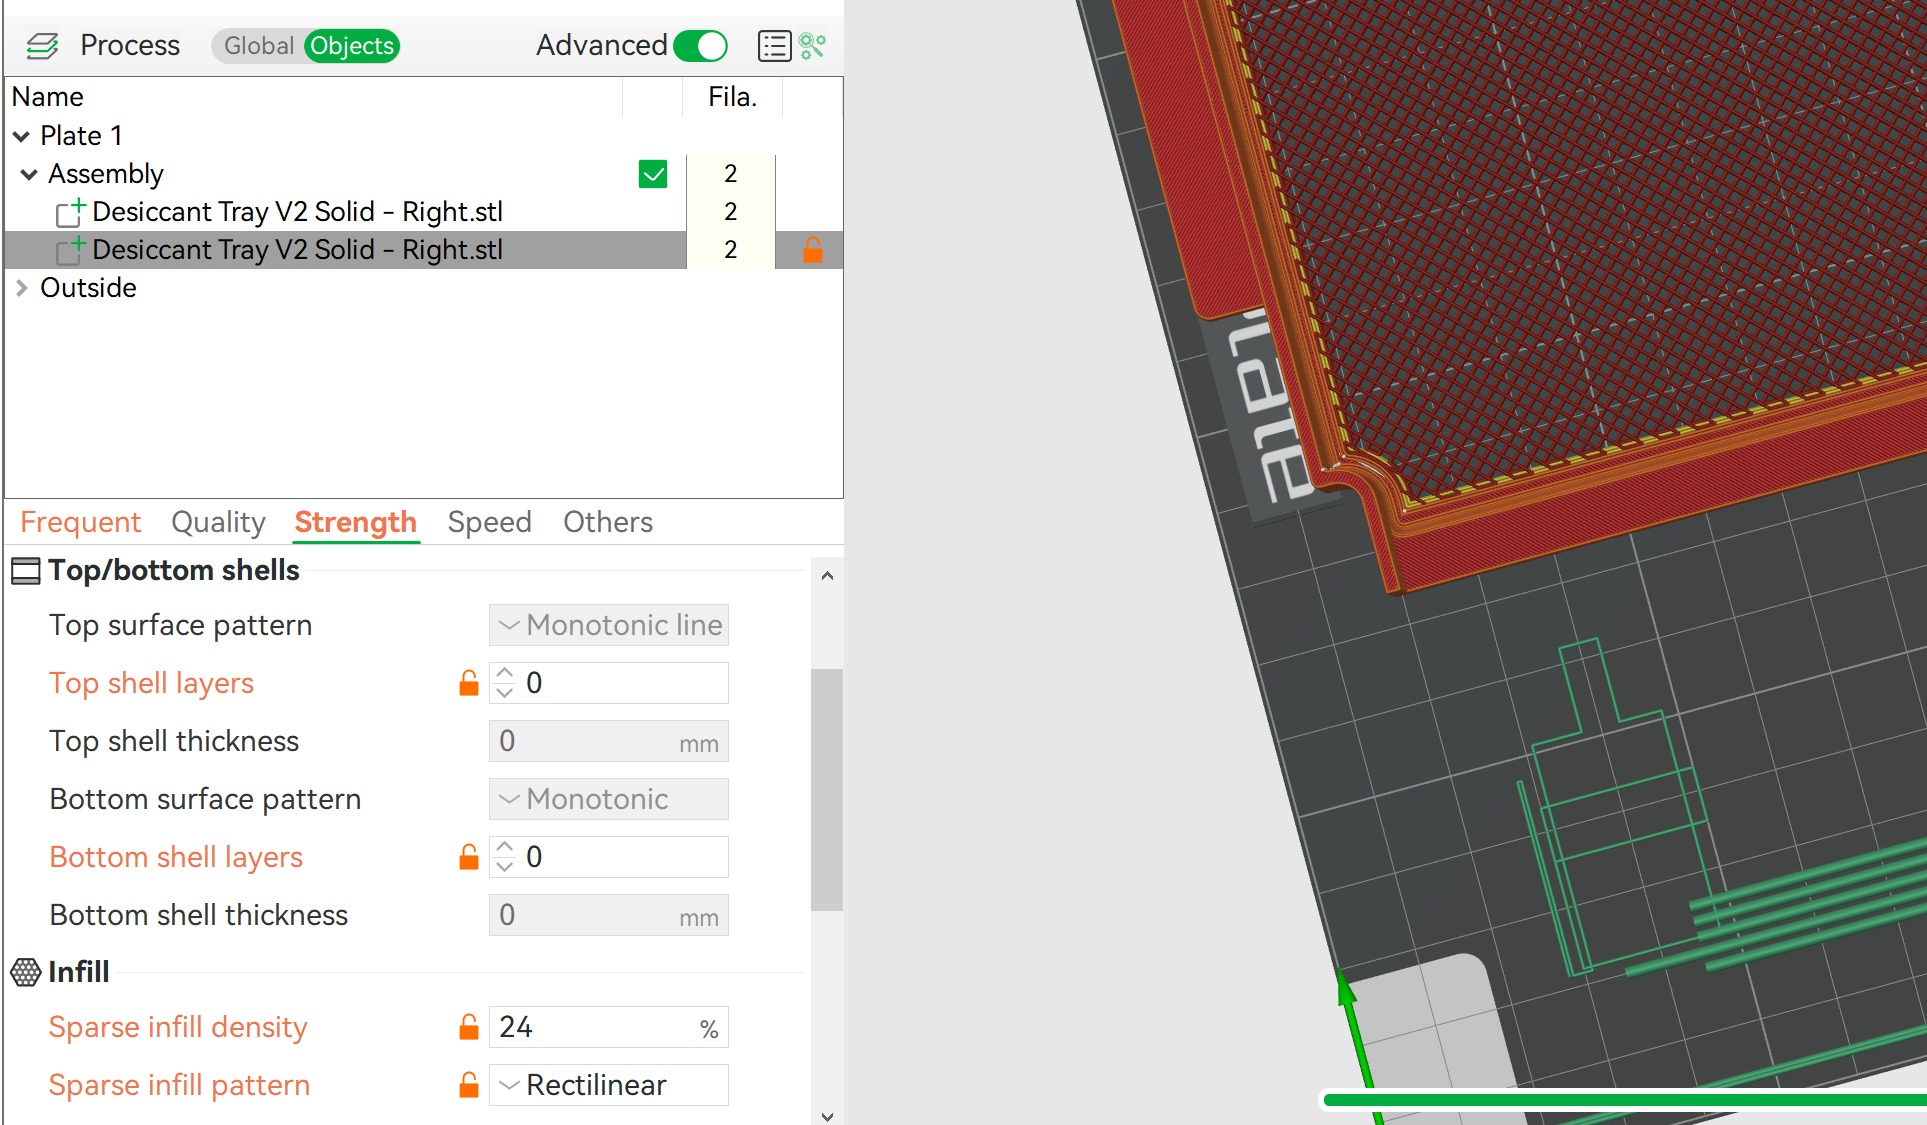
- Set this object to have 3 walls, rectilinear infill at 24%, 0 top and 0 bottom layers. It should now look like this when sliced.
Bambu Lab users can also try my 3MF file with all of this done for you :)
-------------------------------------------------------- V1 ---------------------------------------------------
The model is available in:
- A one piece design for those with a large print bed
- A two piece design pre-cut with frustums built in to join together after printing.
- Can be temporarily placed together while using or super glued if desired.
- A two piece design that has not been split, so you can separate as desired for your printer or preferences.
- 3MF file with settings I used on my Bambu Lab X1 Carbon
- STEP file if you want to modify the design
Recommendations & Tips
- Print in PETG or other material that is more tolerant to heat.
- You may have to adjust your line width in the slicer if the bottom mesh doesn't appear correct after slicing.
- Alternatively, you can try Arachne if that is an option in your slicer. Also take a look at “resolution” settings if you are still having issues. Add another zero to the existing decimal number of your current setting (Example: from 0.01 → 0.001)
- When using the tray, you can use just one half at a time or both
- Try 65c as your temp setting on the PrintDry (their recommendation for desiccant drying).