
The Skeletor Collection a Creality K1/K1 Max/K1C Cooling Solution
Obliczymy ostateczną cenę na podstawie wybranego pliku. Sprawdzisz ją i zaakceptujesz przed płatnością.
Zapisane na tym urządzeniu.

This cooling system just keeps getting better. MK7 is officially released and available for download.
- Ocena
- 4,975 / 5
- Polubienia
- 416
- Pobrania
- 2287
- Wydruki
- 75
- Wyświetlenia
- 19 842
- Oceny
- 40
Aktualizacja u źródła:
Informacje o modelu
- Źródło
- Printables
- Kategoria
- Creality Parts & Upgrades
- Licencja
- Creative Commons — Attribution — Noncommercial — Share Alike
Welcome to The Skeletor Collection—discover the evolution of the Skeletor project, explore each iteration’s unique enhancements, and find out how you can get involved.
📖 Want the full story?
All MK7 details and project updates can be found on my Patreon → The Skeletor Project Collection
🔍 Read the full guide first
Before committing to MK7, please review the complete setup and usage guide →
Get to Know Skeletor Before You Begin:
🚀 Looking for the latest?
-Download Skeletor MK7 → Skeletor MK7
🛰 Cartographer users:
Skeletor MK6 shares all the same cartographer configurations as MK7 Front-Mounted Cartographer. If you’d like to add a cartographer but aren’t quite ready to support MK7, just follow the MK7 cartographer documentation here → Cartographer Mount Options
Skeletor MK6 settings are listed in the post here on Printables on this post below
I really hope you guys enjoy this model as much as I enjoyed creating it. It was fun to take a new approach to cooling on the K1 and K1 Max. I wanted to design something that was different from everything else while also being extremely functional. Not only is this shroud probably the lightest available for download there is almost zero loss in airflow for the part cooling fan!
!!!MAJOR UPDATE!!! 12/12/24:
-Added Skeletor MK6
-Added Skeletor MK6 with Front Mounted Cartographer mount. This mounting option was made specifically for Cartographer3D's low profile cartographer. For more information on how to set up the cartographer please see their set up guide on GitHub.
-For more assistance, please join my Patreon or reach out to me directly.
-If you need the Ultra Low Flathead Bolts M3x4 they can be found by clicking this link.
~~~~~~~~~~~~~~~~~~~~~~~~~~~~~~~~~~~~~~~~Skeletor MK6~~~~~~~~~~~~~~~~~~~~~~~~~~~~~~~~~~~~~~~~
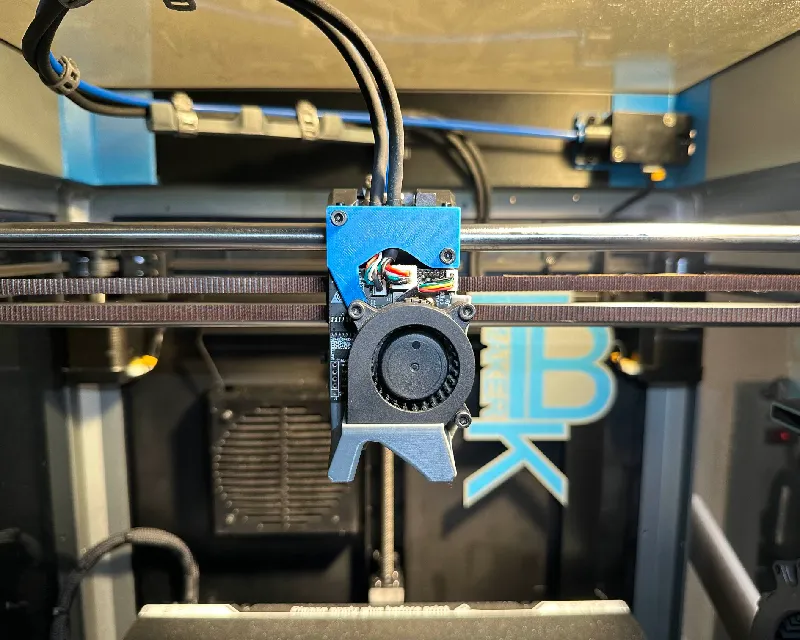
This is Skeletor MK6 a Creality K1/K1 Max/K1C Toolhead Cover/Shroud.
~Hardware Needed~
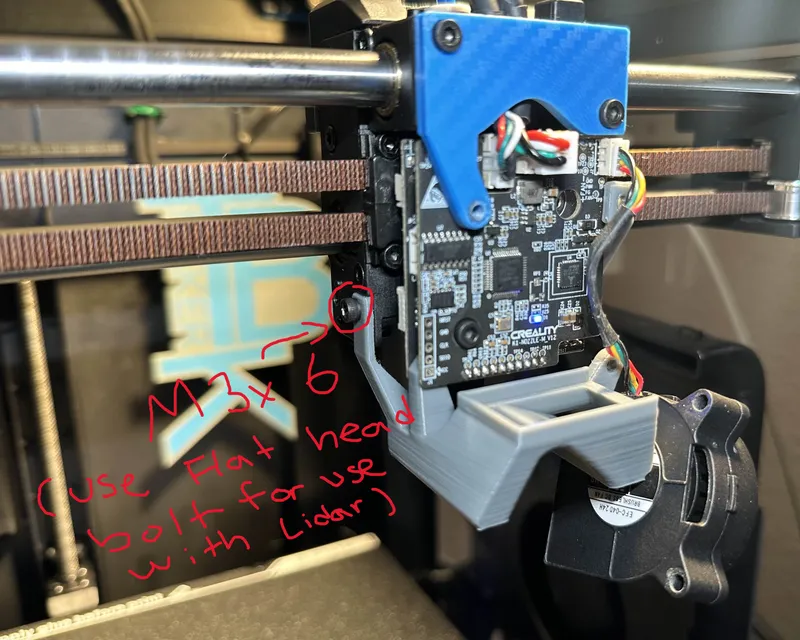
-4 x M3x6 Bolts
-3 x M3x16 Bolts
-1 x M3x25 Bolt
-You can get all of the bolts you need plus some extras by buying this M3 bolt set ➡ https://amzn.to/3W450GS
OPTIONAL hardware in italic below
-For the top strain relief portion, I would highly suggest adding heated inserts where the holes where the stock screws go. It's not difficult to do. and ensures this part will never fail. (after all of my testing I stripped the hole out with the stock screws) Here are the heat inserts I am using: https://amzn.to/4a1ZREI
~Printing Requirements~
-PRINT WITH ABS, ASA, PA6-GF or some other high heat resistant stiff material. PETG WILL NOT WORK.
-The duct itself should be printed with 3 walls, 5 top and bottom layers and 15% infill.
-The Strain relief and Stabilizing arm should be printed solid, either set infill to 100% or change your top and bottom layers to 20
-NO SUPPORTS NEEDED!!!
~Post Processing and assembly~
-Wait for the print to cool before taking it off the build plate. Use a razor scraper if you have one to get it off the build plate.
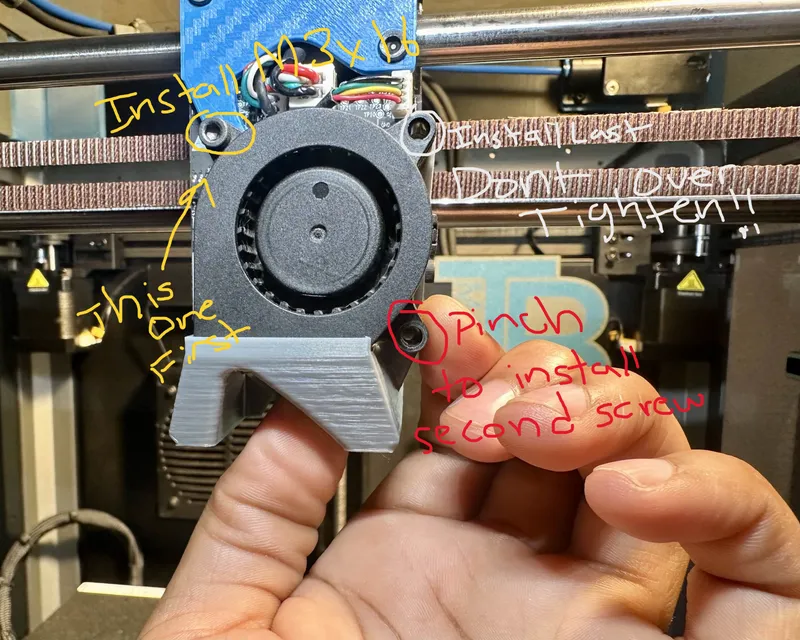
-When assembling DO NOT OVERTIGHTEN SCREWS!!! Only tighten until firm or tight enough where you're confident it will not strip the plastic.
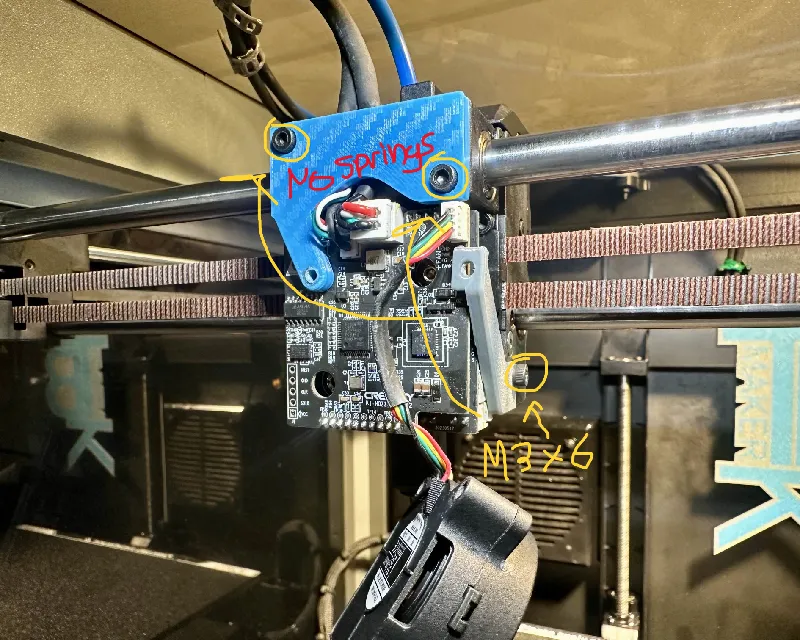 | 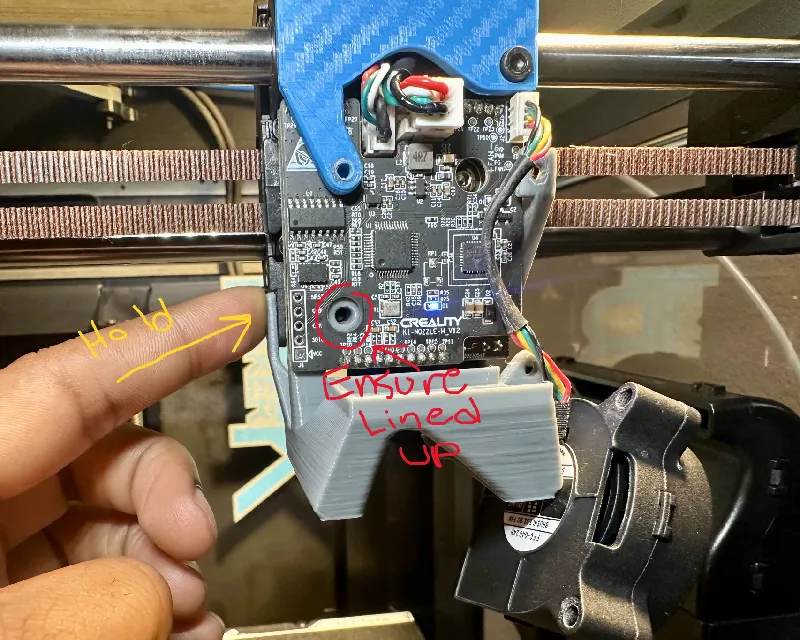 | 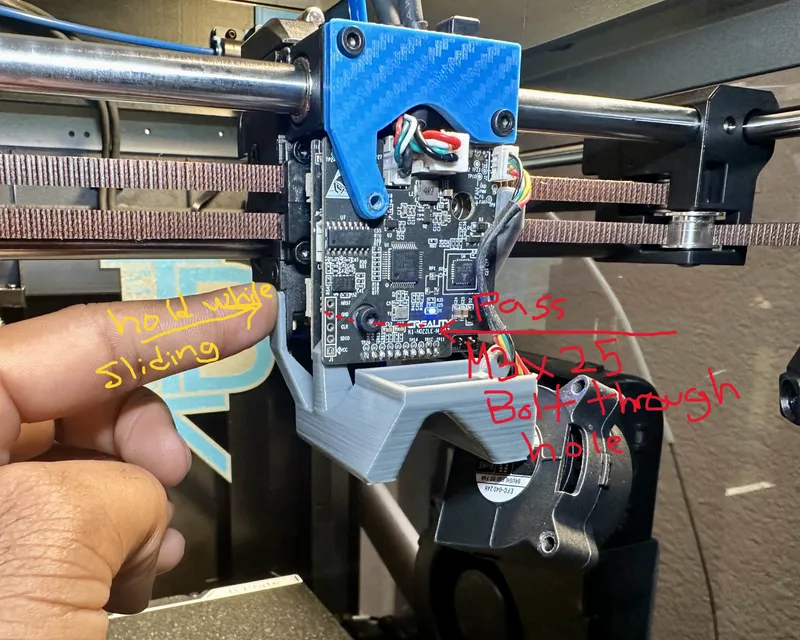 | 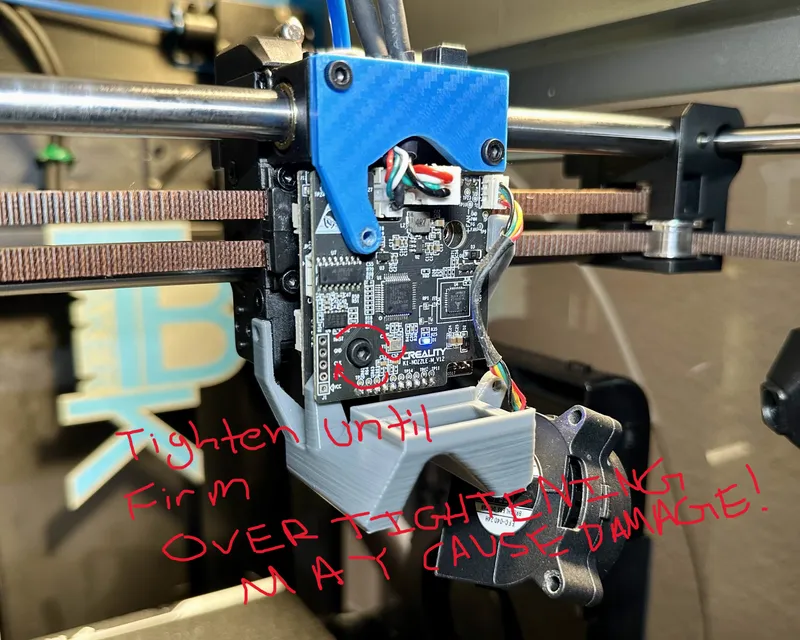 |
 |  |  |
|
~ ~ ~ Update 09/01/2024 ~ ~ ~
Introducing the Skeletor LED mod. This mod allows you to easily add a couple of 5V LED's at the nozzle using your toolhead boards filament runout sensor port.
For this mod you will need to change the following items of code in your klipper printer.cfg file.
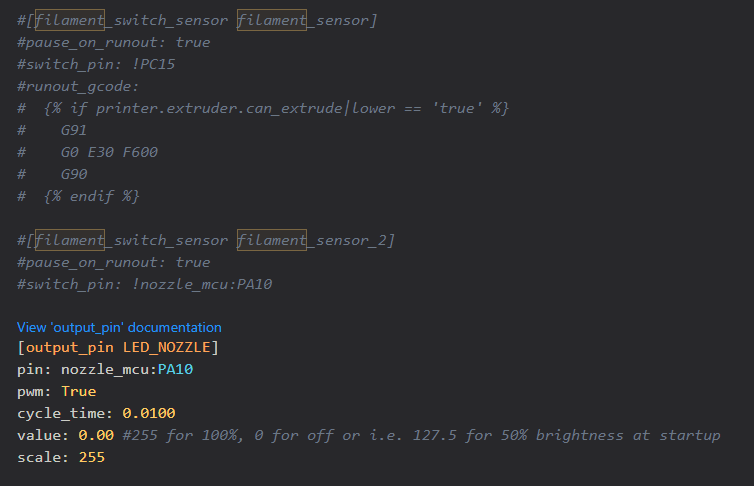
As well as add the following code for dim control to your gcode_macro.cfg folder
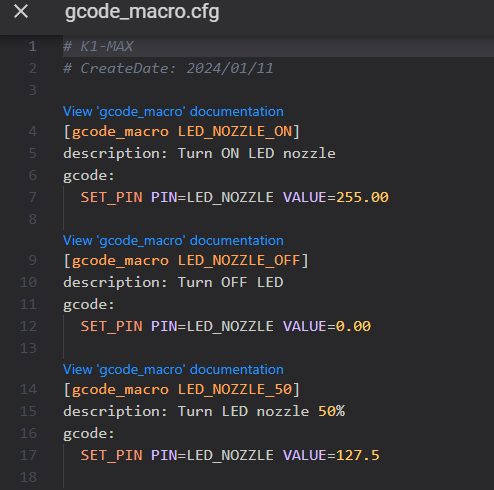
Below are some instructions on how to instill this mod to your existing Skeletor MK6 as well as the material you will need.
5v LED with 17mm segments So long as the length of the LED segment stays under 35mm you can use whatever 5v LED strips you want. The ones in the link are just the ones I used. I saw several others when shopping around. If you find one that works better, please let us all know!
24 AWG and 18-10AWG Heat shrink tubing (I got this from my local hardware store)
Soldering Iron
Helping hands (optional but very…handy)
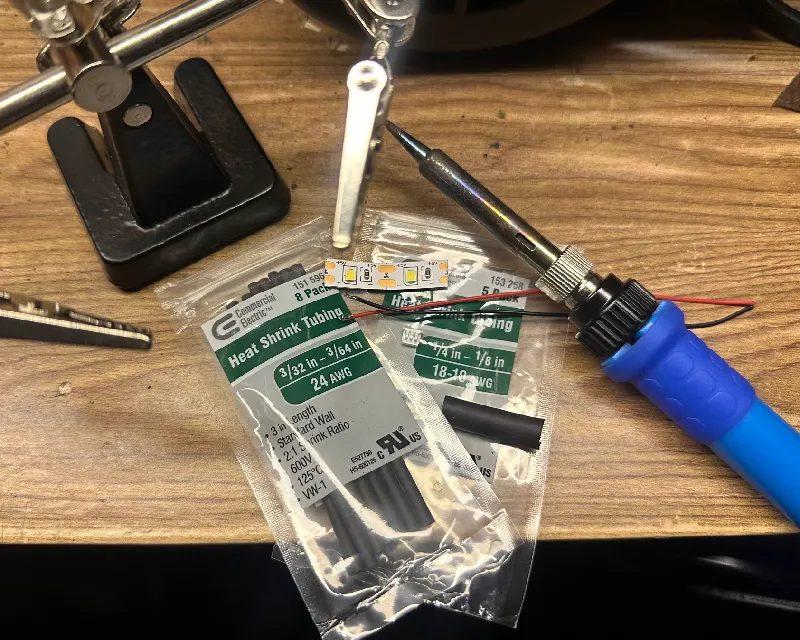 If you get stuck at any point. Please don't hesitate to reach out for help. | 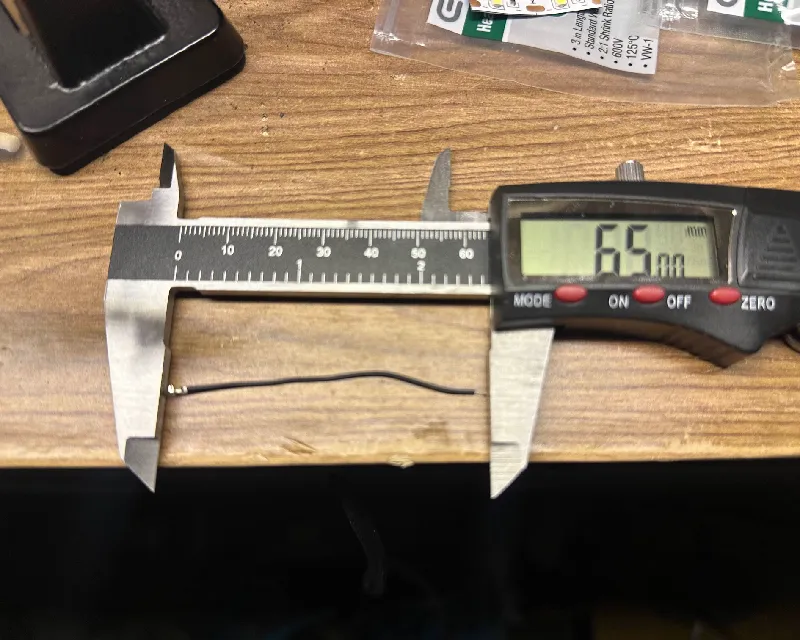 Cut the black wire to 65mm in length |  Cut the red wire to 60mm in length | 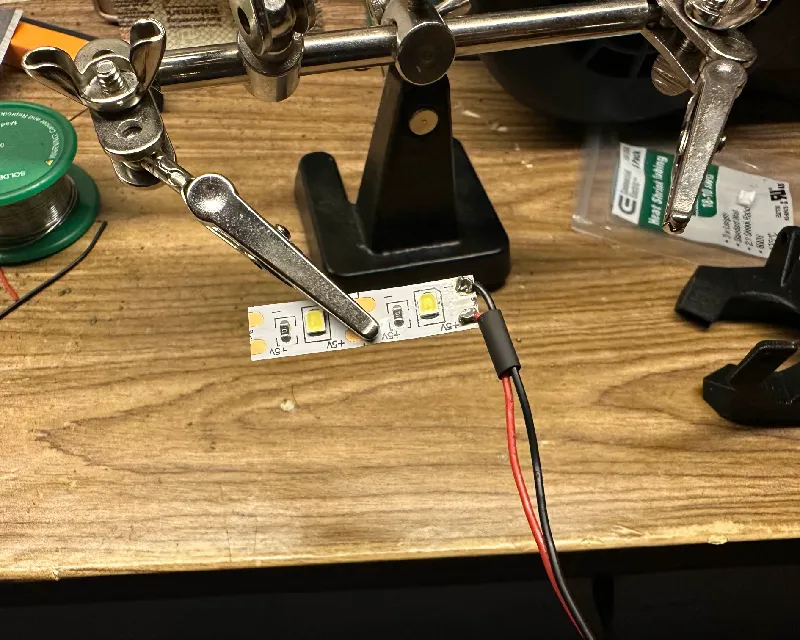 Solder the positive and negative ends of the wire on. Positive end should be facing you. Bend the wires after soldering as picture shows then slide smaller heatsink into place and heat. |
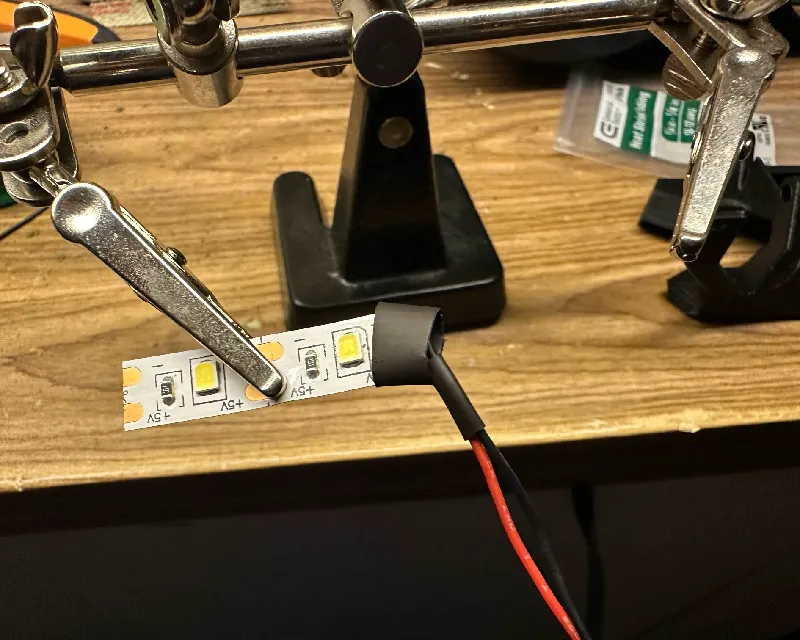 Slide larger heat sink over just the bottom part, this will allow the wires to retain that bend. It is important for the final fit. |  Take off blue backing to expose adhesive. Add an optional dab of super glue | 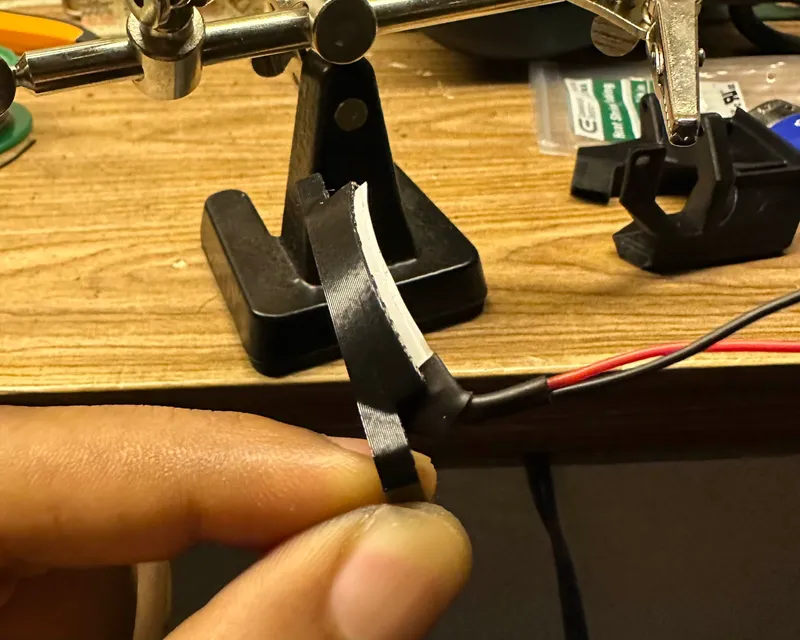 Stick the LED strip to the mount. If you've added glue, wait for it to dry. | 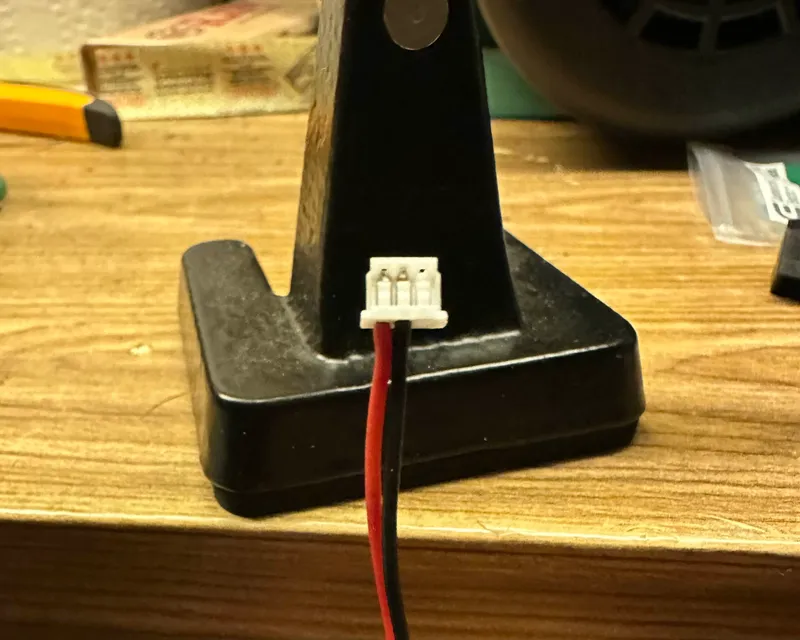 Insert the jst wires into the connector. They must be oriented EXACTLY AS THE PICTURE. |
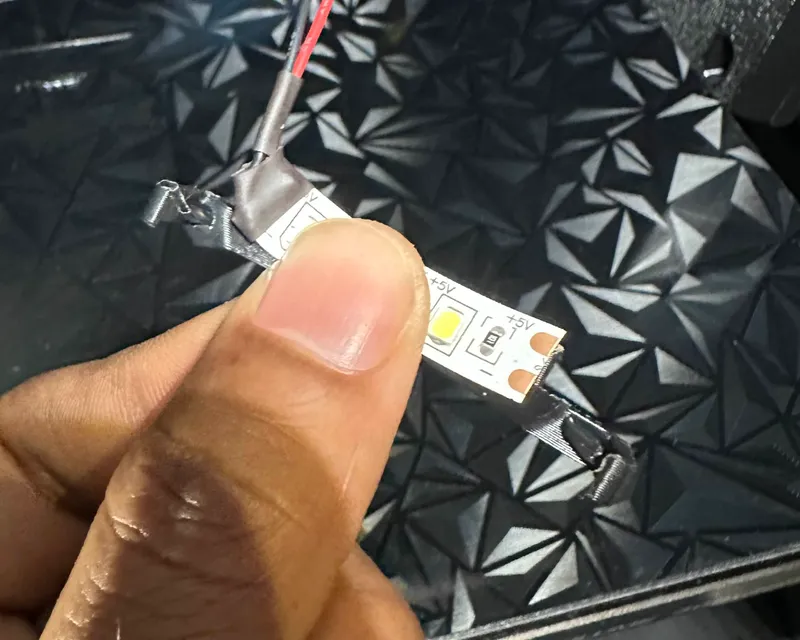 Add a dab of super glue to each corner, just like show in the picture and this mount shout slot right into place. |  Ensure LED is still operational before gluing down. | 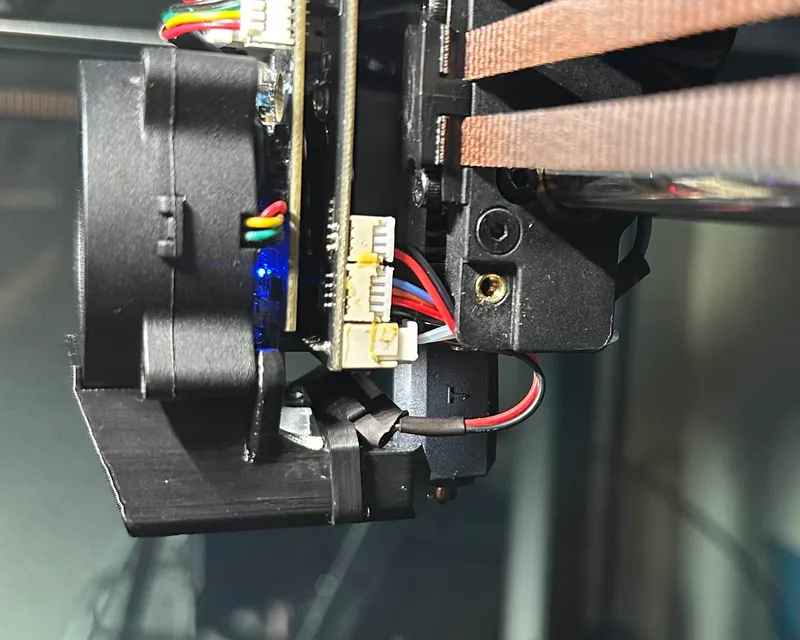 Make sure after plugging in the LED to tuck the wires into the same location where your other wires are. | 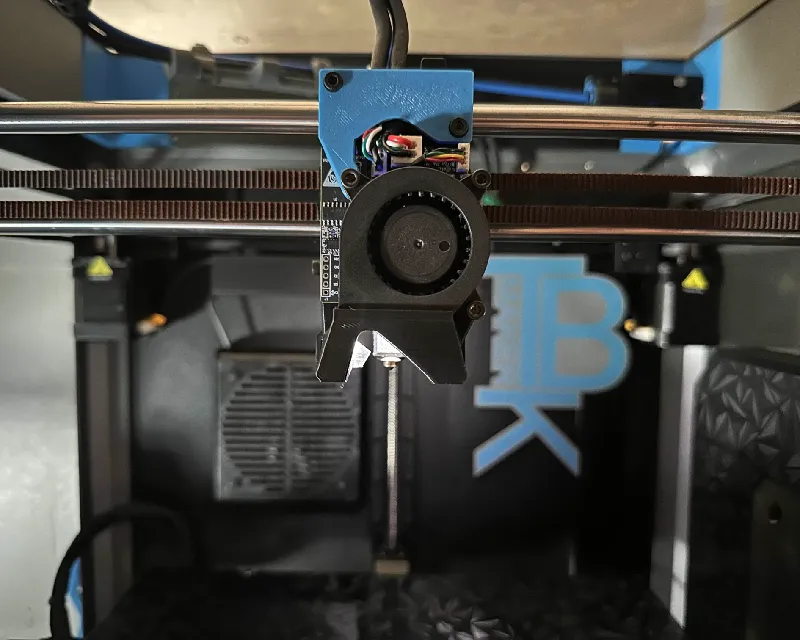 Enjoy finally being able to see your prints~ |
More updates to come! So stay tuned.
~ ~ ~ ~ ~ ~ ~ ~ ~ ~ ~ ~
I want to give a big thank you to those that have been helping me with my testing. It really speeds up the process on getting new Skeletor models out and available to the public.
If you've been enjoying my design work and the Skeletor series, please be sure to leave a like on the model. If you do end up using the model, please post your make. I really enjoy seeing everyone's set up with Skeletor on there. Makes my day
Happy Printing!