
PC Airflow Visualizer Set – RAM Covers & AIO Pump Cap with Tuft Arrays
We calculate the final price from your selected file. You review and accept it before payment.
Saved on this device.

Don’t let your machine stall – visualize airflow with tufts on RAM and pump cap covers.
- Rating
- 0 / 5
- Likes
- 6
- Downloads
- 6
- Makes
- 0
- Views
- 303
- Reviews
- 0
Updated at source:
Model information
- Source
- Printables
- Category
- Computers
- License
- Creative Commons — Attribution — Noncommercial — Share Alike
Visualize Airflow Like in Aerospace
This modding concept borrows a proven technique from aviation: tuft flow visualization. In aircraft testing, short strands of thread (called tufts) are attached to surfaces to reveal how air flows — or stalls. That same idea now brings movement into your PC case.
The Airflow Visualizer RAM Bar and Pump Cap are designed to hold polyester tufts that flutter with airflow, creating a striking and functional visualization of your system’s internal cooling dynamics.
These parts also feature recessed “AirFlow” lettering and flow-line graphics, making the design visible even without multicolor (MMU) printing — the shadows cast by directional lighting reveal the engraved shapes clearly.
Airflow Tuft Installation Guide
(RAM Bar & Pump Cap)
This guide explains how to install polyester tufts into the Airflow Visualizer RAM Bar and Airflow Visualizer Pump Cap to simulate airflow – inspired by real-world aerodynamic tuft testing.
Required Materials
- Polyester sewing thread (lightweight)
- Sharp scissors
- Superglue or hot glue
- Tuft Length Gauge (included as STL)
- Printed RAM Bar and/or Pump Cap
Step-by-Step Instructions
0.5. Preparation – Determine Optimal Tuft Length
Before cutting all threads, test a few different lengths in your case. The tufts should be long enough to catch and respond to airflow, but not so long that they tangle or interfere with nearby components. Use the included Tuft Length Gauge (20 mm / 25 mm / 30 mm) to find the best fit for your setup.
1. Cut Rough Tuft Lengths
Cut a generous number of thread pieces:
- 9 pieces for the RAM Bar
- 21 pieces for the Pump Cap
- Each piece should be ~40–50 mm long to start.
2. Tie a Knot
Tie a small, tight knot at one end of each thread. The knot will serve as a stopper when measuring the tuft length. (In the example, I used black polyester thread for better visibility — feel free to choose any color that contrasts well in your case.)

3. Trim Using the Tuft Length Gauge
Insert each thread from below into the Tuft Length Gauge, with the knot staying underneath.
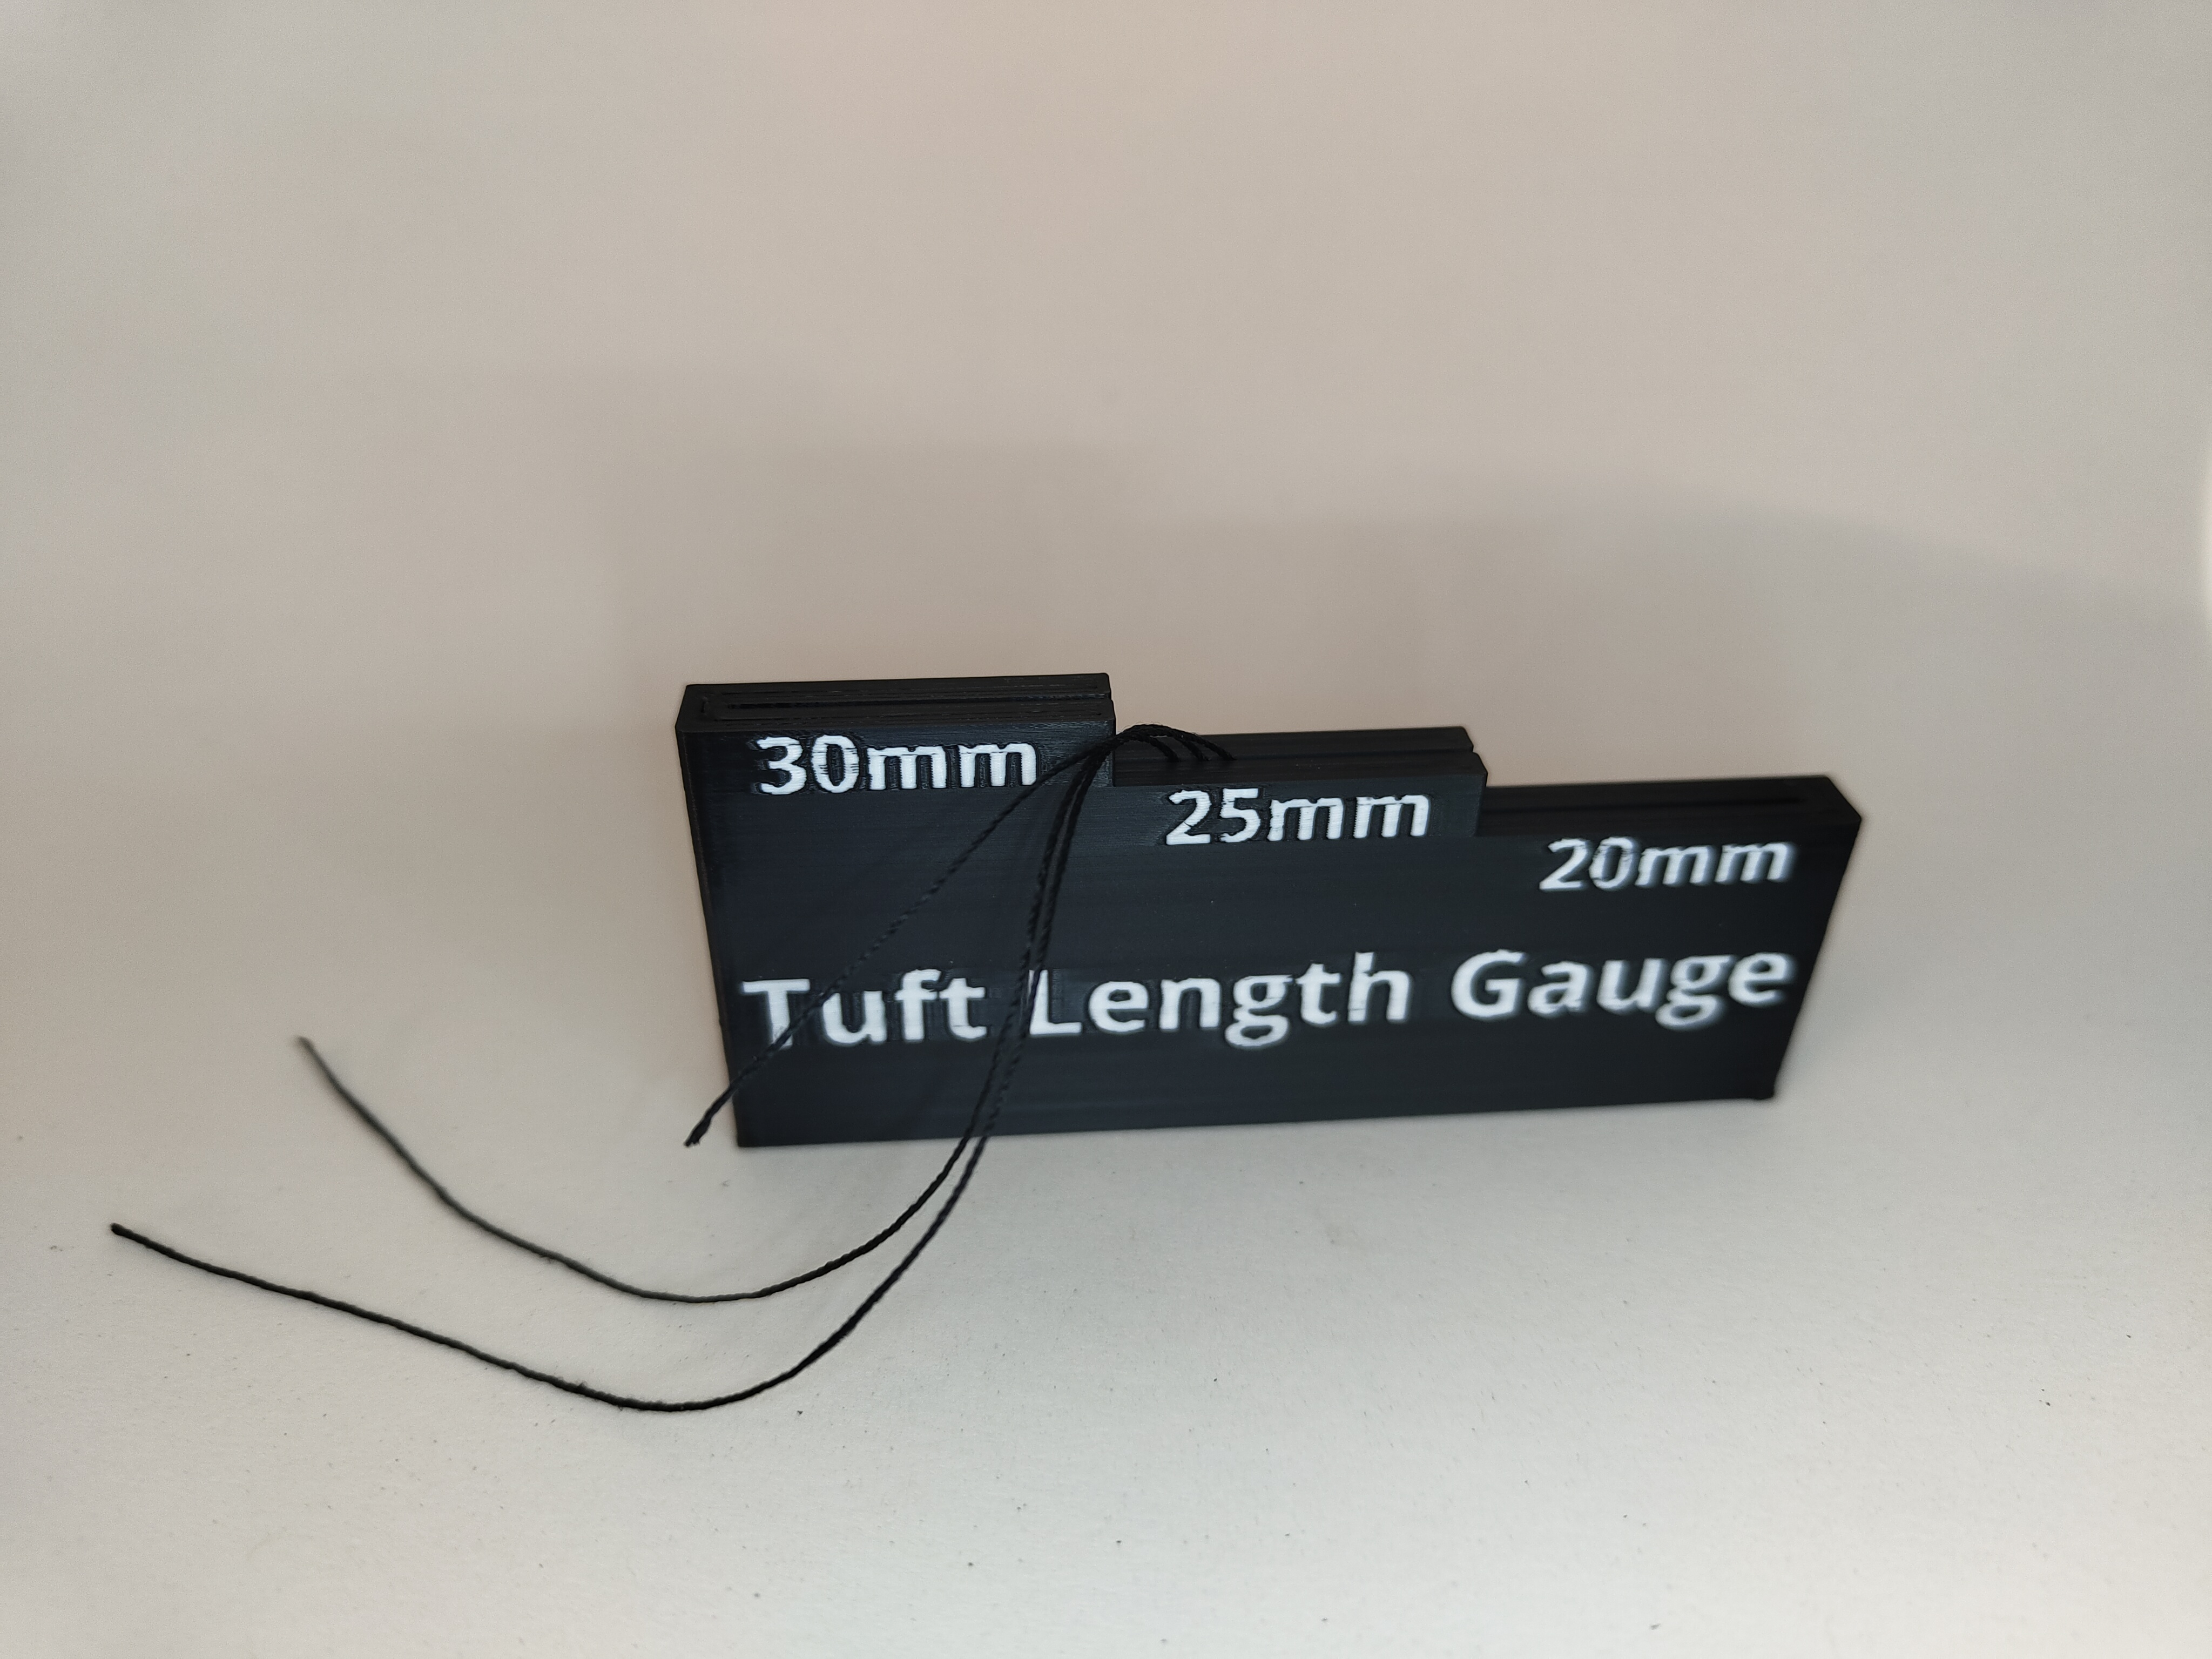
Gently pull the thread upward through your chosen slot (20 mm, 25 mm, or 30 mm) until the knot stops against the bottom edge of the gauge.
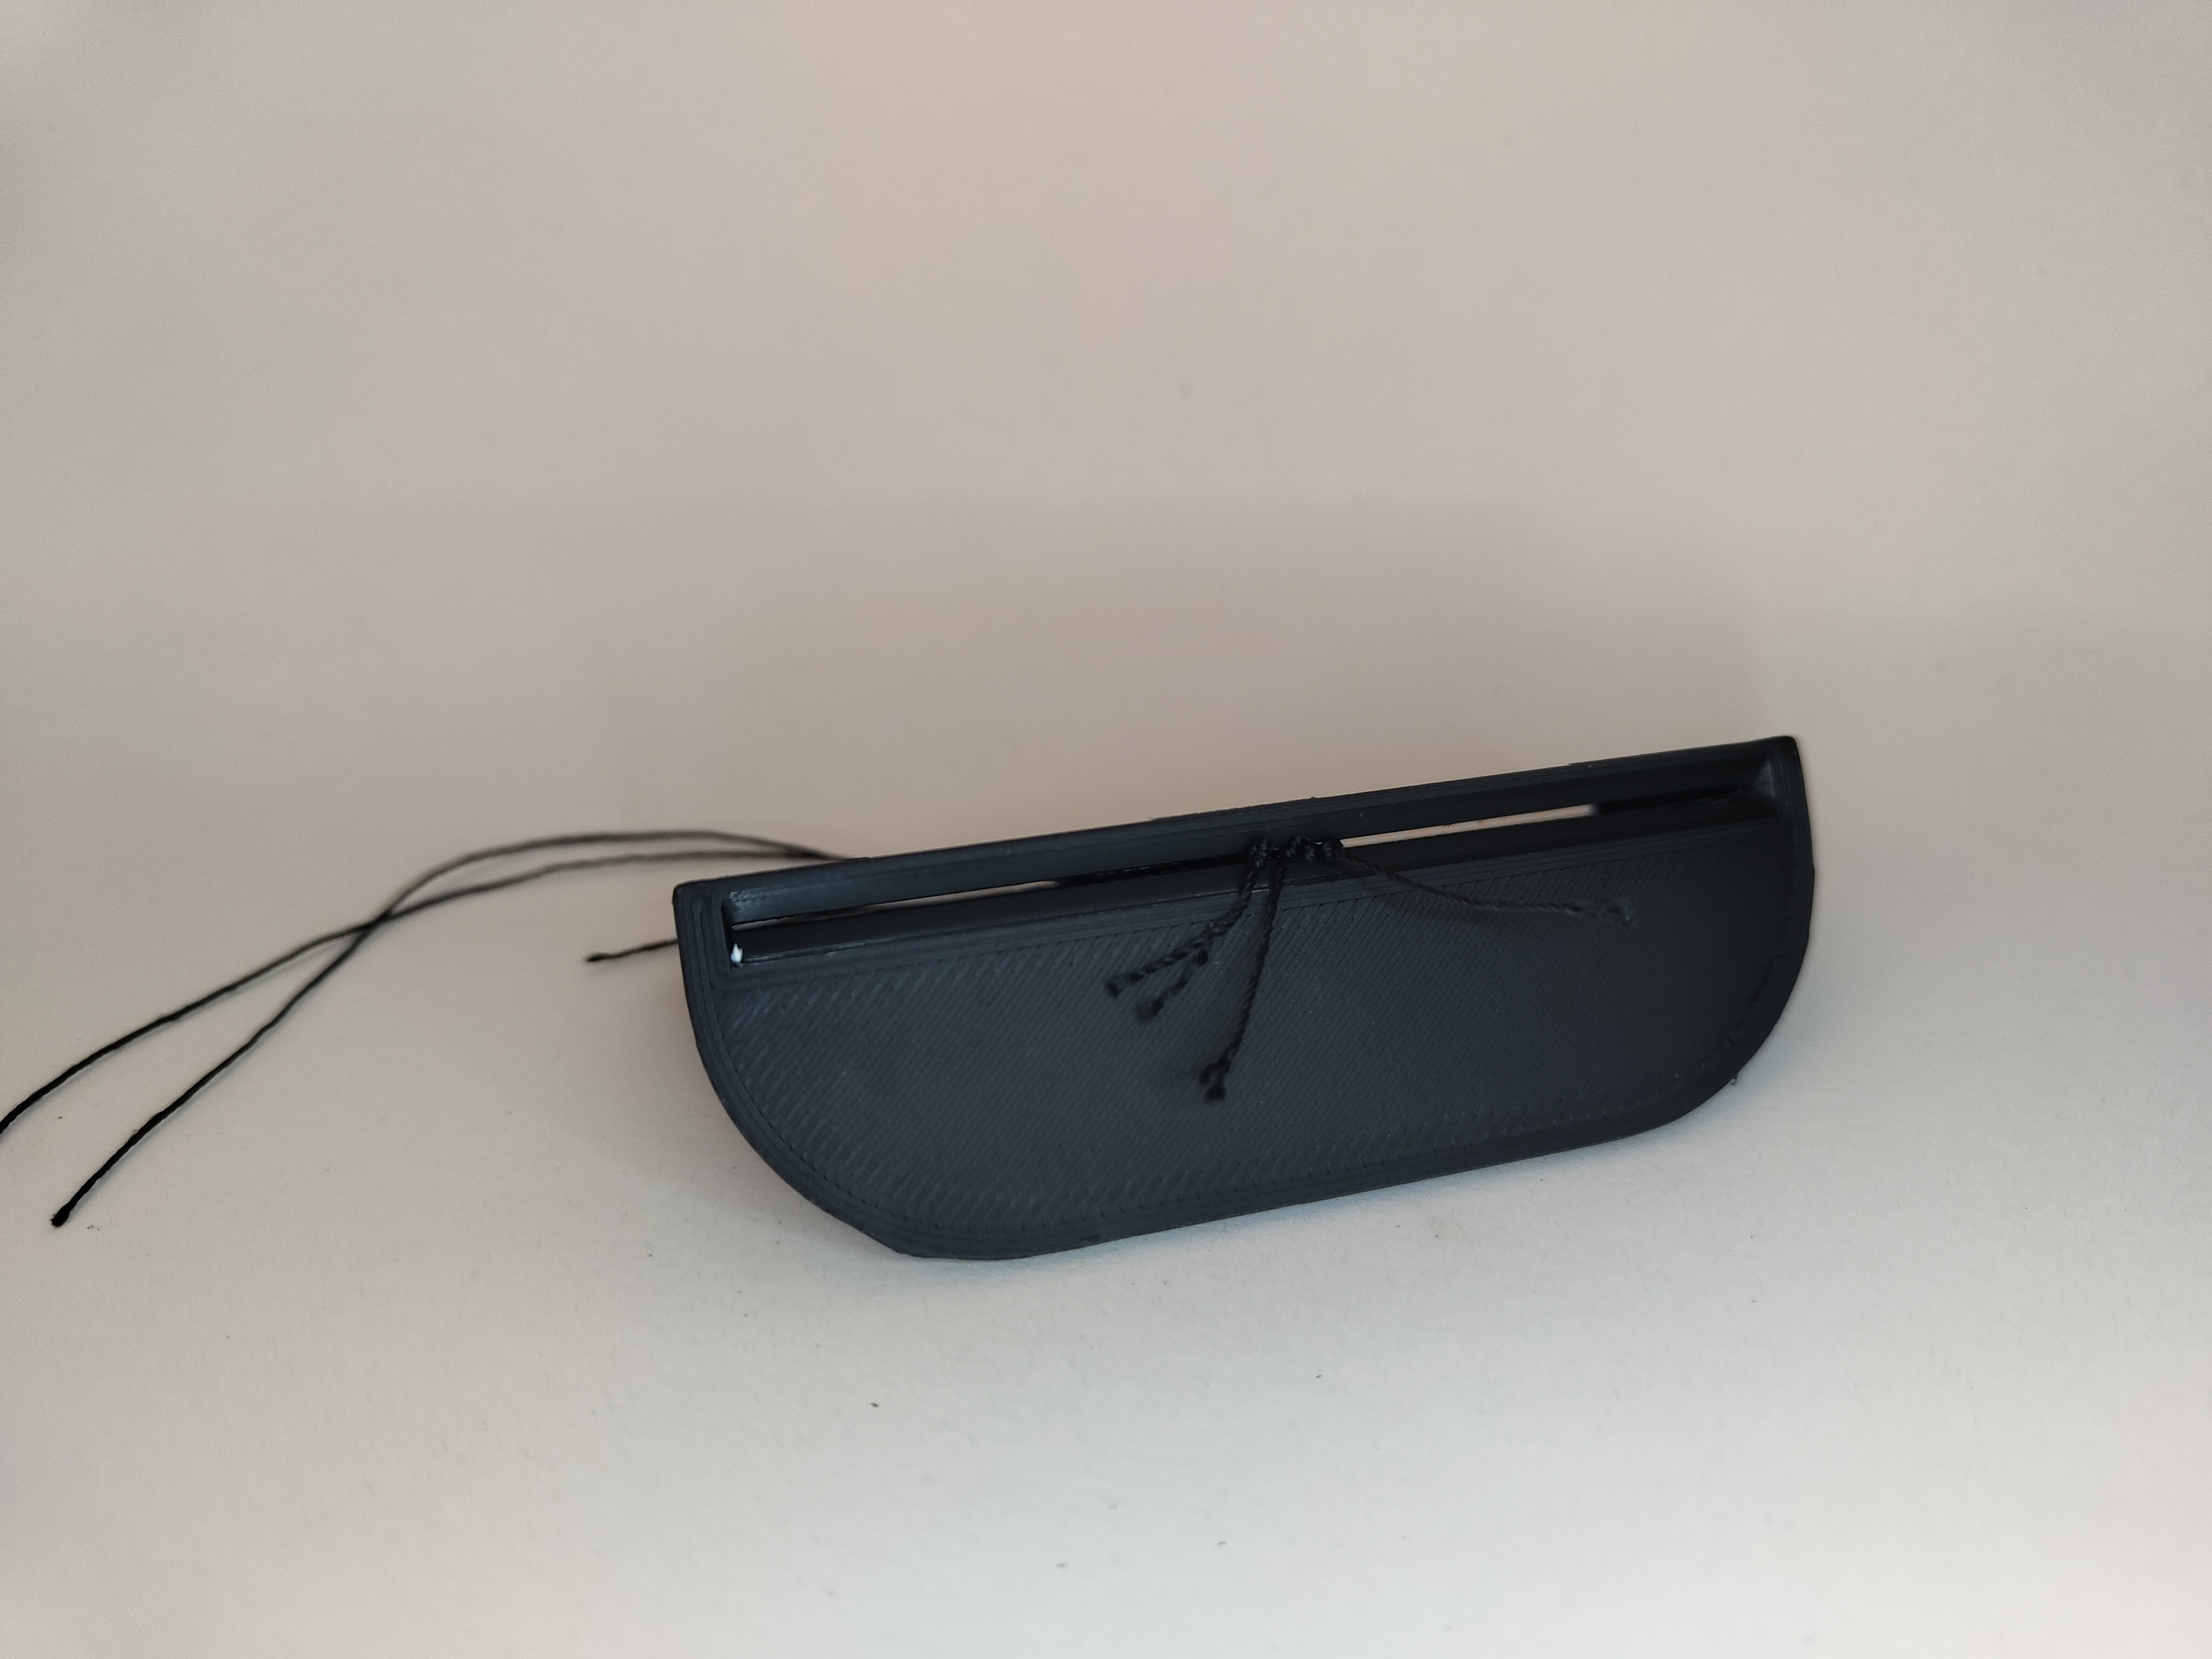
Use sharp scissors to trim the excess thread at the top, leaving a precisely measured tuft.
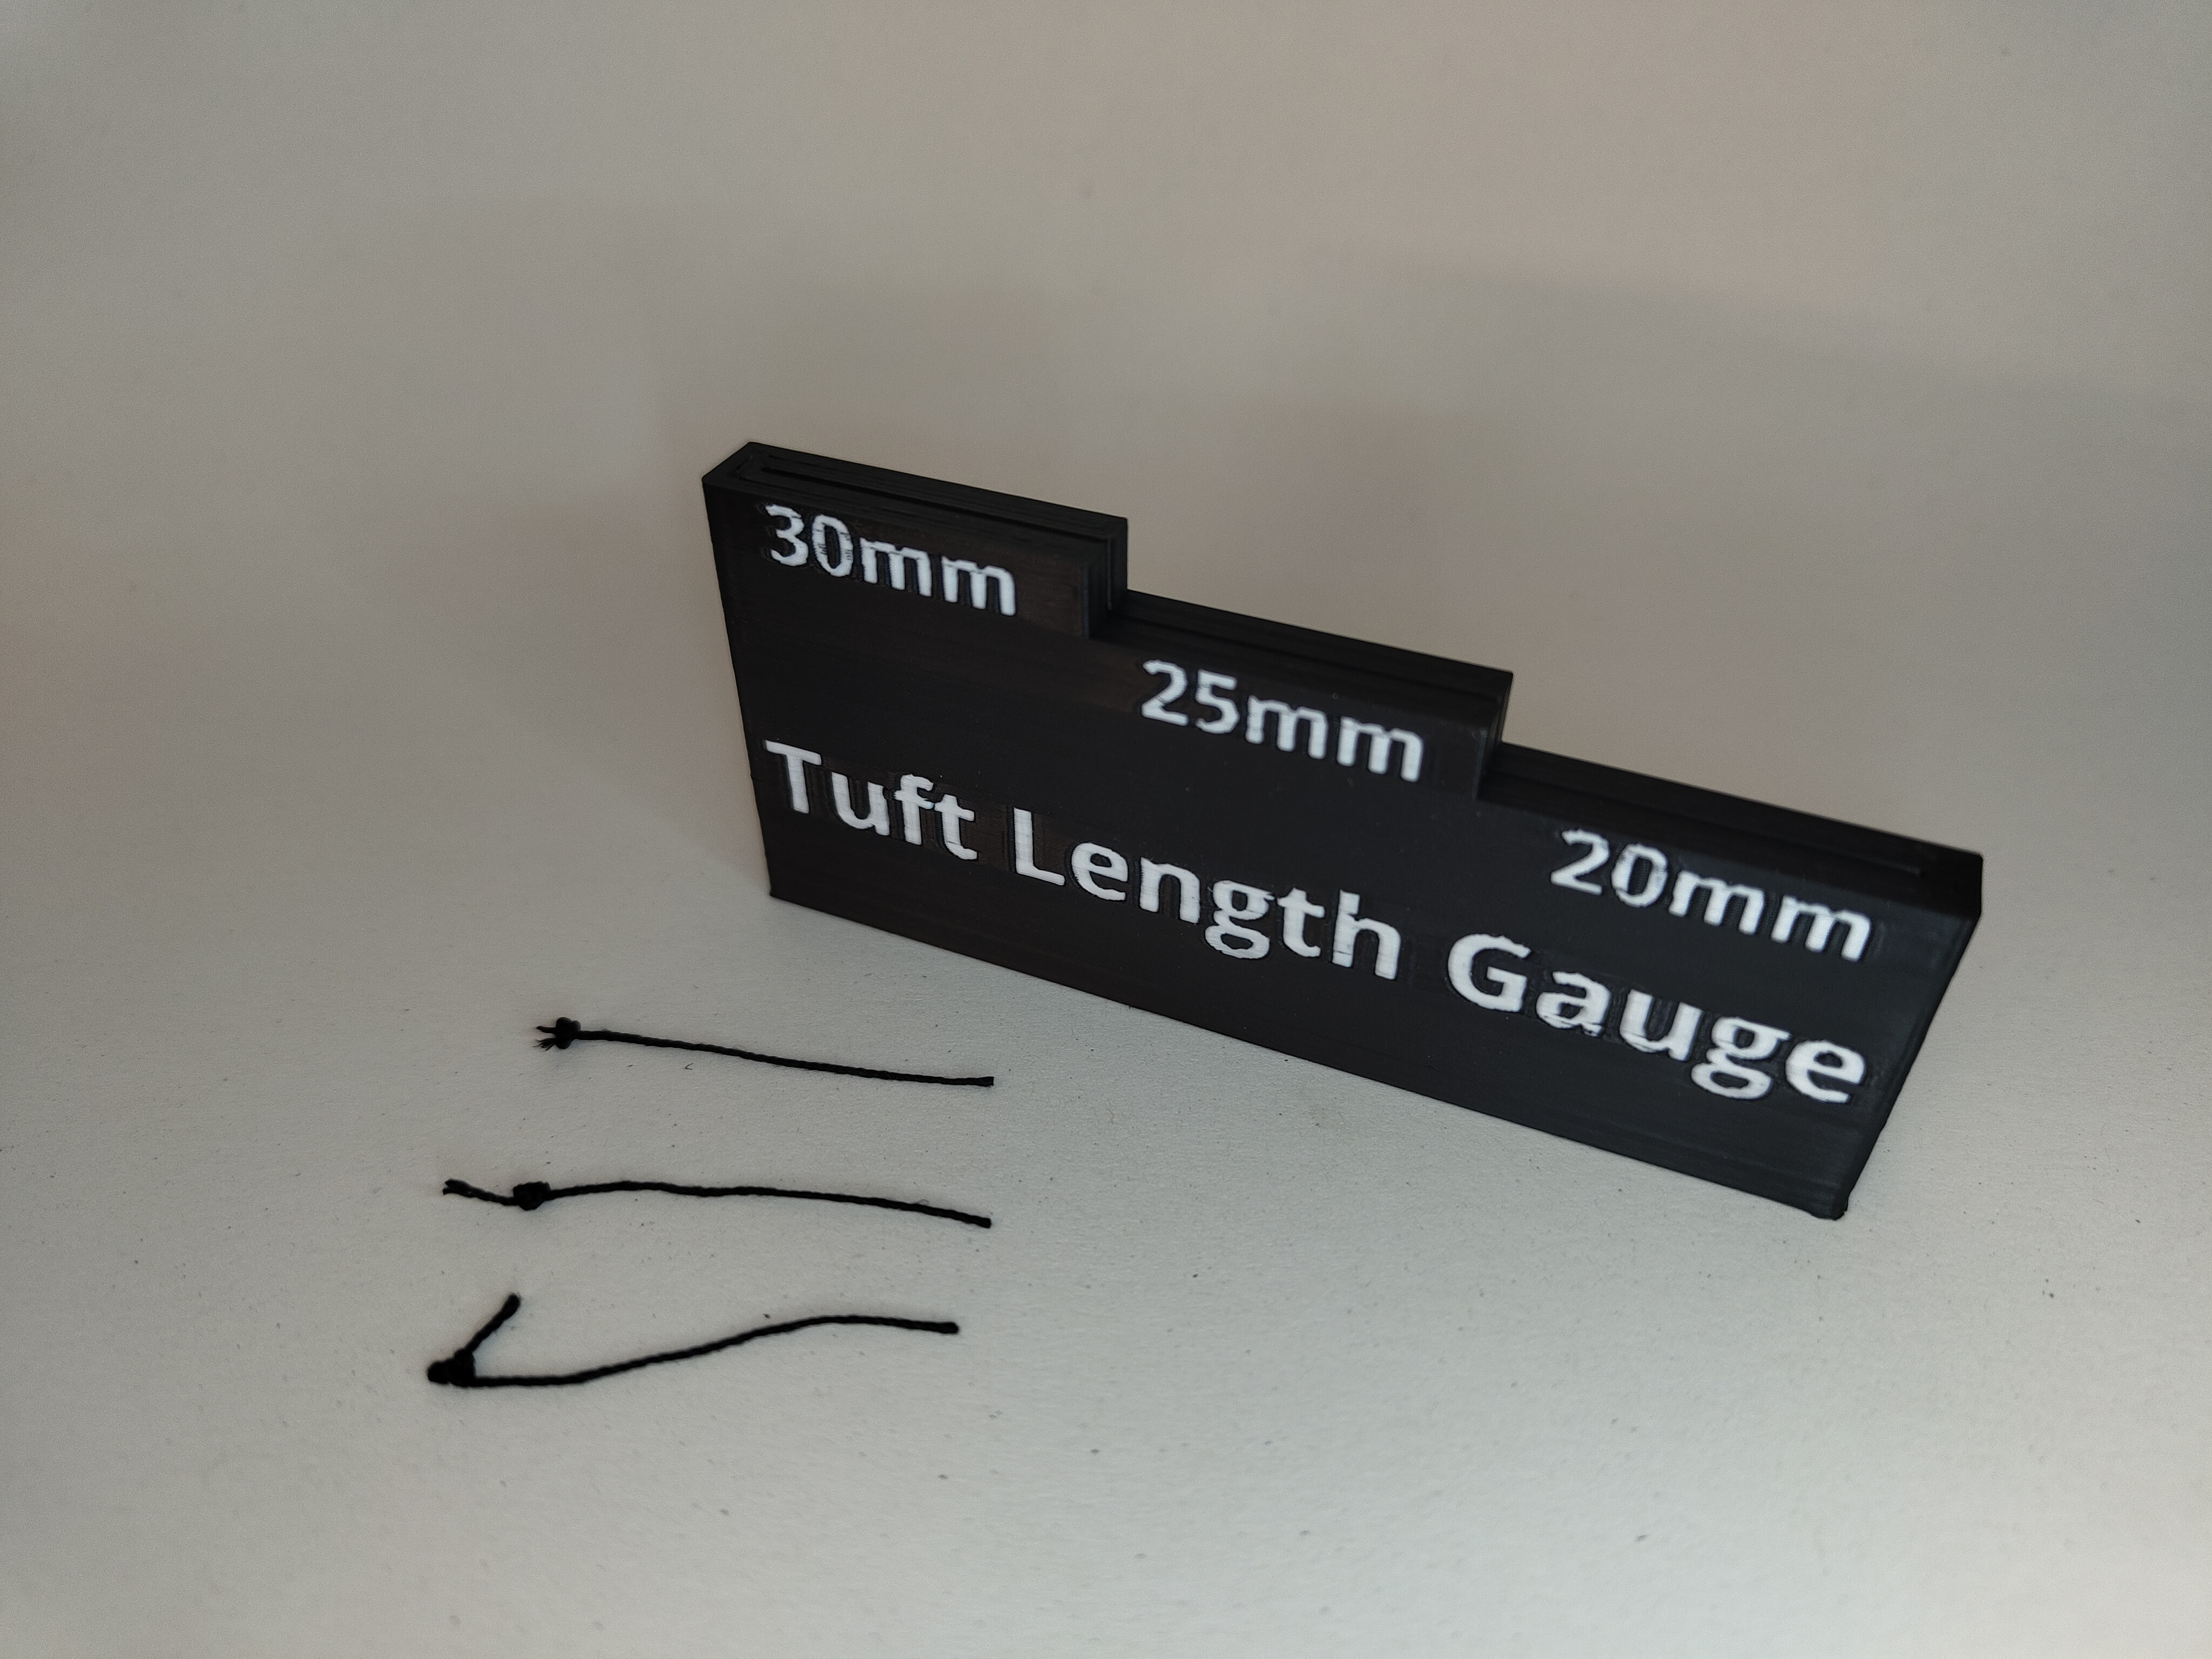
Optionally trim off any excess thread below the knot.
4. Insert Tufts into the Printed Parts
Feed the cut end of each thread from the back side of the RAM Bar or Pump Cap into the corresponding holes.
Tip: If any holes are partially blocked due to printing artifacts, carefully clear them using a fine needle or pin.
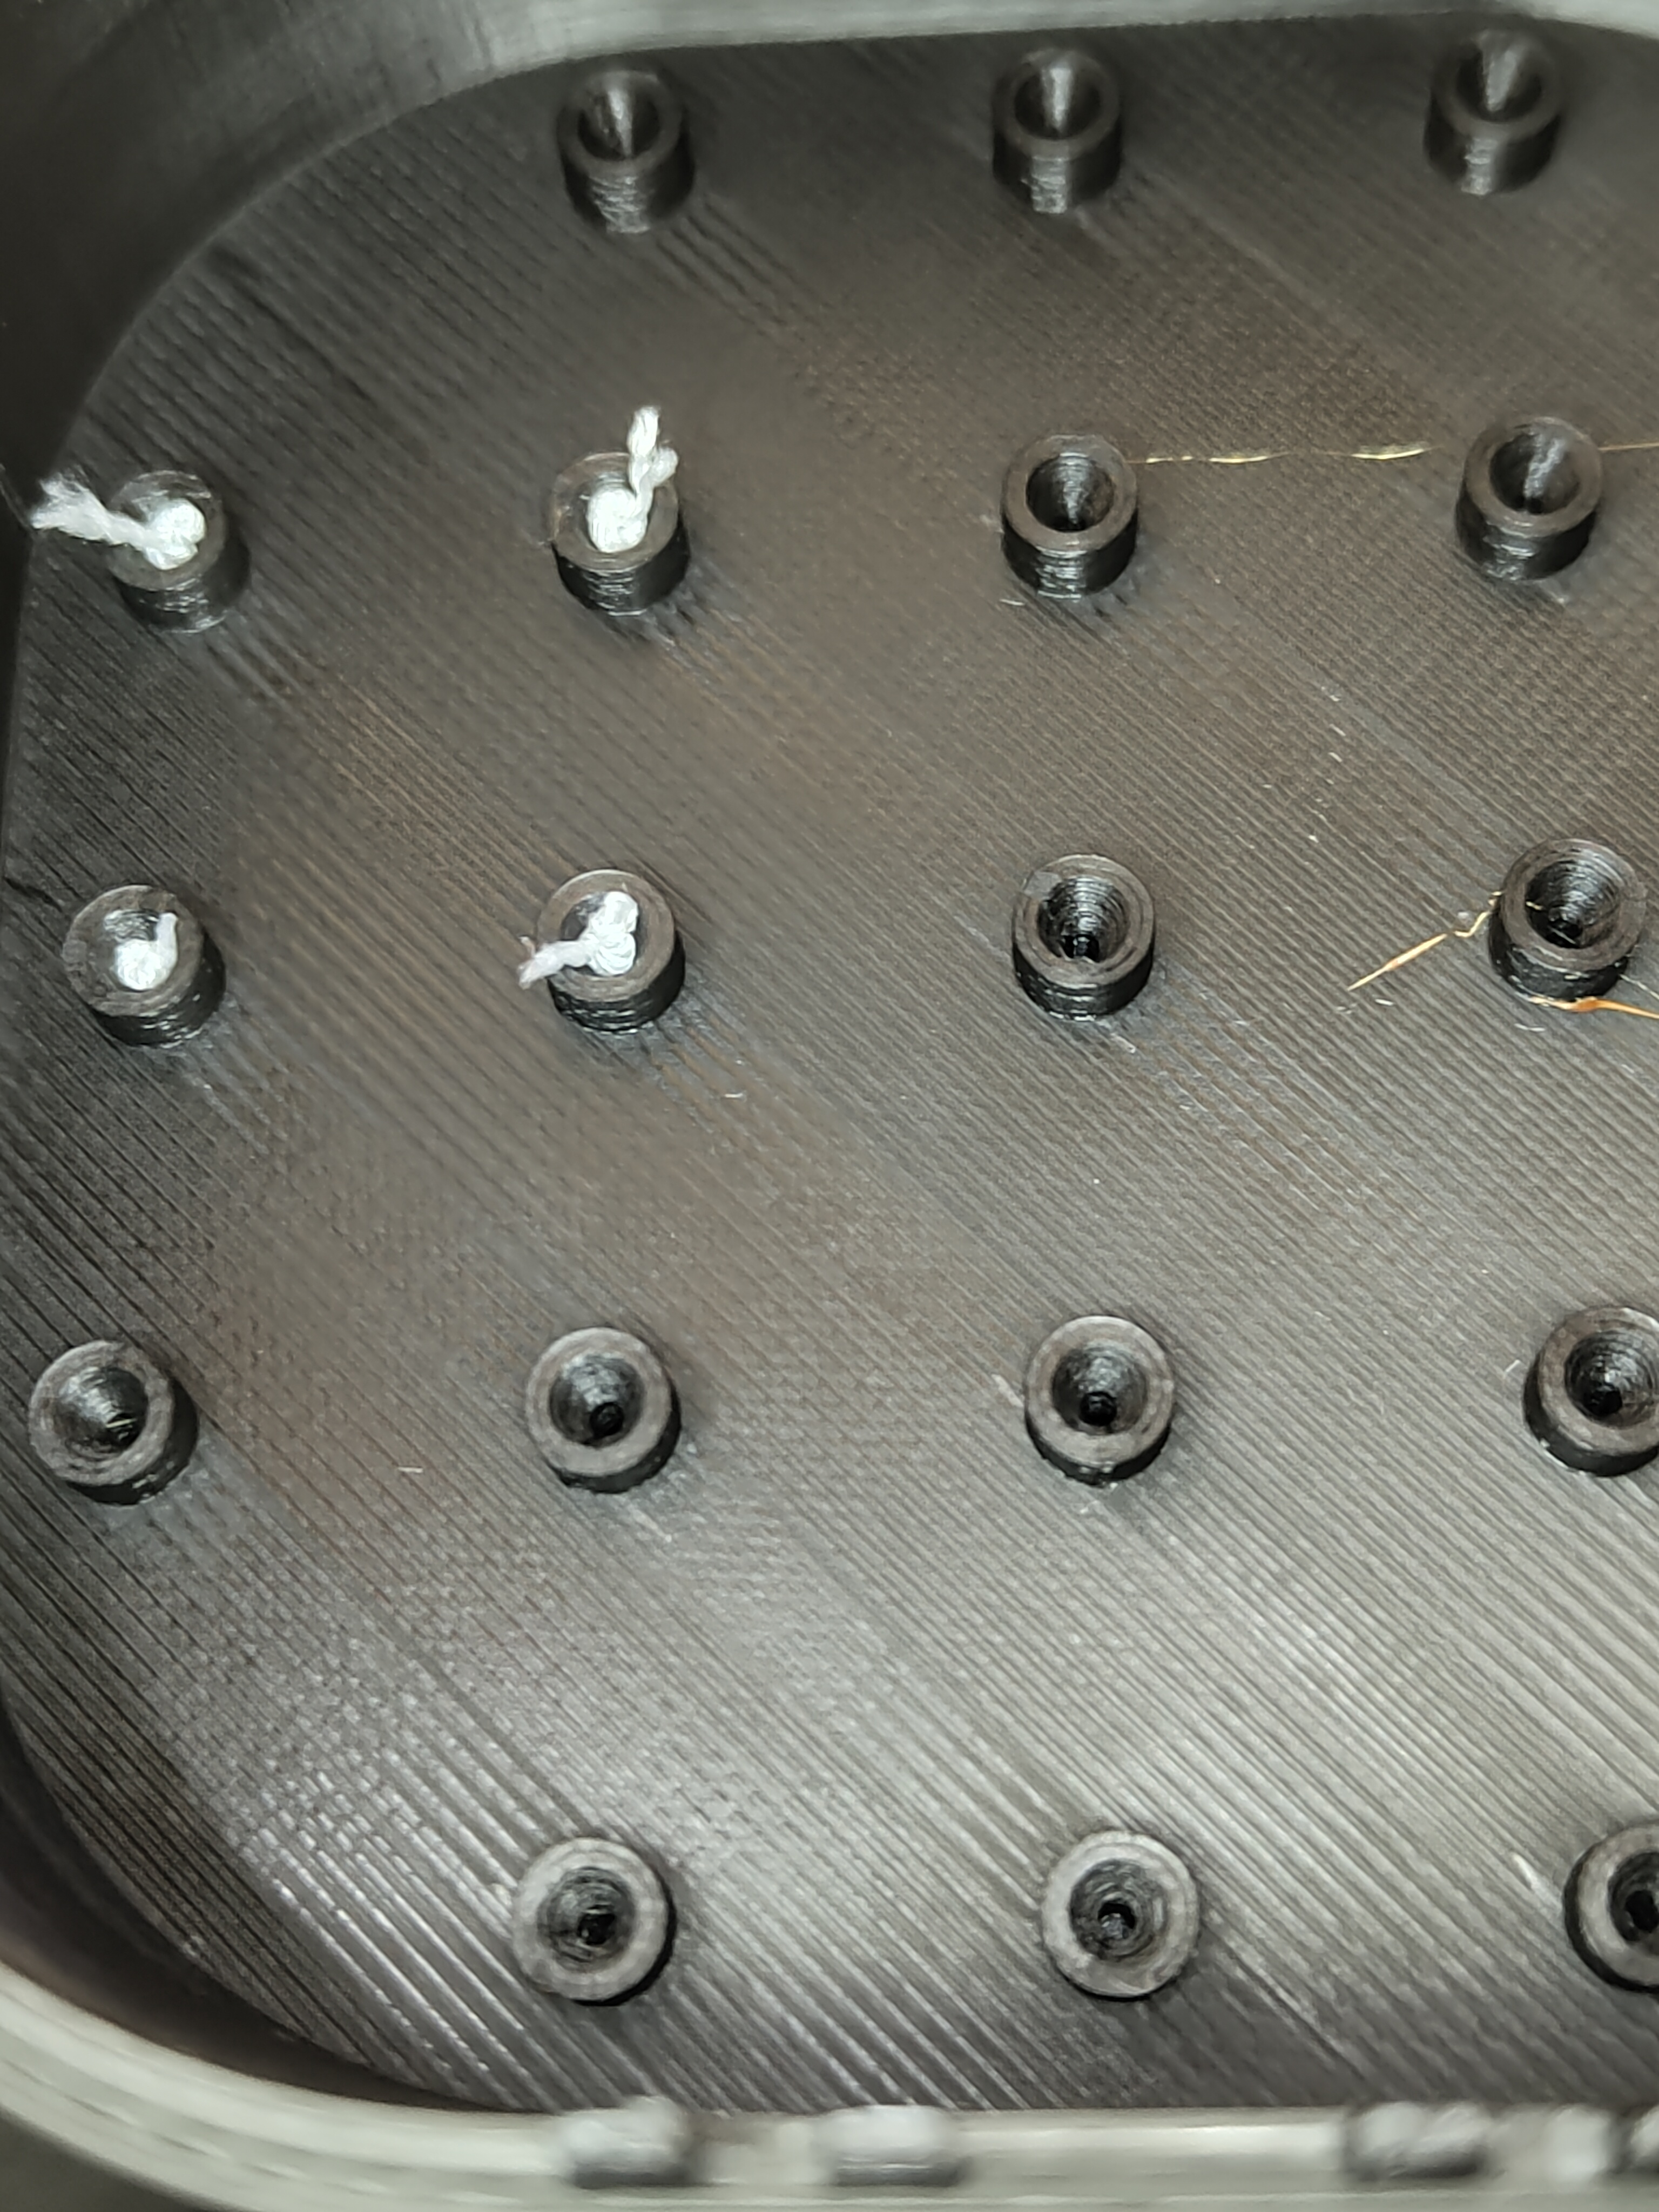
Pull the thread through until the knot locks into the knot pocket on the inside of the part.

5. Secure with Glue
Apply a small drop of superglue or hot glue where the knot sits to secure the tuft permanently. Let it dry fully before handling.
Result
You now have a working set of visual airflow indicators. The tufts respond to moving air inside your PC case — just like on wind tunnel test models or aircraft wings.
Printing instructions
Airflow Visualizer RAM Bar | |
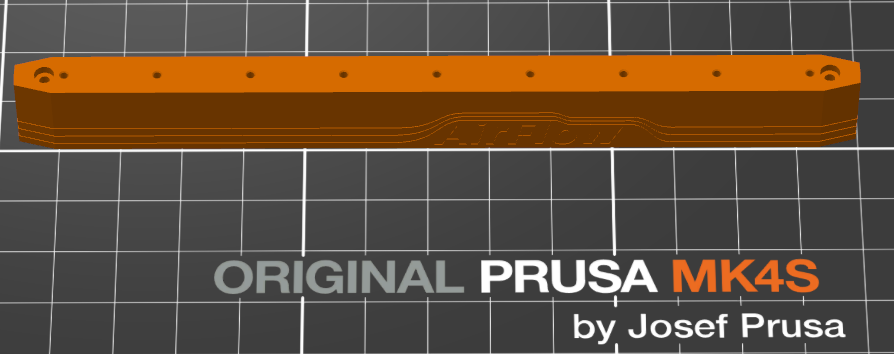 | |
| Material | PLA |
| Nozzle | 0.40mm |
| Layer Height | 0.10mm |
| Infill | 15% |
| Supports | No |
| Brim | No |
| MMU | Yes, but not necessary |
| Print Orientation | Standing Normal |
Airflow Visualizer Pump Cap | |
 | |
| Material | PLA |
| Nozzle | 0.40mm |
| Layer Height | 0.10mm |
| Infill | 15% |
| Supports | No |
| Brim | No |
| MMU | Yes, but not necessary |
| Print Orientation | On the flat Face |
Tuft Length Gauge | |
 | |
| Material | PLA |
| Nozzle | 0.40mm |
| Layer Height | 0.10mm |
| Infill | 15% |
| Supports | No |
| Brim | No |
| MMU | Yes, but not necessary |
| Print Orientation | Standing Normal |