
Voron0 Exhaust System with Activated Carbon and Fan - cool PLA printing!
Obliczymy ostateczną cenę na podstawie wybranego pliku. Sprawdzisz ją i zaakceptujesz przed płatnością.
Zapisane na tym urządzeniu.
A complete Voron0 tophat exhaust system with room for activated carbon filtering and 4010/4015 fan.
- Ocena
- 0 / 5
- Polubienia
- 13
- Pobrania
- 41
- Wydruki
- 0
- Wyświetlenia
- 633
- Oceny
- 0
Aktualizacja u źródła:
Informacje o modelu
- Źródło
- Printables
- Kategoria
- Voron Parts & Upgrades
- Licencja
- Creative Commons — Public Domain
With Voron0 I have observed that sometimes, chamber's temperature becomes too high. This is especially problematic, when running CANBUS and canboard MCU gets close to it's max temperature of 85 C. Opening lid or door is not a solution, because it isn't automated/regulated. The solution I designed is the exhaust system with a fan that can be automatically adjusted according to chamber's temperature.
After initial tests, it has been determined that this modification is also great for successful PLA printing as it can keep your chamber temperature below 40 C for the time of the print. There is no need to keep the door or tophat open during the print.
I've designed this system due to lack of exhaust systems for Voron0. This system is compatible with any version of Voron0 as it replaces one side panel of the tophat. Both - 80mm and 100mm tophat versions are supported.
So far, exhaust system has been tested on following tophats:
- LDO 100mm panels & LDO v0.2 100mm upgrade
- Siboor's 80mm
BOM
- 1x Fan 4010 or 4015 (suggested strong Delta 4015 fan you can get from Digikey 24V 12V)
- 4x BHCS M3x10mm
- 4x magnetic FHCS M3x14mm (countersink M3 screw)
- 8x standard Voron heatinserts M3x5x4
- 4x magnet 6x2mm
- 2x Activated carbon cube or activated carbon pellets (if using pellets, make sure to use the grill)
Printing
You have to print either 80mm plate or 100mm plate, depending on which tophat version you have. Grill is optional if using carbon pellets. No support needed for any part when printing. You may have overhang issues when printing FanMount. If that is the case, I recommend setting larger line width (0.6 or 0.7mm) and reducing layer height to less than 0.16mm (at least for the problematic part). Since the exhaust printed parts do not bear much load, it is enough to print with 2 perimeters and 15% infill. I recommend printing with PETG, ABS, ASA,… but not PLA!
How to assemble
There are no manuals for assembling for now, but STEP file is attached, so you are welcome to check it out and see how exhaust system is built.
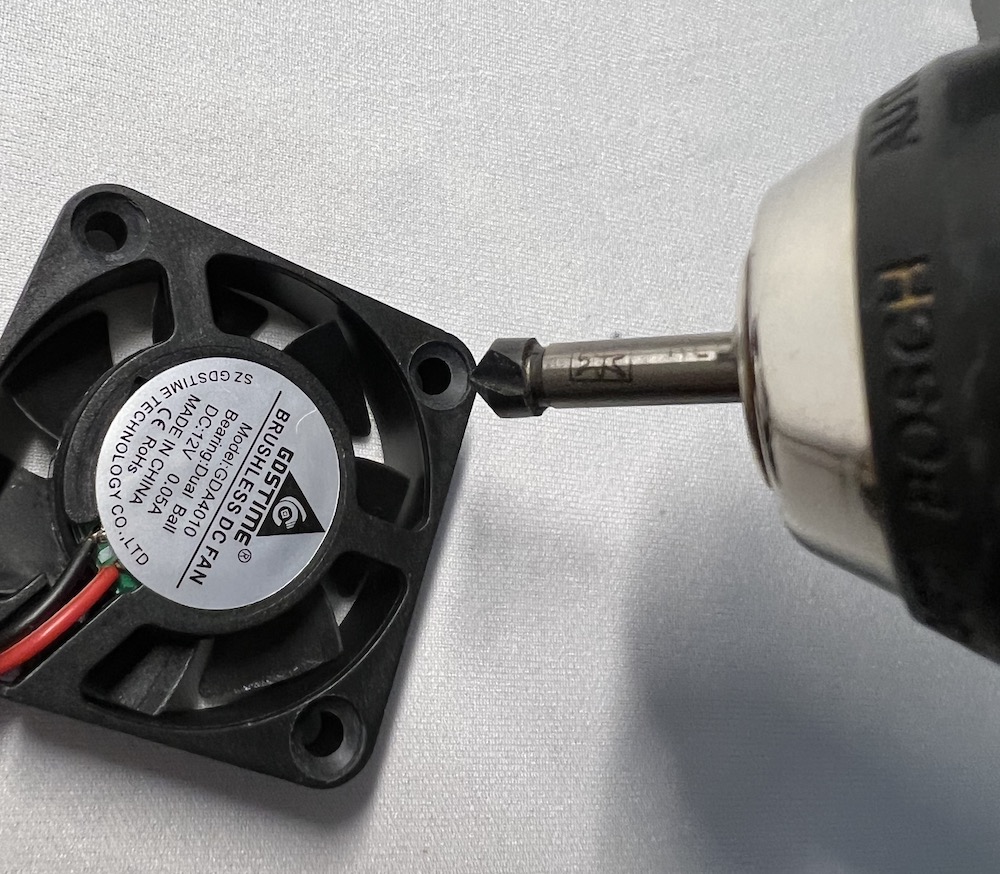
There is only one caveat when assembling; it is expected to have screws sitting flush with the fan. For that case, you will most likely have to use deburring cone (diameter 6.3mm) on fan's mounting holes (check picture) and enlarge entry points so that countersink screws can be screwed in fully. Fan's screws are magnetically attached to four magnets of the cover. Be careful not to deburr too much - you do not want screws to sit too deep, because then magnetic force decreases.
Bottom of the plate that replaces side panel is slightly enlarged - I made this so it is easier to stick 1.5mm thick adhesive foam which is good to use under all four sides of tophat for better sealing.
Exhaust system is not in the central position but rather moved to the left. This is by design so it does not interfere with URBI (any variant), which is another great mod that I recommend you to do.
Future improvements
Current system is not perfect as it requires manual opening/closing of the exhaust with cover. Better solution would be with automatic cover that closes when fan speed is 0. I may work on this improvement (using servo perhaps) in the future if enough people are interested.
Changelog
R2:
- added support for 4015 fans
R1:
- initial release