
Bambu Lab P2S LED Progress/Status Bar (HA & MQTT)
We calculate the final price from your selected file. You review and accept it before payment.
Saved on this device.

Make your own Bambu Status bar with a ESP32 + WS2811 LED strip for your BambuLab Printer using Home Assistant or MQTT
- Rating
- 0 / 5
- Likes
- 51
- Downloads
- 52
- Makes
- 0
- Views
- 1,953
- Reviews
- 0
Updated at source:
Model information
- Source
- Printables
- Category
- Bambu Lab Parts & Upgrades
- License
- Creative Commons — Attribution — Noncommercial
Bambu Lab LED Progress Bar (DIY version using Home Assistant + ESP32 + WLED or MQTT)
There’s a ready-to-use progress bar kit available from BIQU if you prefer something plug-and-play: BIQU Panda Status LED Light Bar Kit H2D-Style
I wanted to build my own version instead, mostly because I already had the parts and enjoy putting things together.
I followed this video and adapted the approach to work on my P2S: https://www.youtube.com/watch?v=SImwERgIi7w
The goal:
Use an ESP32 to control a 5V WS2811 COB RGB LED strip and turn it into a visual printer status and progress bar.
There are now two ways to run this project: the original Home Assistant + WLED version, or the new Standalone MQTT version, which communicates directly with the printer. Both use the same ESP32, LED strip and wiring.
Project Updates – 24/09/26: Home Assistant V2 + Standalone MQTT Version
After receiving feedback and suggestions from the community, I made several corrections and improvements to the project.
The Home Assistant configuration has been updated to V2, with better printer-state handling, improved HMS / print error recovery, cleaner WLED control and a dedicated filament status.
I've also spent quite some time researching Bambu Lab's MQTT communication, and the Standalone MQTT version is finally available !
This version runs custom firmware on the ESP32 and communicates directly with your printer over your local network. No Home Assistant, WLED or additional server required!
It also includes a web interface for easy Wi-Fi and printer setup, automatic printer discovery, customisable LED colours and brightness, and built-in diagnostics.


Both versions now have their own setup guides, along with a separate wiring guide. You can choose whichever setup works for you.
The MQTT firmware is still in beta but stable, so feedback, suggestions and contributions are very welcome!
Parts I used / Shopping List:
ESP32 WROOM - runs WLED / Custom MQTT Firmware
24V → 5V buck converter (3A) - the Bambu PSU is 24V, LEDs + ESP32 need 5V (option 2 adjustable ) . An external USB power supply works too.
WS2811 COB RGB LED strip - Smooth continuous RGB light (I had the 5v 720, and used a 25cm piece / 10 sections/leds)
470Ω resistor - goes inline on the data wire to clean the signal and avoid flicker
1000µF 16V capacitor - stabilizes the 5V line
3M double-sided adhesive tape — used to stick the LED strip along the front edge of the print-bed frame
Wires — to connect everything
Wiring & Installation Guide
Before choosing either version, check out the attached Wiring Guide. Both the Home Assistant and Standalone MQTT versions use the same hardware and wiring, so you only need to build the LED bar once.
The guide includes the parts list, wiring diagram, photos, cable routing and instructions for mounting the LED strip on the printer.
You can also choose how to power it: use an external USB power supply if you don't want to open your printer, or connect it to the printer's internal 24V supply using a buck converter for a cleaner installation.
Once everything is assembled…
Choose Your Setup
Option 1 – Home Assistant Version
Uses Home Assistant + the Bambu Lab integration
ESP32 running WLED
Full printer-state and print-progress automation
Improved HMS / print error handling
See the attached Home Assistant Setup Guide V2
Requirements:
Before starting, you should have:
Home Assistant running (Home assistant page)
Bambu Lab integration installed (more info here)
WLED integration installed ( WLED page | HA Integration )
Soldering Iron
Once those are in place, everything else is mainly wiring, flashing WLED, creating the presets and importing the Home Assistant automation.
For the full installation process, troubleshooting notes and configuration steps, see the attached Bambu Lab LED Status Bar - HomeAssistant V2.
Option 2 - Standalone MQTT Version
The standalone version runs custom firmware directly on the ESP32 and communicates with your Bambu Lab printer over MQTT.
No Home Assistant or WLED required!
Direct communication with your printer over your local network
Easy installation using the web firmware installer
Built-in Wi-Fi setup and automatic printer discovery
Web interface to customise LED colours and brightness
Live printer status, print progress and diagnostics
See the attached Bambu Lab LED Status Bar - MQTT Guide for the full installation instructions
The firmware is still in beta, and I'm continuing to improve it based on testing and community feedback.
Requirements
Bambu Lab printer with LAN Mode enabled
ESP32 connected to your local Wi-Fi network
Printer's LAN Access Code
Printer IP address and serial number (automatically detected when discovery works)
Printer Compatibility
Printer | Home Assistant | Standalone MQTT |
|---|---|---|
P2S | ✅ Tested | ✅ Tested |
X1C | ✅ Community tested | 🟡 Expected to work |
P1S | 🟡 Expected to work | 🟡 Expected to work |
Other Bambu models | ⚪ Not confirmed yet | ⚪ Not confirmed yet |
I originally built and tested both versions on my Bambu Lab P2S. The X1C Home Assistant setup has also been confirmed working by other users.
The P1S may also be compatible, although the physical mounting, cable routing and available printer information can differ between models.
The standalone MQTT firmware is currently tested on the P2S. I'm hoping to expand compatibility with help from the community.
If you try either version on another Bambu printer, please share your results in the comments! I'd love to keep adding confirmed models to this table.
Boost MeEnjoying the project? Give it a Boost! 🚀
A Few Differences from the Home Assistant Version
The LED animations are slightly different from the original Home Assistant + WLED version. I tried to keep them as close as possible, but encountered a few limitations when interpreting the printer's MQTT data and recreating the WLED effects in the custom firmware.
The result is something a little closer to the BIQU-style status bar, but with a few extra features:
Customisable LED colours and brightness through the web interface
Automatic Wi-Fi setup and printer discovery
Built-in diagnostics
Automatic brightness adjustment and idle dimming
Heating, calibration and filament changes are currently grouped into a single animation, rather than having separate effects like the Home Assistant version.
Both versions have their own advantages, so feel free to choose whichever works for your setup.
Presets for printer states (Home Assistant Vesion)
1: P2S-Idle (Plasmoid, Blue & Light Blue) 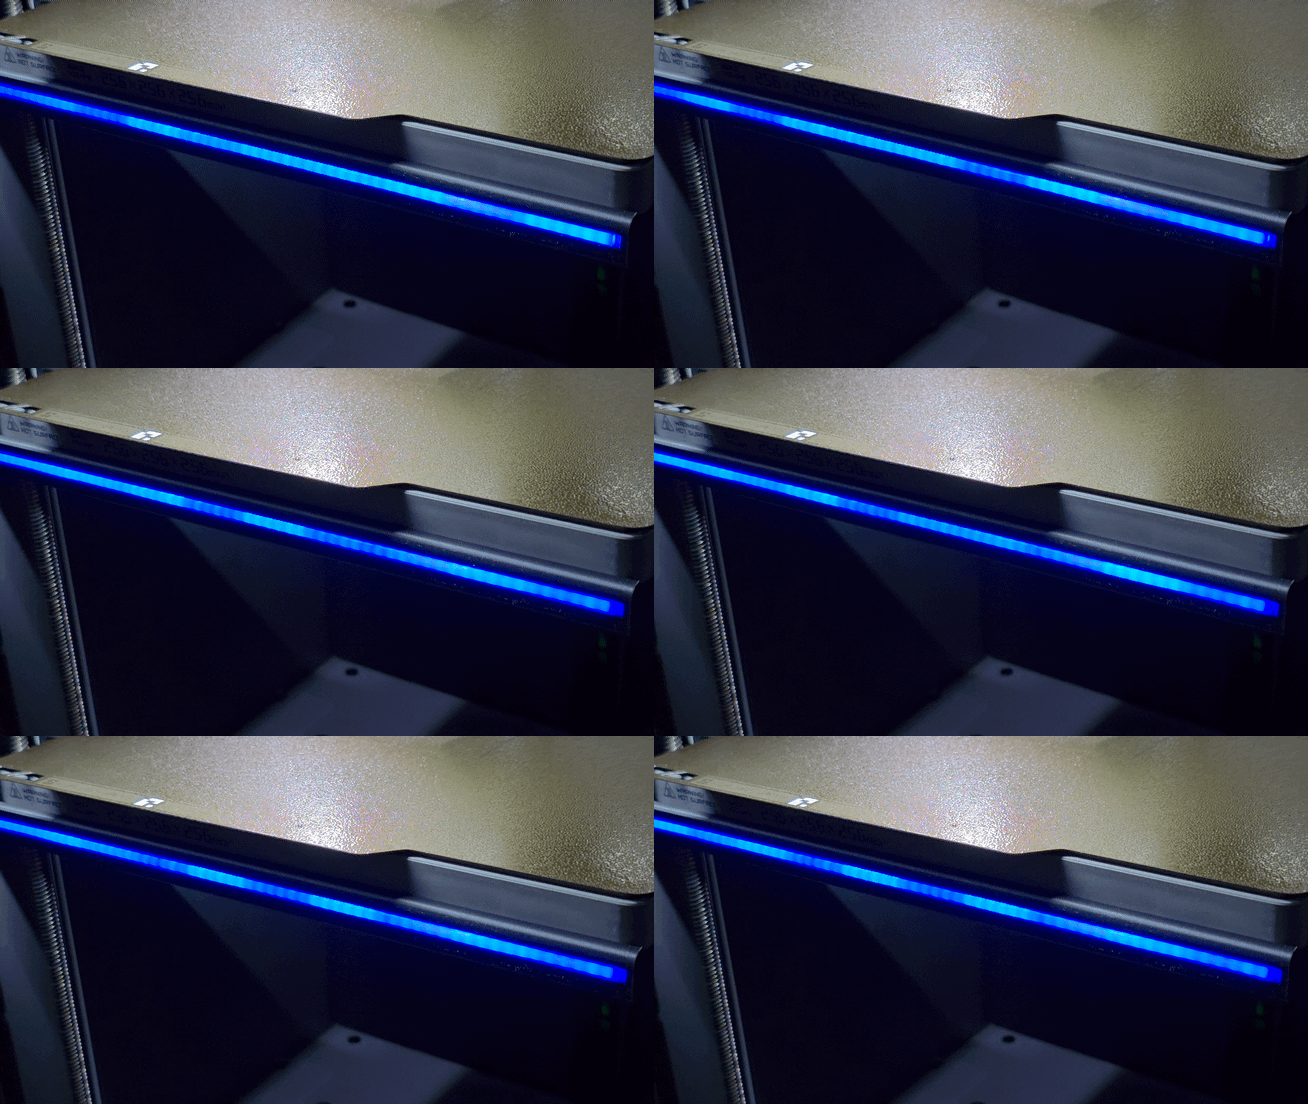 | 2: P2S-Finished (Fade, Green & Black) 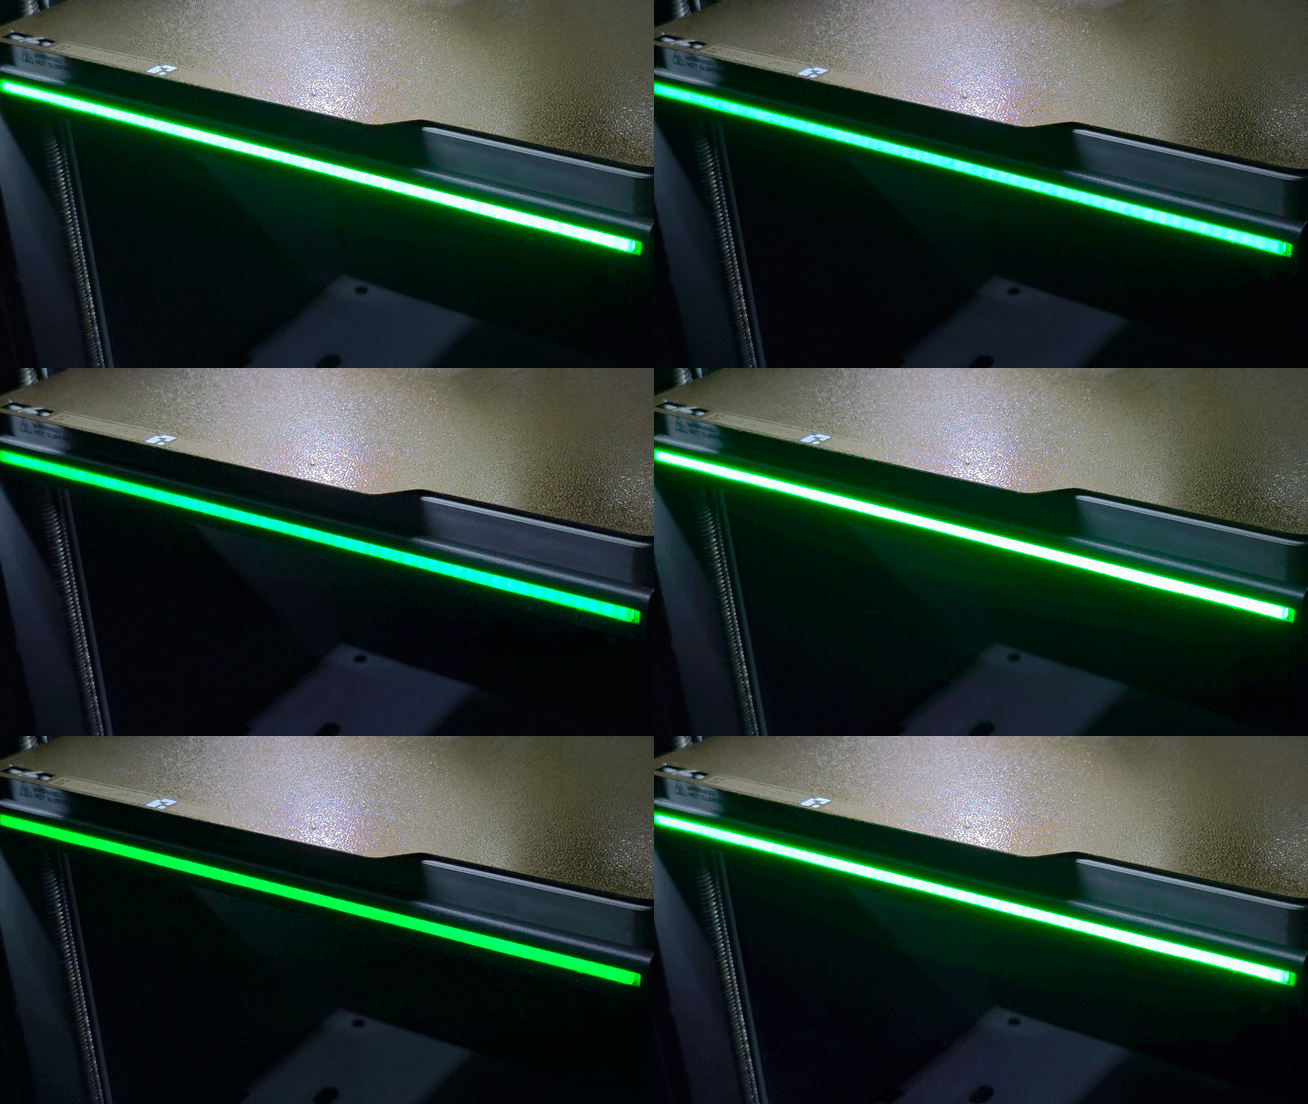 |
3: P2S-Error (Fade, Red & Black) 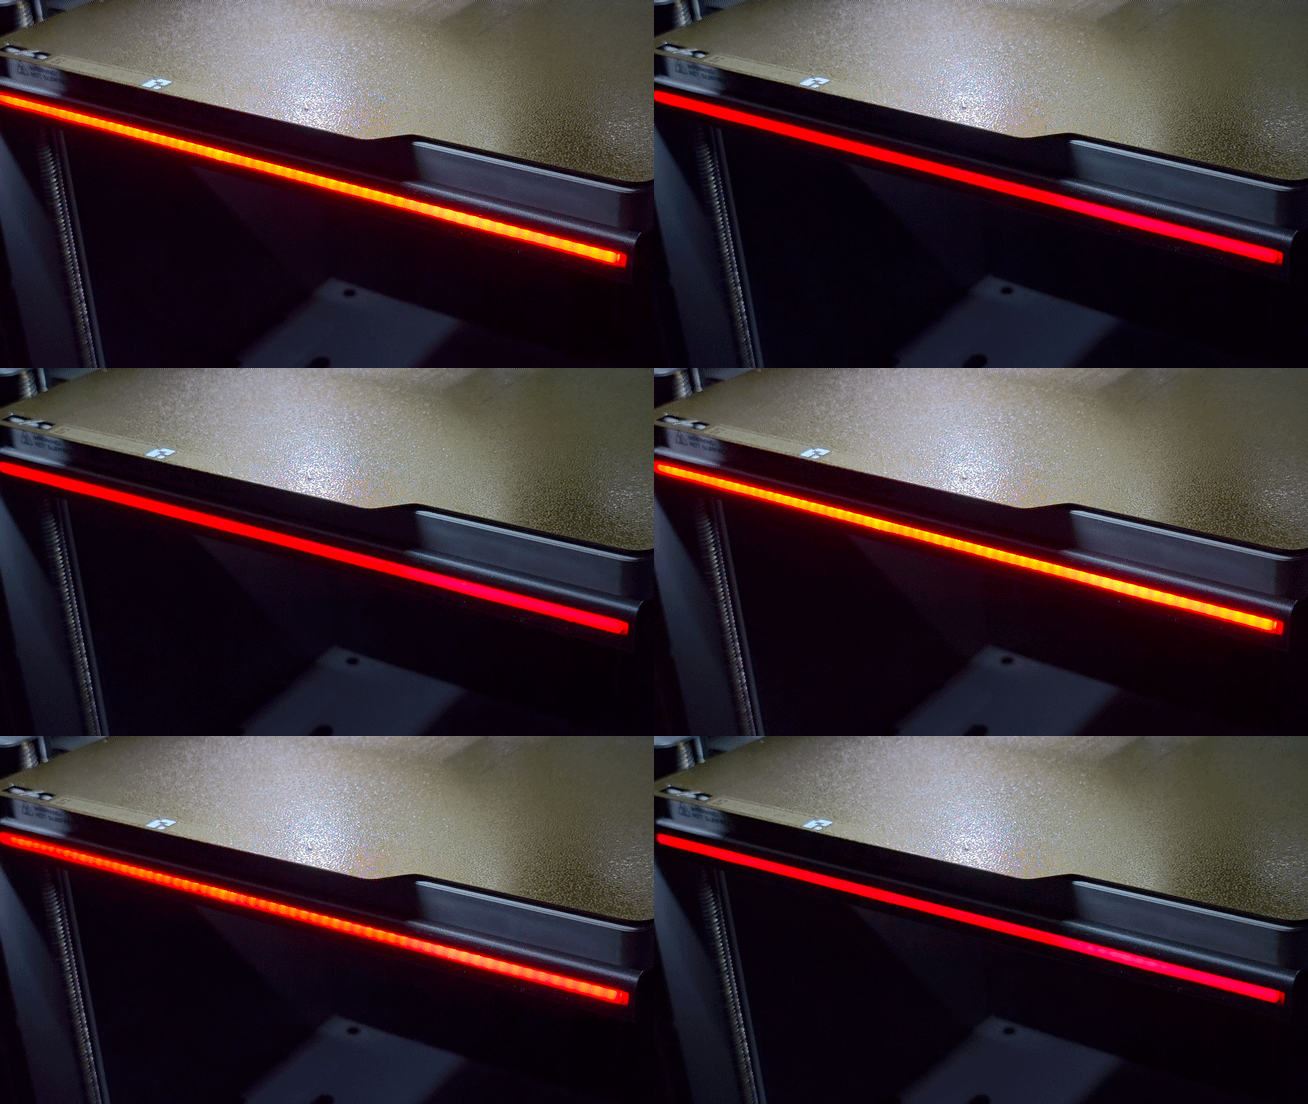
| 4: P2S-Heating (Loading, Red & Orange) 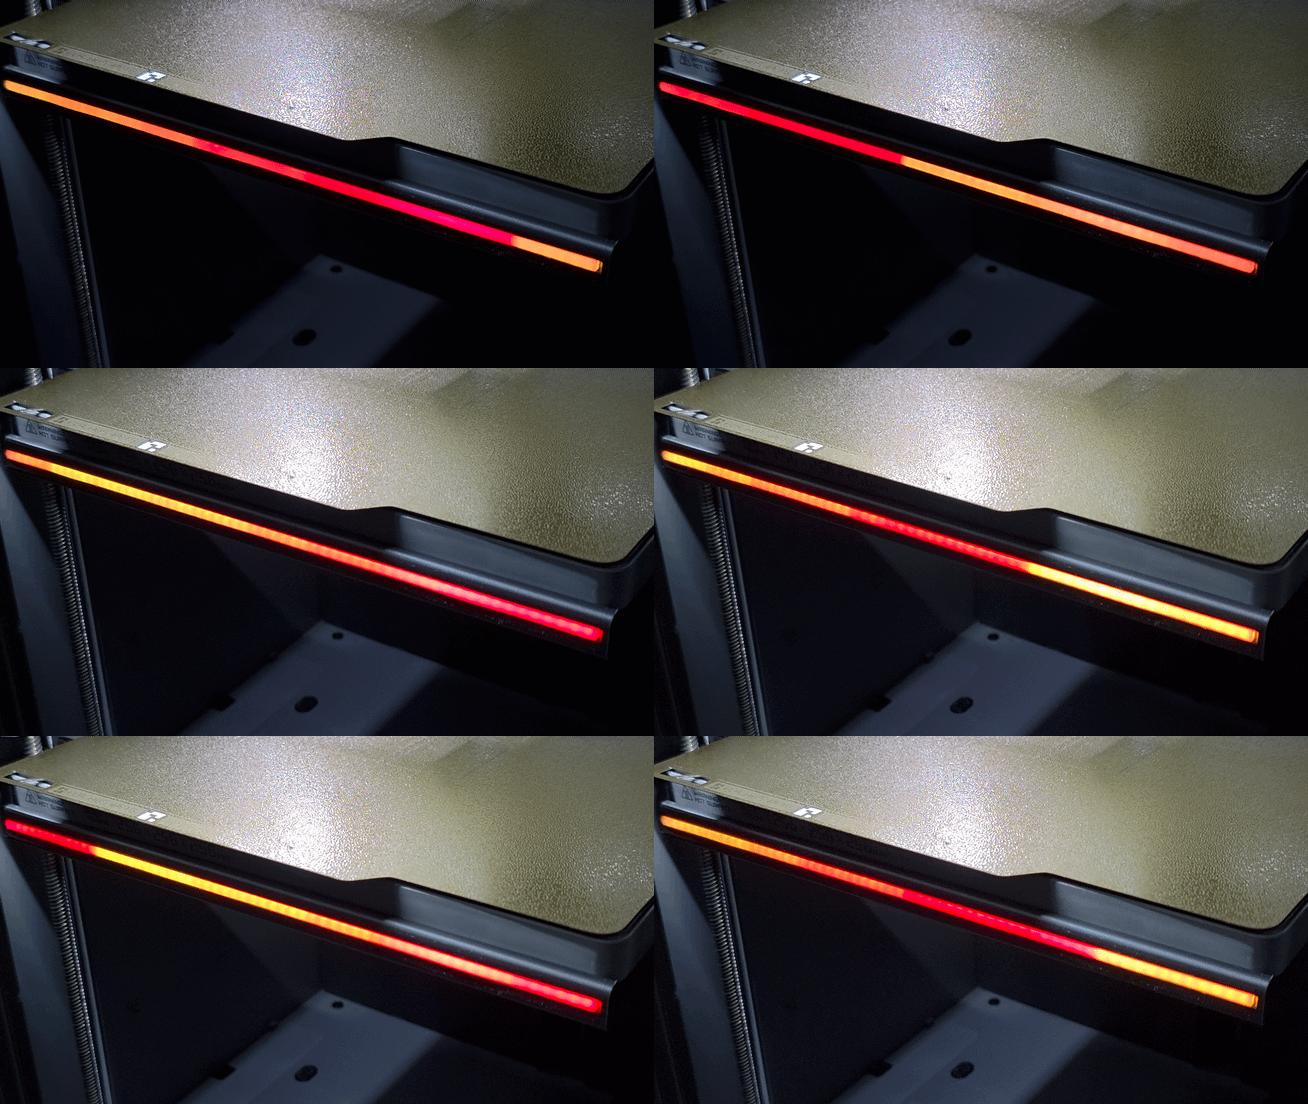 |
5: P2S-Calibrating (Gravfreq, Light blue & Purple) 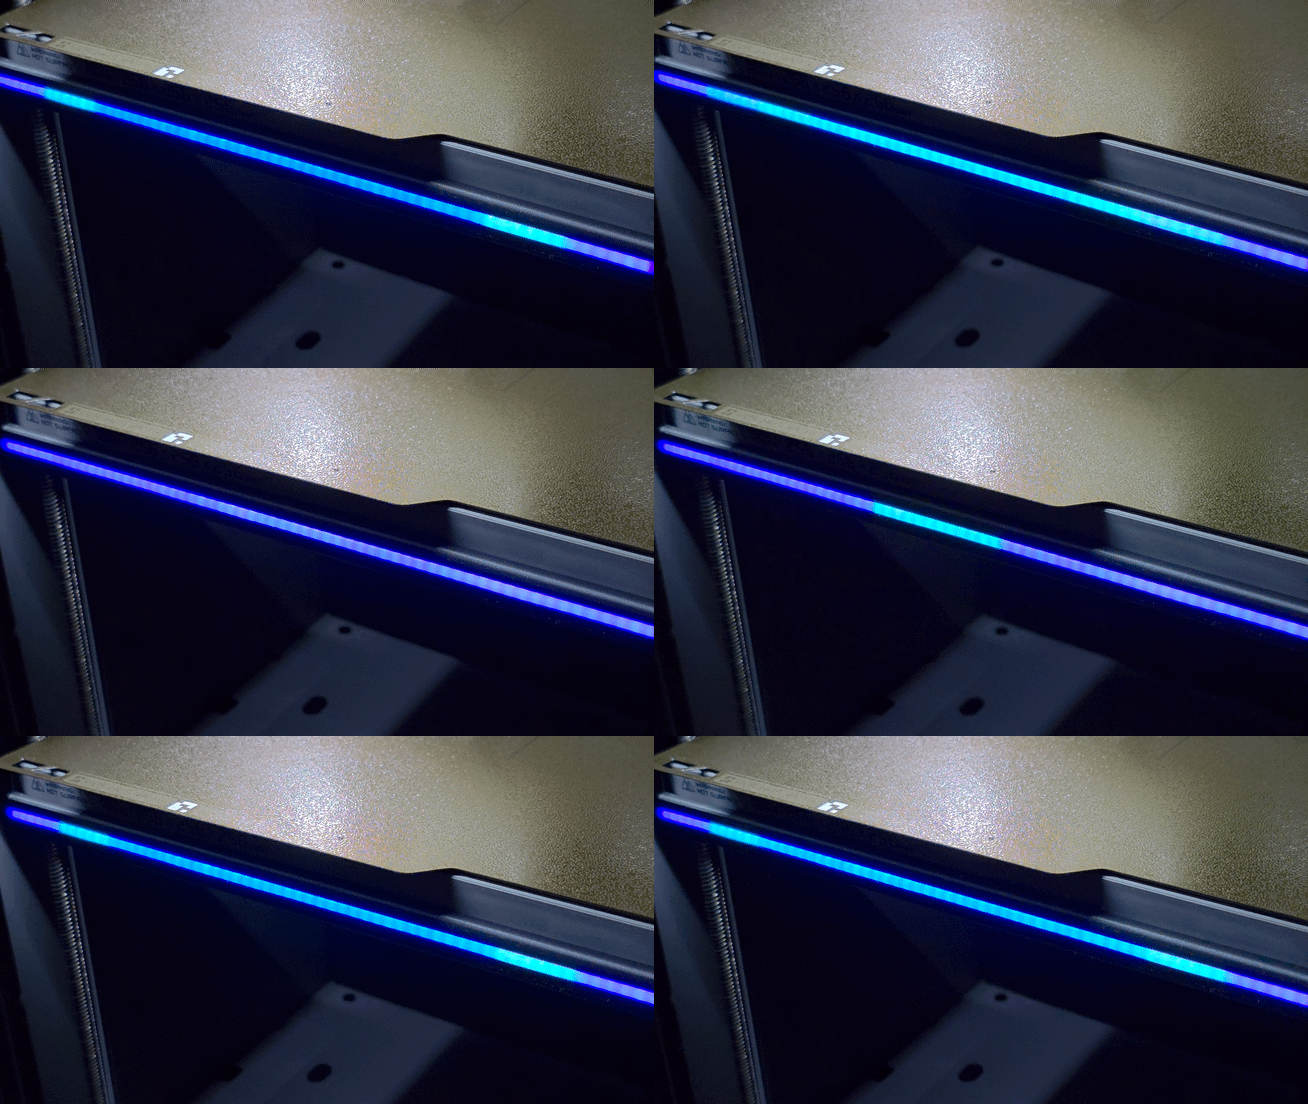
| 6: P2S-Printing (Percent, White) 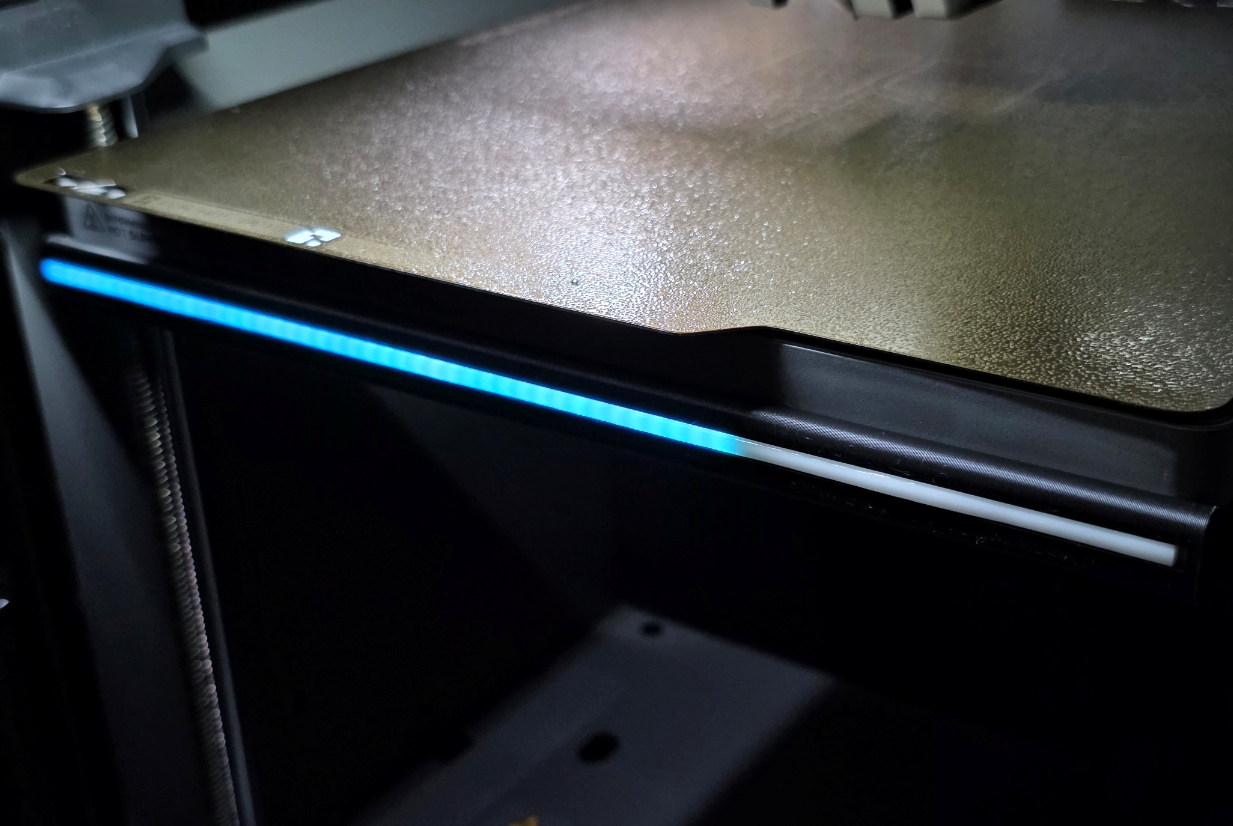 |
7: P2S-Sleep (Plasmoid, Light Blue & black) 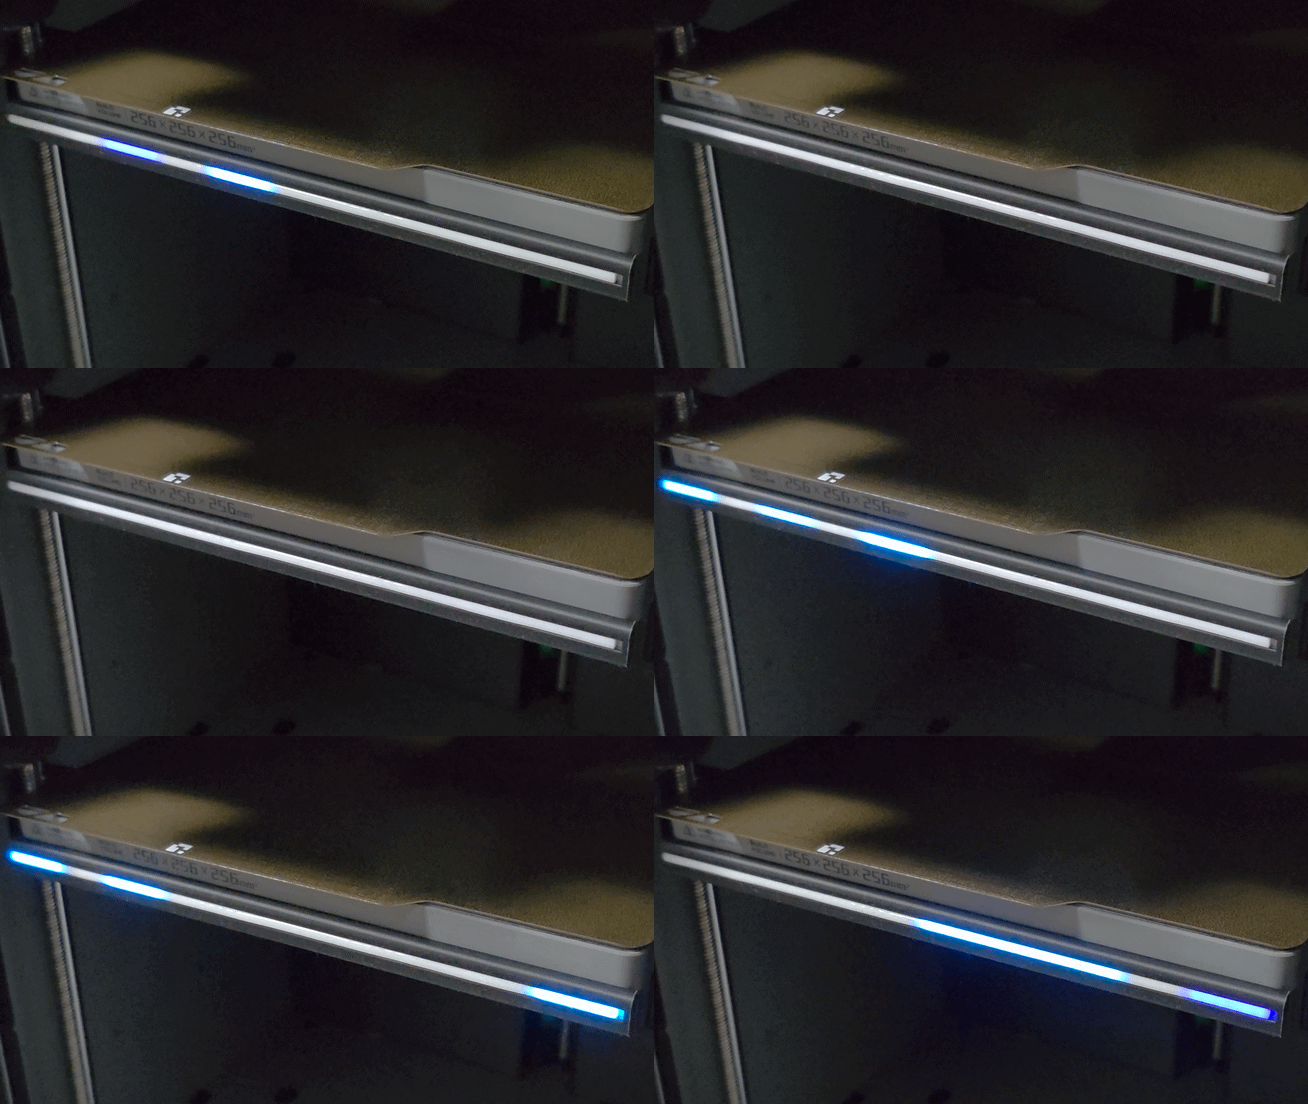 | 8: P2S-Filament (Chase, Green & Blue)  |
That’s it (for now?)
Everything is working on my P2S, but some settings and features may vary depending on your printer and setup. The MQTT firmware is still in beta, so expect a few rough edges while I continue improving it.
I've included three separate guides to make things easier:
Wiring Guide – Parts, power options, wiring and LED mounting.
Home Assistant Setup Guide V2 – WLED configuration, presets, automation and troubleshooting.
Standalone MQTT Setup Guide – Firmware installation, Wi-Fi and printer setup, LED customisation and troubleshooting.
You can also find the latest MQTT firmware and source code on GitHub .
A Little Note About This Project
As I mentioned at the beginning, this project started as a fun way to reuse some parts I already had. The standalone MQTT version eventually turned into a much bigger learning experience than I expected!
I understand how most of the hardware, networking and integrations work, but when it comes to coding I'm not good at all. So I used AI (Claude) to help develop the firmware.
Even with that help, it took quite a bit of time, testing and troubleshooting to get everything working. One of my main goals was to make the project as easy as possible for others to replicate, with a simple web installer, an easy-to-follow setup process and detailed guides, so you don't need any coding experience to build your own.
Please consider the standalone firmware a beta / work in progress. It works on my setup, but there's definitely room for improvement, and I'm still learning along the way.
Want to customise or improve the project?
Feel free to modify the STL / LED mount, I used onshape to create it: Onshape Document URL, experiment with different LED effects and colours, improve the cable routing or adapt the project to another Bambu printer.
If you have suggestions, find a bug or build your own version, share it in the comments! For the MQTT firmware, you can also open an issue or submit a pull request on GitHub.
And if you enjoyed the project, feel free to give it a Boost! 🚀 It helps support future updates and improvements.
Thanks for all the feedback and support so far. Have fun building your own Bambu Lab LED Status Bar!