P
Printablesweberyap

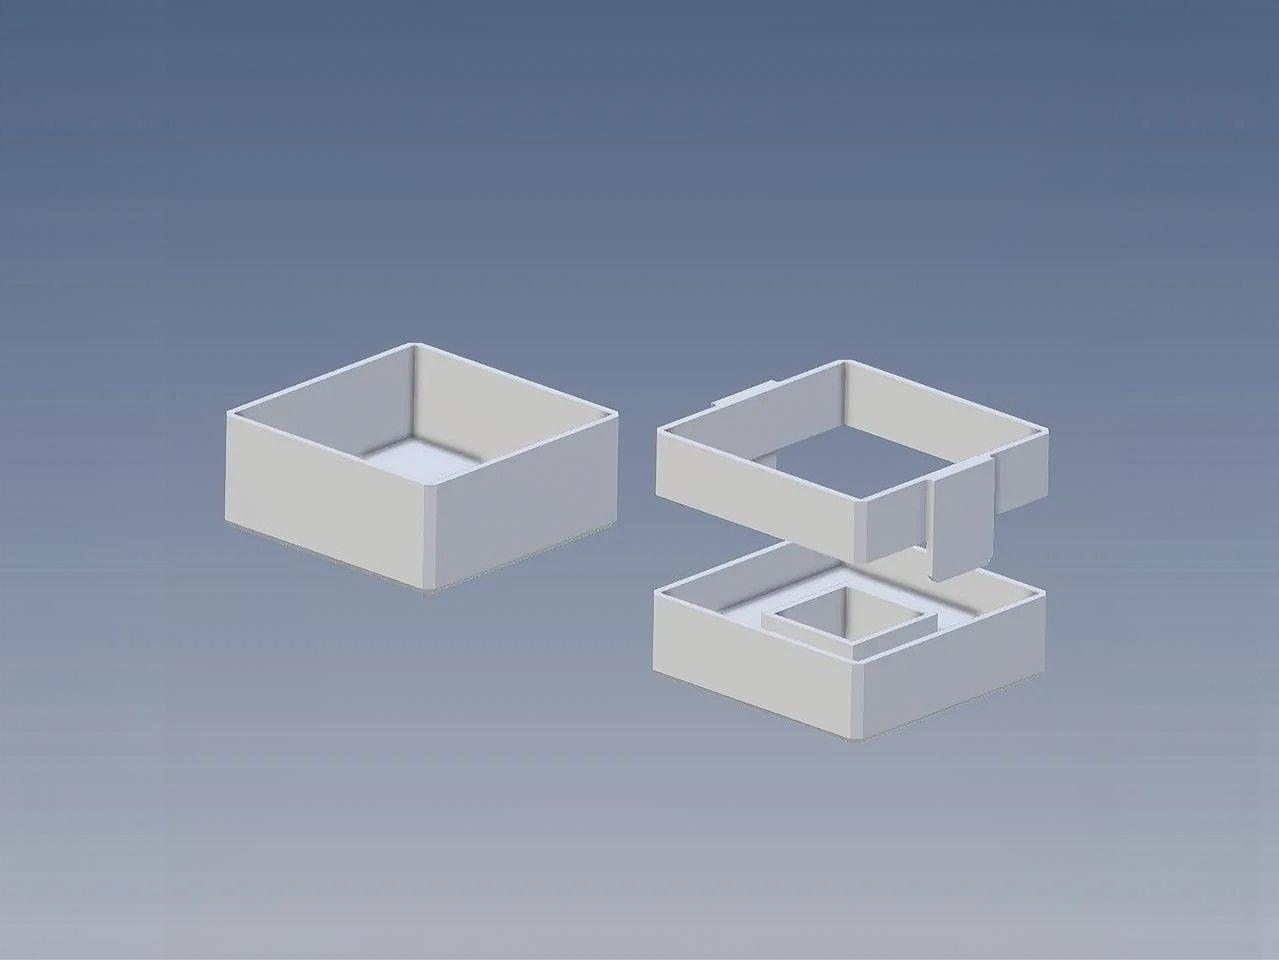
Rebuild Silica Dry Box for Bambu AMS with Xiaomi Mi2
Rebuild from @Thomas_63847 model
- Downloads
- 699
- Likes
- 83
- Rating
- 4.93
Counting matching models…
Rebuild from @Thomas_63847 model
Replacement gear sets and first stage feeder funnel for the Bambu first stage feeder assembly. This includes gears: Worm Gear (on the motor shaft) Helical Gear (meshes with the worm gear) Small Cluster Gear (small gear on the long…
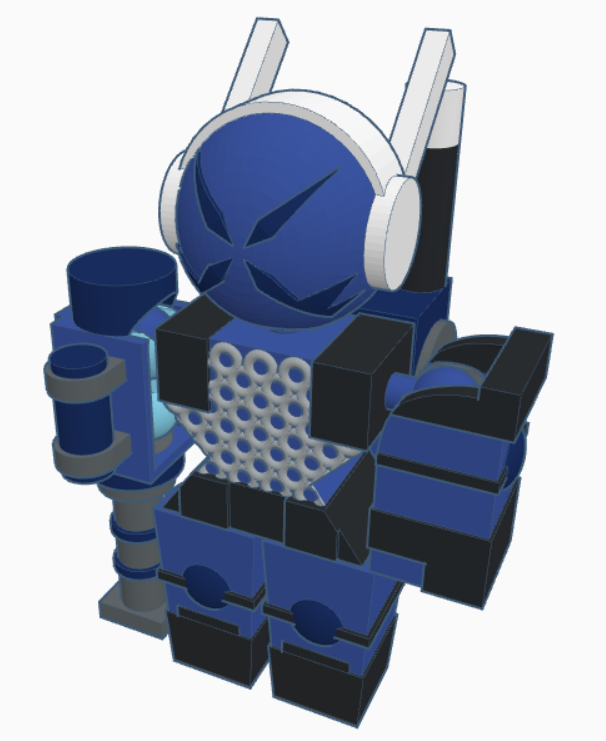
IMPORTANT. Print using PETG and with TREE SUPPORTS so that the figure and the parts dont get shot down in flight by the government. (11/4/25 UPD: Thickened the arms and legs since it wouldn't load correctly in Orca Slicer.) (MEGA-UPDATE…
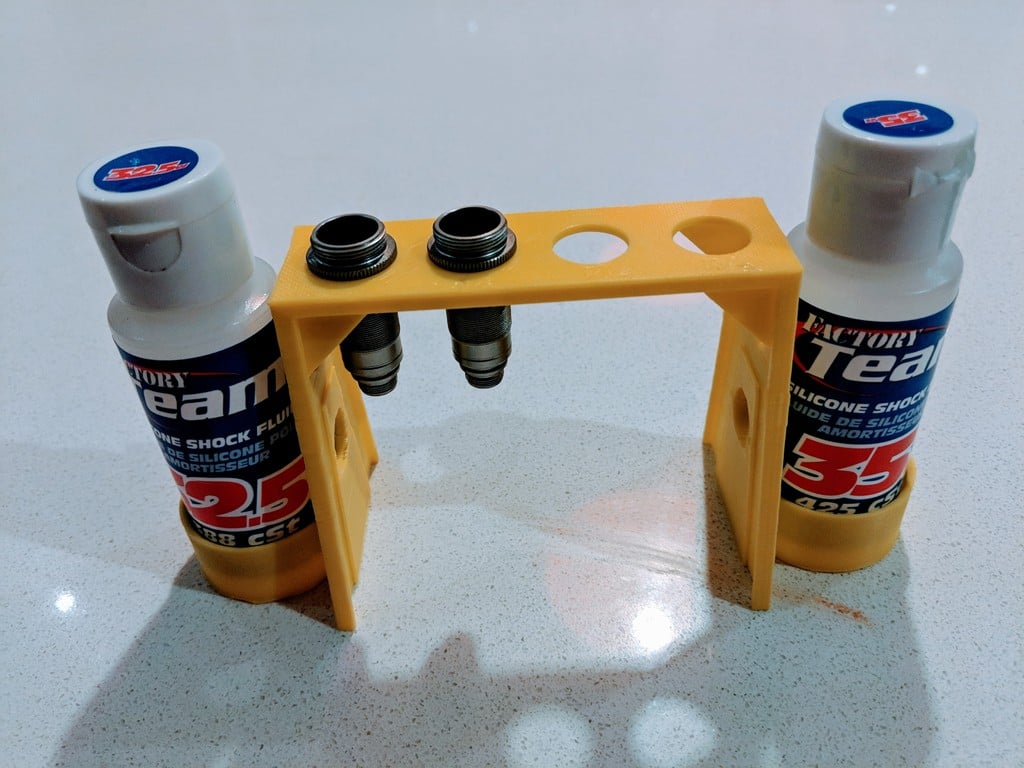
Shock rebuild stand for 1/10 scale vehicles. Designed to hold the shock bodies while the oil settles, and keep things neat during this messy job. Designed for standard 12mm shocks, like Team Associated B6/B6D, B64/B64D, Losi 22 etc. The…
Update 14.05.2023: Added the Door only - Version Updated the SD card slot on the 3mm - Version Update 04.04.2023: Added the One Piece - Version Added the 3mm - Version ----------------------------------- If you need a different version as…
not my design, it is a remake from an old hanger found at my parent's home. useful for drying clothes on a closet door with enough distance to the closet. diameter of the door part is 18,3 mm, should also fit slightly thinner doors (1 mm…
Note. This may work with a stock X5SA Pro. but be aware I have a bunch of modifications to mine. Particularly integrated stepper/leadscrews. Finished rebuilding the Z-axis. Gained 6 more mm in Z height (now 433) Bearings are now Misumi,…
This model is of Seele monolith 01 from the Evangelion Rebuild series, as depicted below. Caution This is a work in progress and may be hard to print around the Seele logo at the top. You will need a small nozzle, 0.2mm ideally. Please…
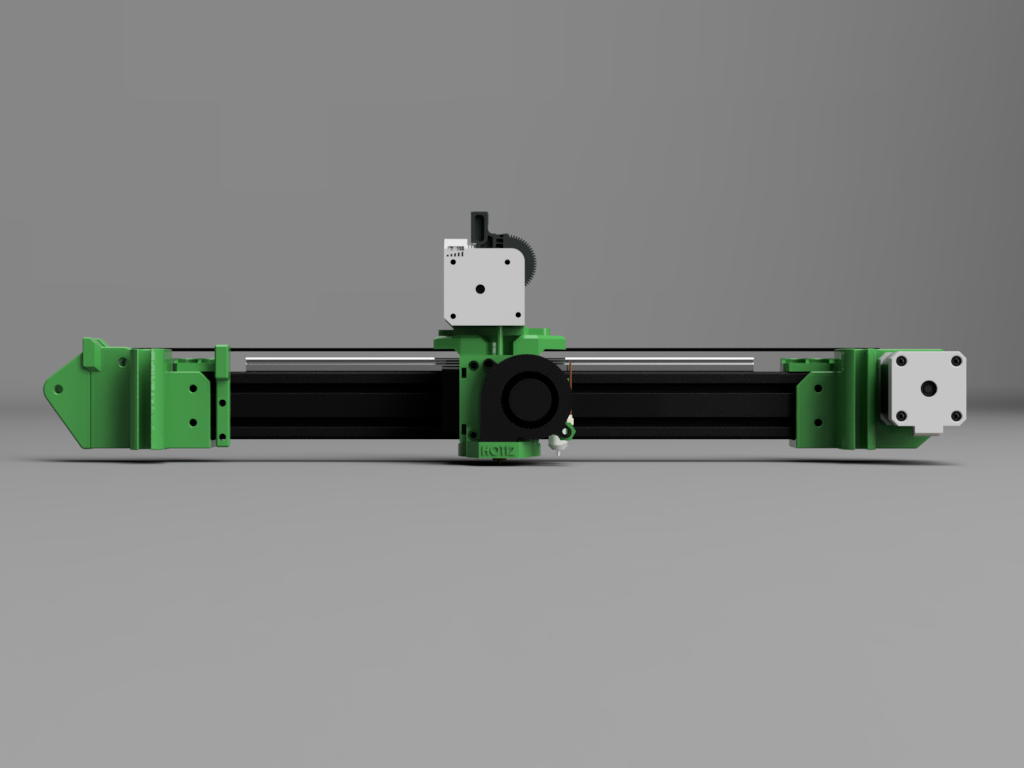
This is my attempt on making the printer head lighter and more precise. It utilizes a BambuLab hotend, or in my case a very good copy, and the BondTech extruder made for the Wanhao D6. Also remote cooling with CPAP-tube. My goal is to…
Due to aging plastics and design, these sign indicators mount tab would snap right around the support structure begins closer to the housing. I've fashioned the new mounting piece that sandwiches the remaining plastic snug and is easily…
I had my Creality CR 10S5 printer in mostly original state for 2 years. I was printing with it, but I have some prusa printers mk3s and after some experiences I could see so many problems with those Creality printer. I decided to do not…
All you need is 4 m3 socket head screws and youre in business. Enjoy!
My goal was to fill the AMS with desiccant, but I didn't find a suitable one, so I just cut the remixed model again.
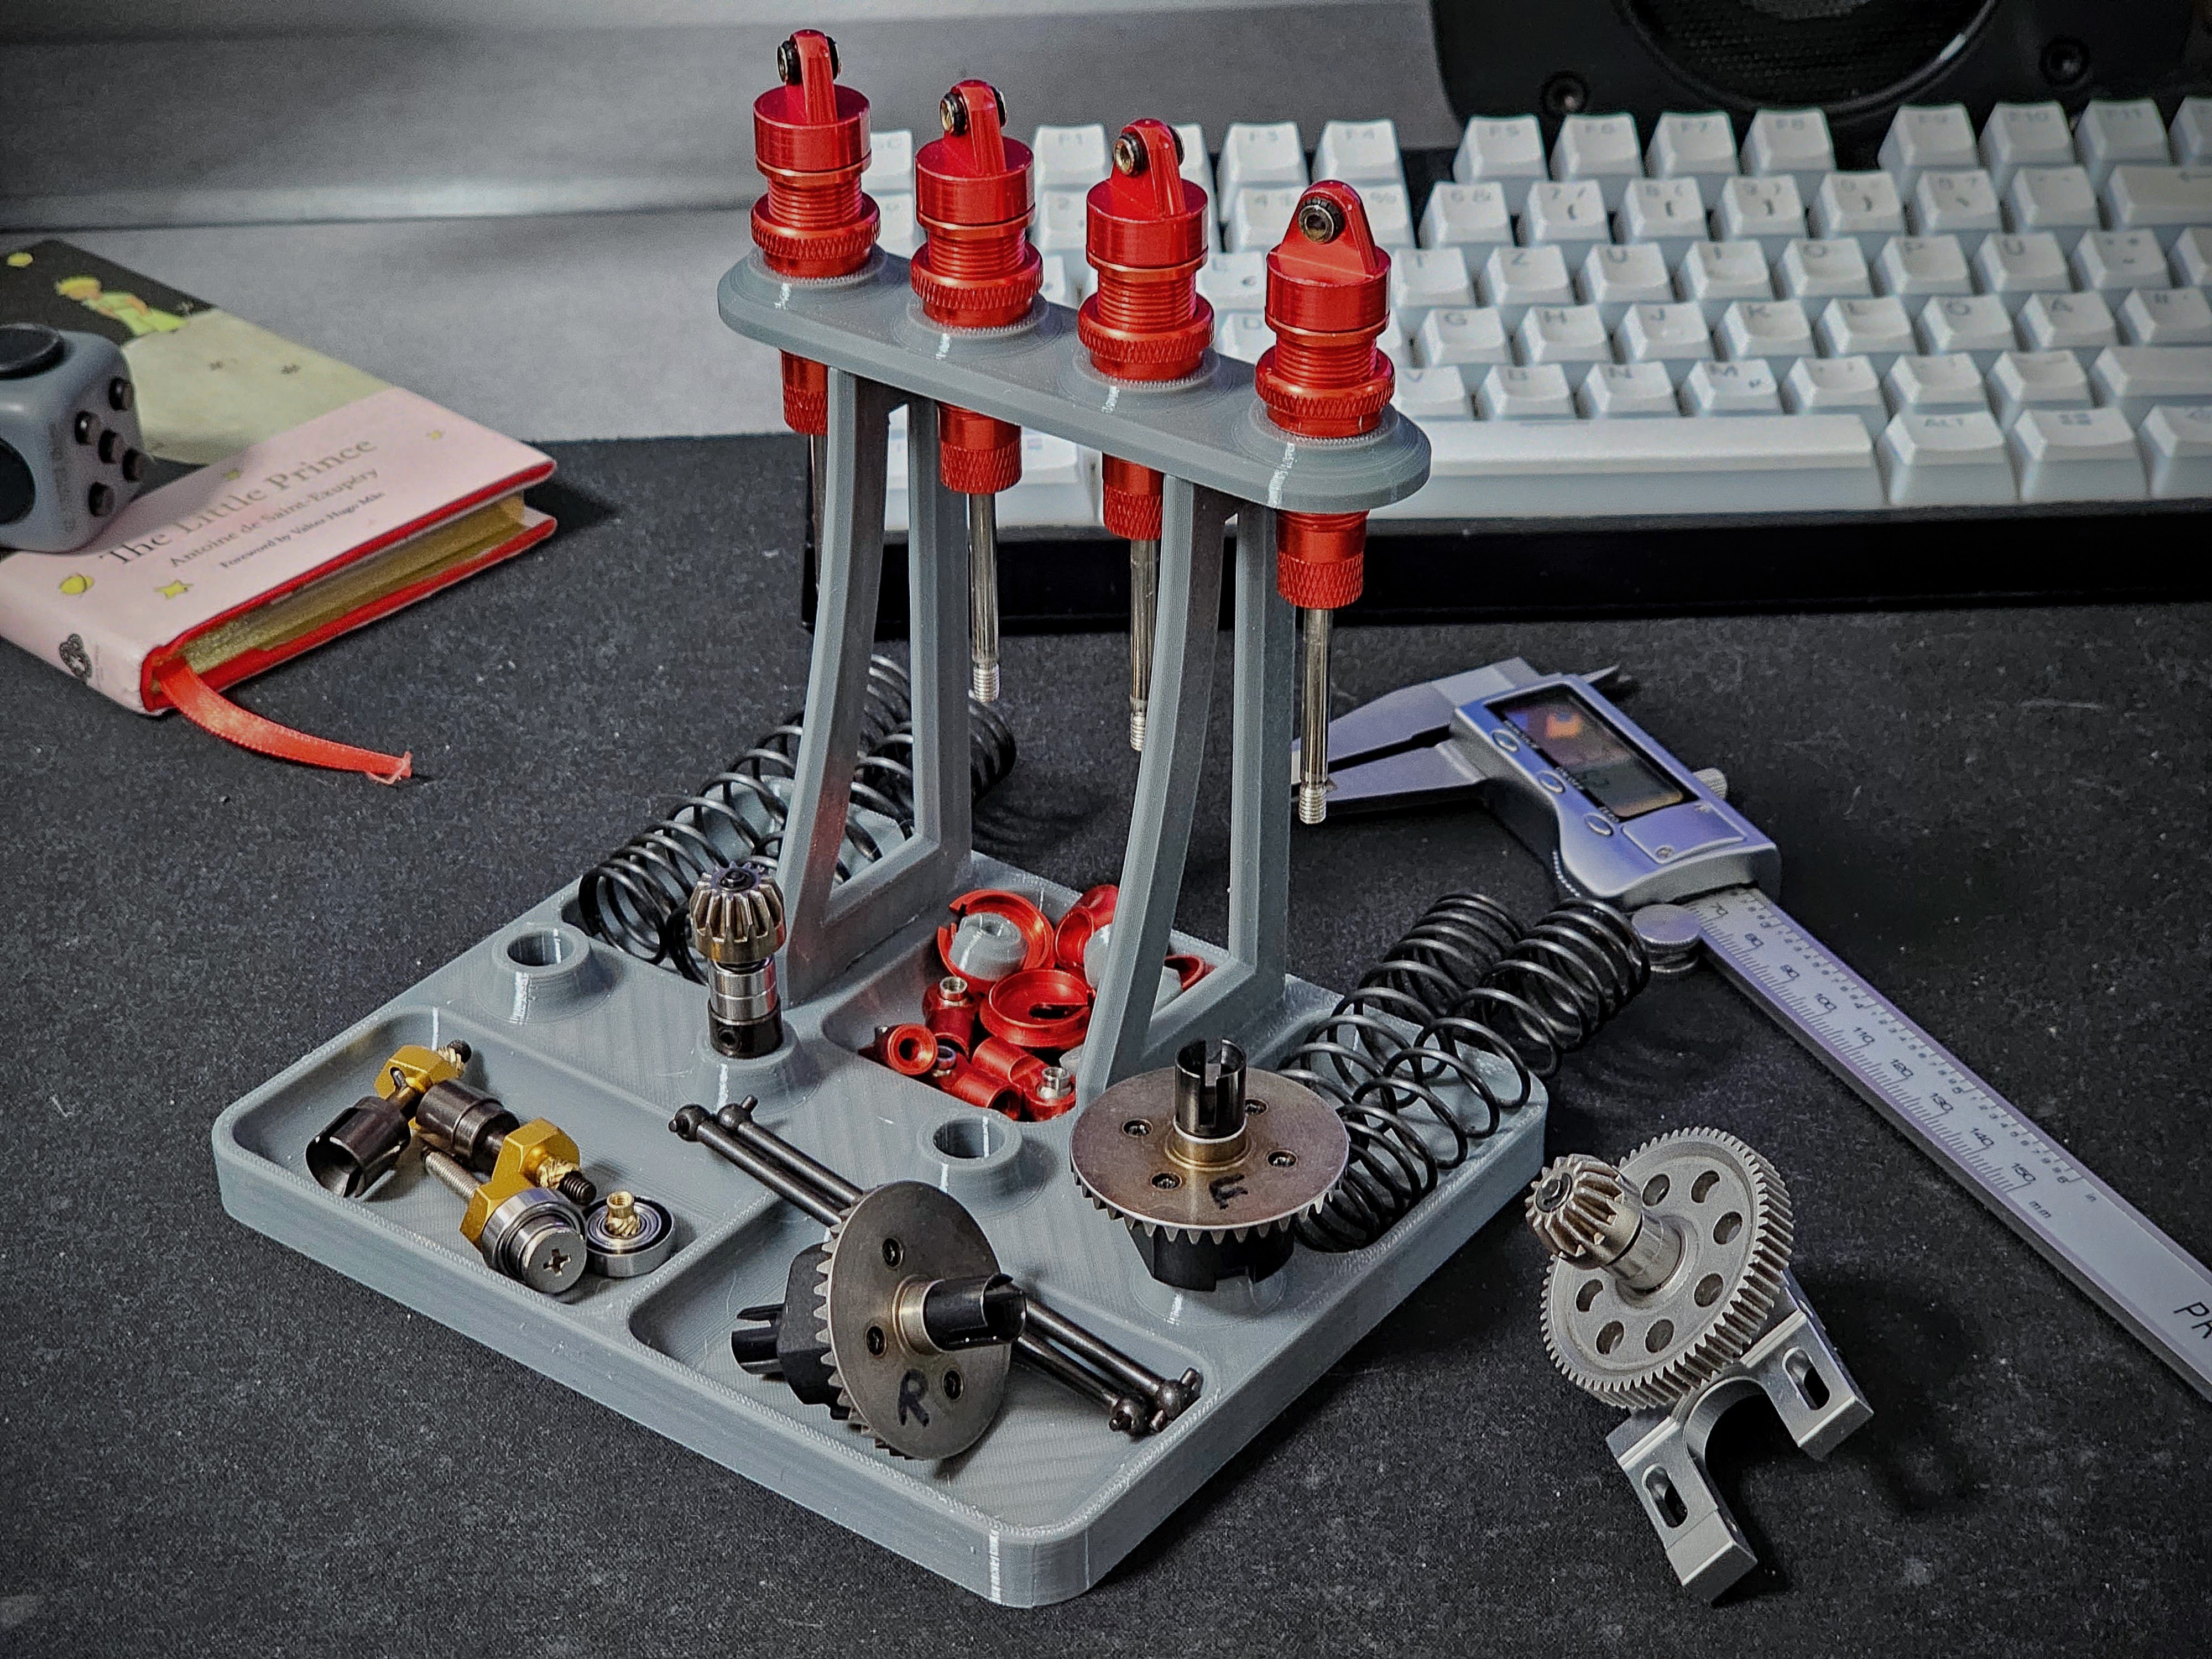
Made a simple rebuild stand for my 1/10 scale rc car differentials and shocks. It is compatible (as is) for shocks with diameter up to 14mm and for diffs with cups up to 10mm. However you can always edit provided STEP files or files…
This is a reworking of the Wanhao i3 Plus (Cocoon Create Touch) Z axis and X axis. This design came about because I had to check the X-axis idler pulley, which is very, very hard to access on an I3 plus!!! Why should you install this?…
After i worked a little bit on my “accurate styled” Logo and saw that many parts of the logo isn't good align, i thought "why recreate it not complete?" so i recreate it from scratch and try to make it perfect as possible.
Each models are made by myself and shown in videos down below. EP1 : EP2 : EP3 : EP4 : EP5 : EP6 : EP7 : EP8 : Notice : These models are for educational purpose. Please take care of your safety first, and do it at your own risk.
Here's my rebuild of the X and Y axis of the Velleman K8200. It features GT2 belts, tangential clamping for the use of Igus linear bearings (Also works for normal ball bearings). It is way more sturdy than the original design and it…
Hi Buddy It’s no shame to race on a budget! If we help each other, we keep the racing community alive. Because i want to start with rc racing and can't effort all of this tools that you need or may want. So i designed my own Droop gauge.…
I broke the stock antenna for my SDR. Just the plain bunny ears that came with the dongle. This antenna actually worked pretty well so it was unfortunate. I might have left it outside in a storm. This new version of the plastic body is…
https://www.thingiverse.com/thing:4441076 presented a gardena tool. No supports needed. Tested print on resin printer. should also work on PLA... Print Settings Rafts: Yes Supports: Yes Resolution: 200 Infill: 20 Filament: Elegoo Resin…
I don't know why Aqara made a modern Zigbee switch in a way where It looks like it was designed 20 years ago. The "white" color looks like it's been sitting in the sun for too long, turning it almost beige. Mushy buttons make creaky…
WARNING. YOU PROBABLY SHOULDN'T DO THIS MOD IF THIS IS YOUR ONLY PRINTER. IF SOMETHING BREAKS OR DOESN'T FIT YOU WON'T HAVE ANOTHER PRINTER TO FIX IT WITH The Anet A8s stock lower frame is about as bendy as 3D printers get and many of the…
Rebuild the model to correct all the mistakes in the original one.
My version of the RAMPS electronics case. To be mounted on the Prusa i3MK2 frame. The whole thing is bolted together with M3 screws. Requires drilling two mounting holes in the frame
hi Rc friends. I designed a custom tray for differential rebuilds and service. Why buy one when you have Fusion 360 and a 3D printer? :D I even added a small drainage opening for easy cleaning and to get rid of that nasty gear oil easily.
In an effort to make the Band easier to print I have gone ahead and subdivided up the parts into more manageable pieces that should print cleaner with less support. Included are two new Cuffs a solid half that can be printed in hard…
I had problem with led fitment in the original design, so I mad my own box. PS: For dual color printers Add both files marked #1 & #2 at the same time to have the two layers set perfectly (I've added a configured Bambu Studio 3mf files if…
Base of the work from 'Ultimate TEVO TARANTULA upgrade' from kwijatkowski ( https://www.thingiverse.com/thing:2761136 ) but with a few alterations Category: 3D Printing
The original enclosure for filament runout sensor is "basic", too basic, the filament doesn't enter very well many times and when you use reverse bowden configuration the filament crash inside when goes backwards (when you use filament…
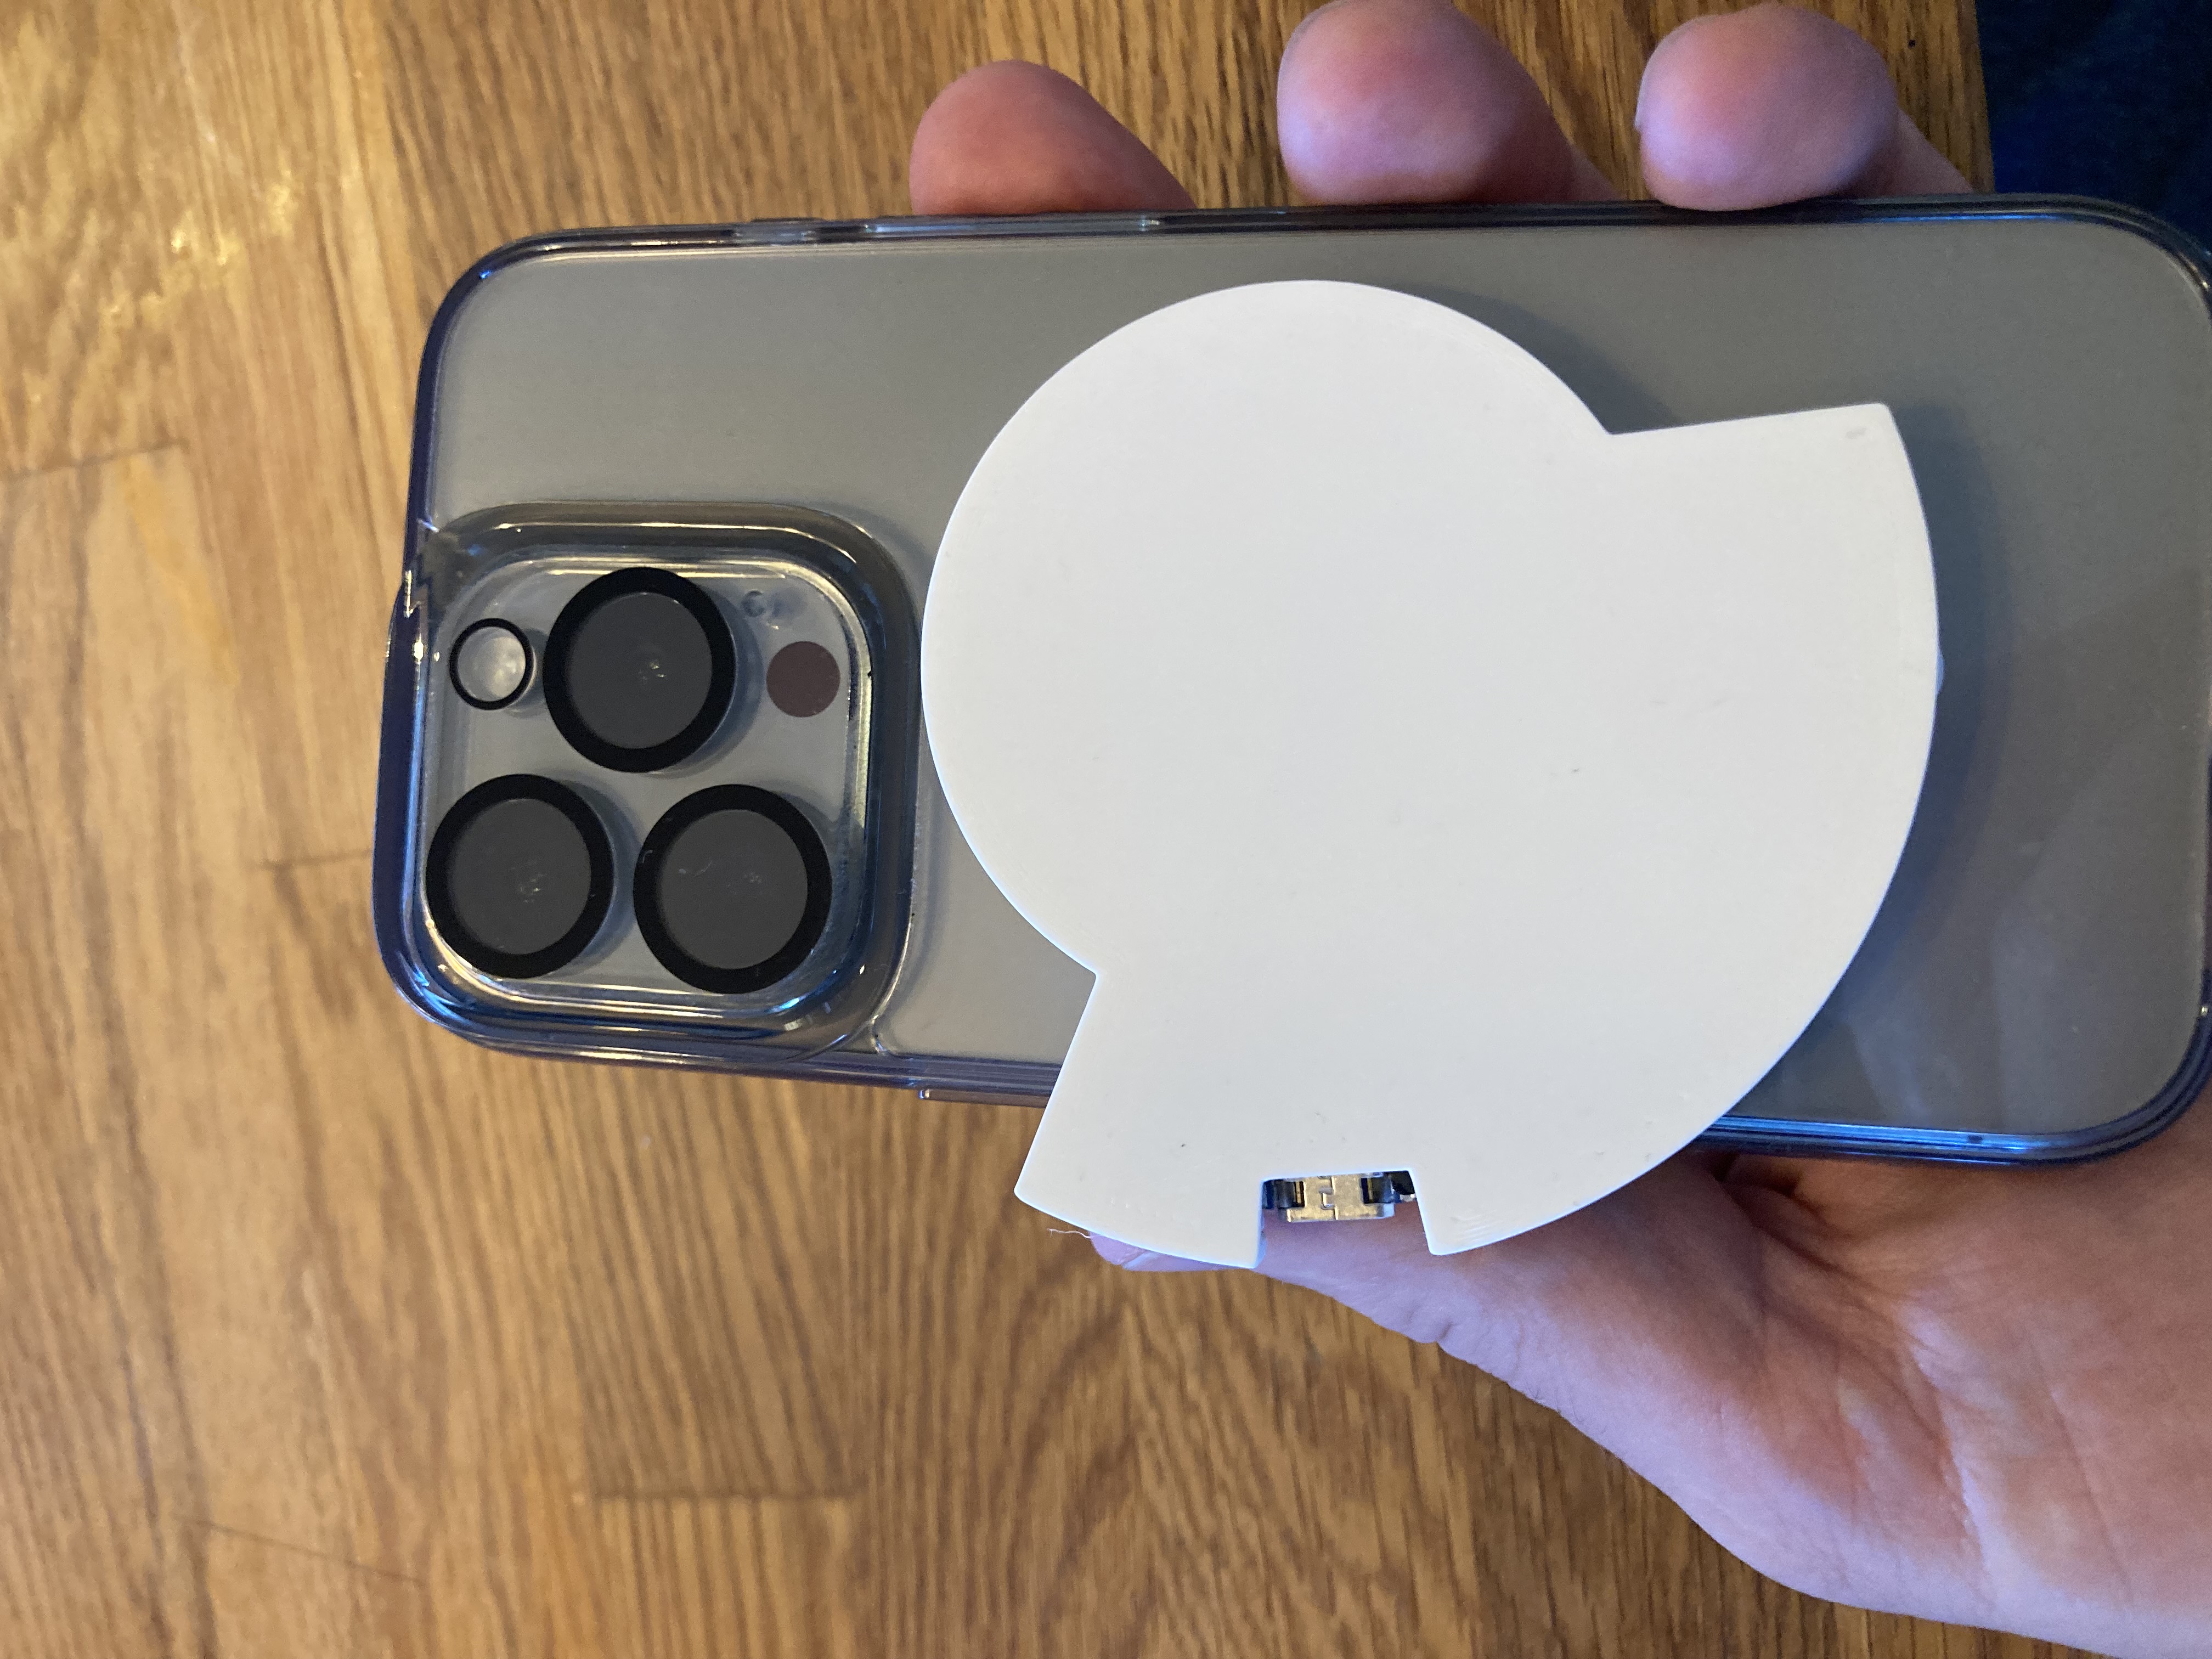
I had a problem with the iPhone 15 and its huge camera bump that my lilvboj induction chargers did not lay flush to the back side of the phone. I saw a hack on reddit where someone just opened it and put the chip and coil into a smaller…
I really liked this stand and printed a few for myself and my friends. One of them requested I put shock holes in the body to hold during rebuilds, so that's what I did.
A simple stand to hold shocks while rebuilding them. designed for use with 1:10 RC crawlers Multiple holes allow for various holdering orinations. Bottom basin can be used to hold removed parts or catch overflown oil. Print Instructions:…
My 45 years old inlet needed a replacement. Here it is. Print Settings Printer Brand: Prusa Printer: i3 MK3 Rafts: No Supports: No Resolution: 0.2mm (quality). Prusa Slicer. Infill: 25% or more Filament: No matter PLA (your choice) Your…
I was rebuilding my buggy and wanted a stand where I could leave the diff case for the oil to settle and to be able to work more easily with both hands. In the only picture I took you can't see it fit in the hole but it actually fits. The…
Just a simple rabbit ear antenna mount for RTL_SDR antenna's but will probably work with others. The original model just didn't fit my needs so I remixed it!
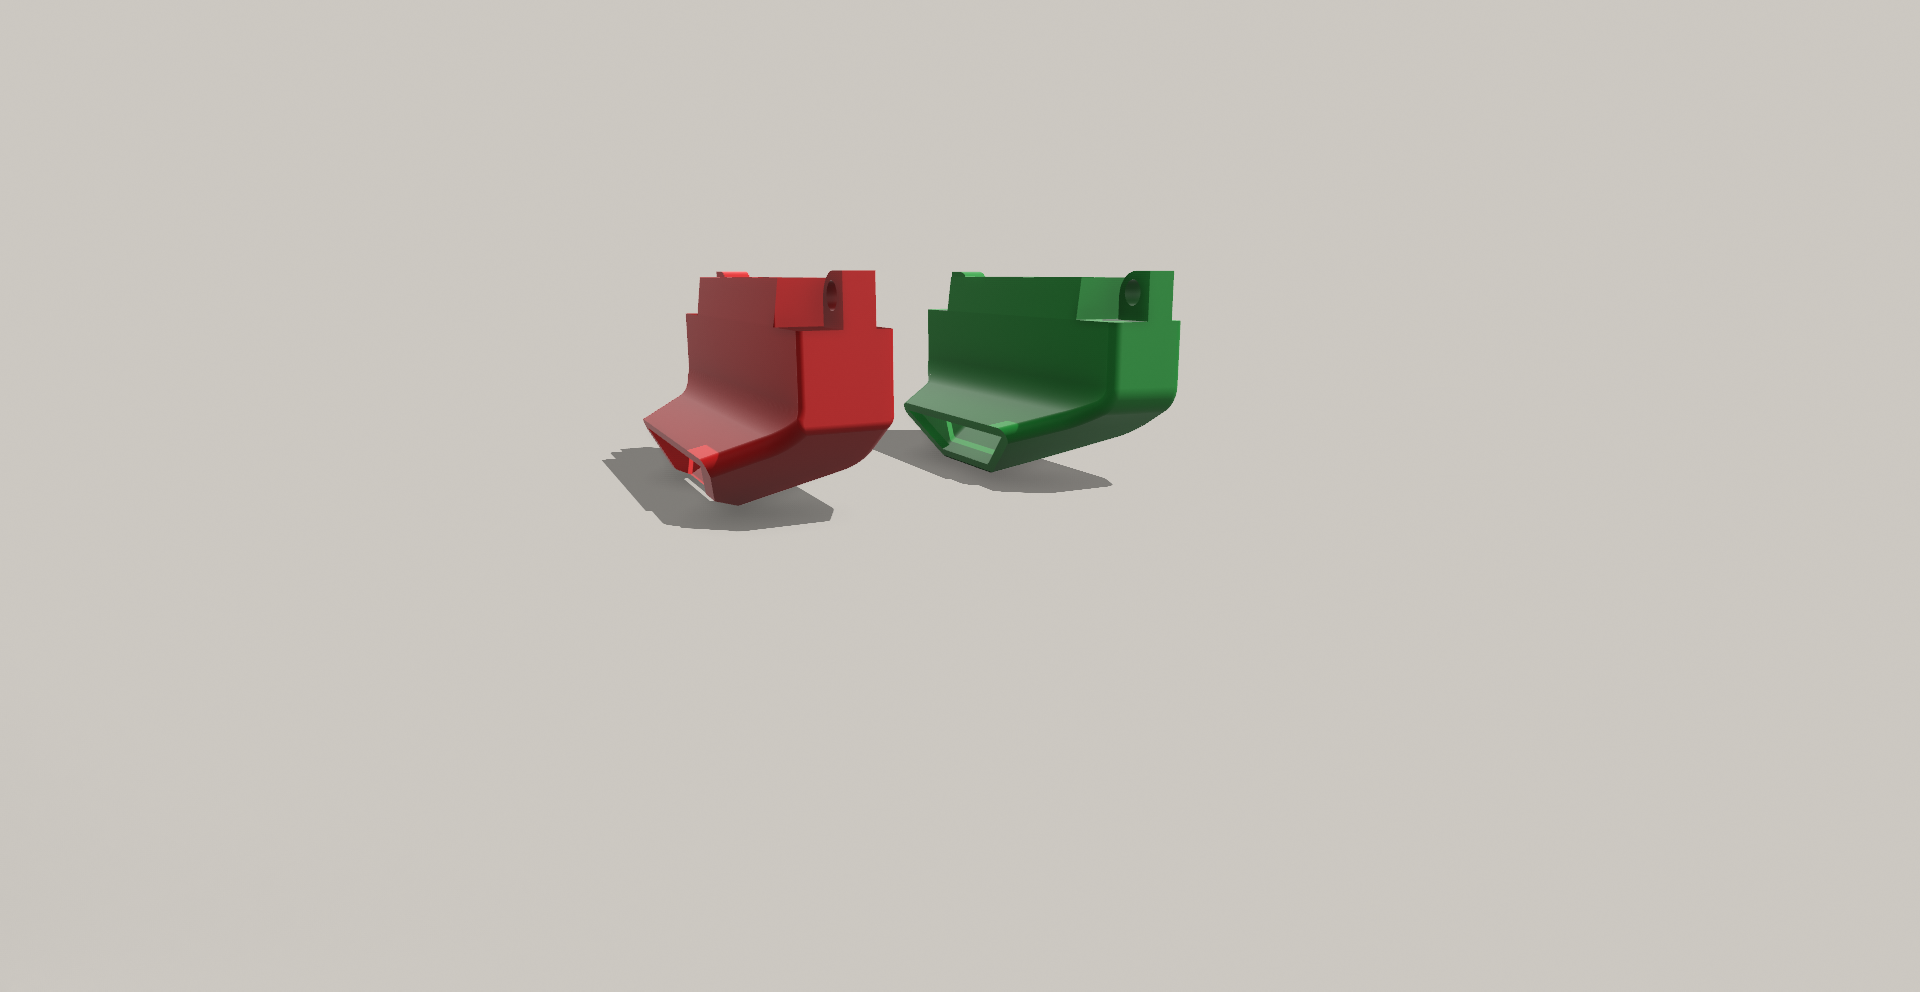
The Step rebuild of the CR-5 PRO Fan Duct with step files. The rebuild dosen't match the original 100%, but at the import parts. The red Part shows the Original and the green the rebuild by my self.
This is a brake gasket set for an Aprilia Tuareg 50 motorbike. I designed this gasket set because a brake cylinder rebuild kit is not available. This kit is for a hand brake rebuild. The parts have to be printed with NinjaFlex or a…
This case will allow you to rebuild your HOTRONIC Power Plus 4 foot warmers with new NiMH batteries. First, carefully open up your battery back (don't damage the old batteries) and salvage the parts in the picture. Using the salvaged…
Mountain bike suspension damper jaws designed to securely clamp the shaft of your shock during service or repair. These sizes should be compatible with both Fox and RockShox dampers. Please double-check the required size for your damper…
I got the Team Corally TorqMaster drivers and box drivers for Christmas, so of course I needed a nice holder for them! I think the 3D model turned out quite well, but I ran out of filament halfway through... so now the top part is orange!…
Hardware Required Magnets Recommended magnets: Amazon Link 100% Scale Models: 5 × 2 mm magnets 6 × 2 mm magnets (may have slight tolerance fit issues in some parts) 50% (Tiny) Models: 2 × 1 mm magnets 3 × 1 mm magnets (may also have…
I'm currently pretty busy, but I waned to share my WIP. I may add more instructions later, but for those who can see what I'm doing and put the parts in place, here you go. This started by wanting to use,…
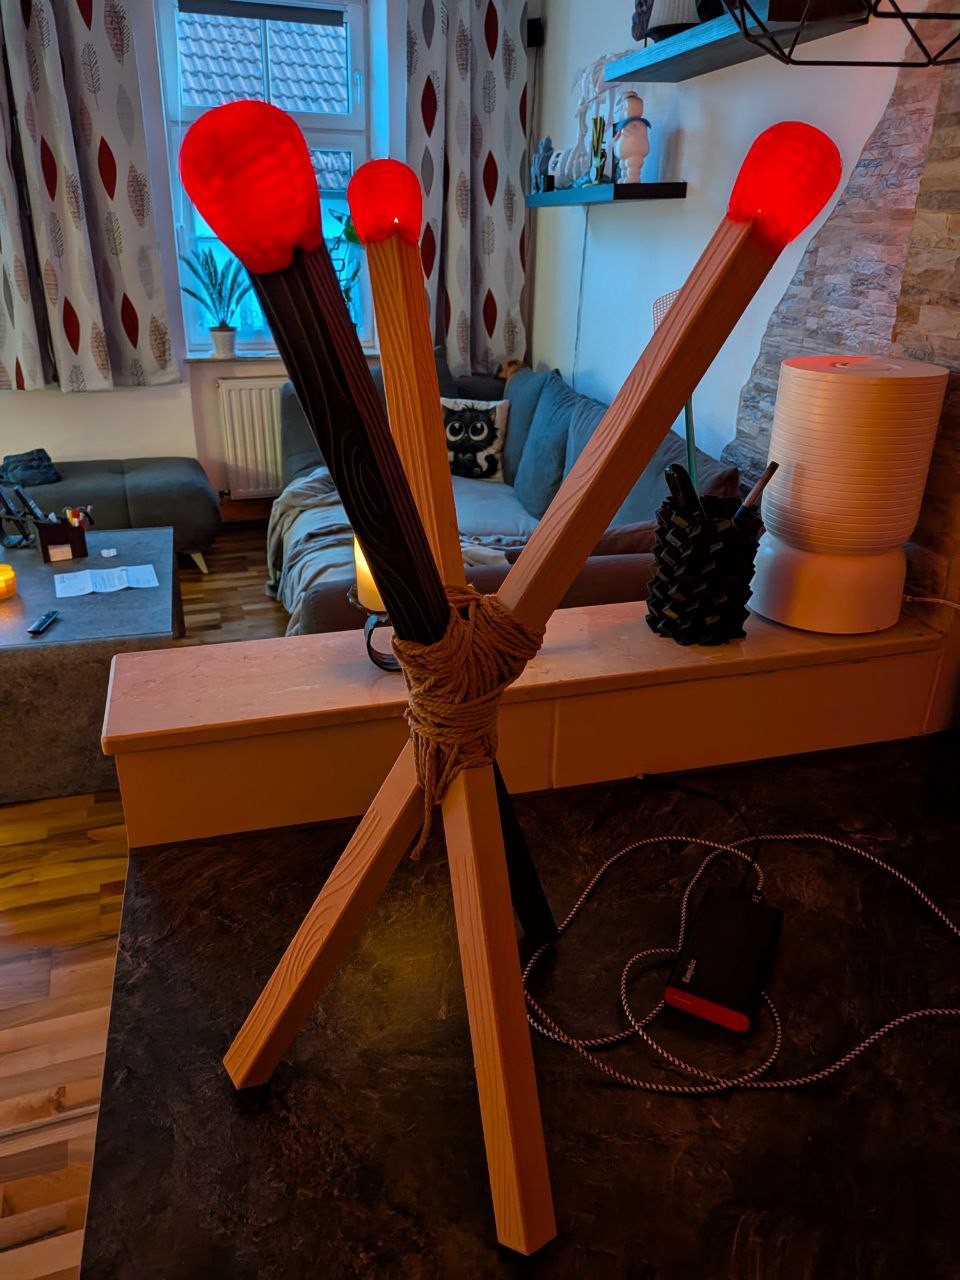
I really wanted this lamp from IKEA link But since it wasn't available, I decided to recreate it. For lighting I used this LED from Amazon and operate it with a power bank. Furthermore, I decorated the connection point of the poles with a…
This is a recreation of a popular Curse of Strahd Sunsword model as a solid/STEP instead of a Mesh file, featuring a collapsible blade. Thank you to Skeggox Workshop for this model that was used as a reference in the creation of this…
This is a gridfinity baseplate for IKEA Alex e.g. with article number 594.222.20, 004.735.46 or 904.861.39 width a total width of 36cm and a drawer width of 30cm. The baseplate parts were generated with the scad files from…
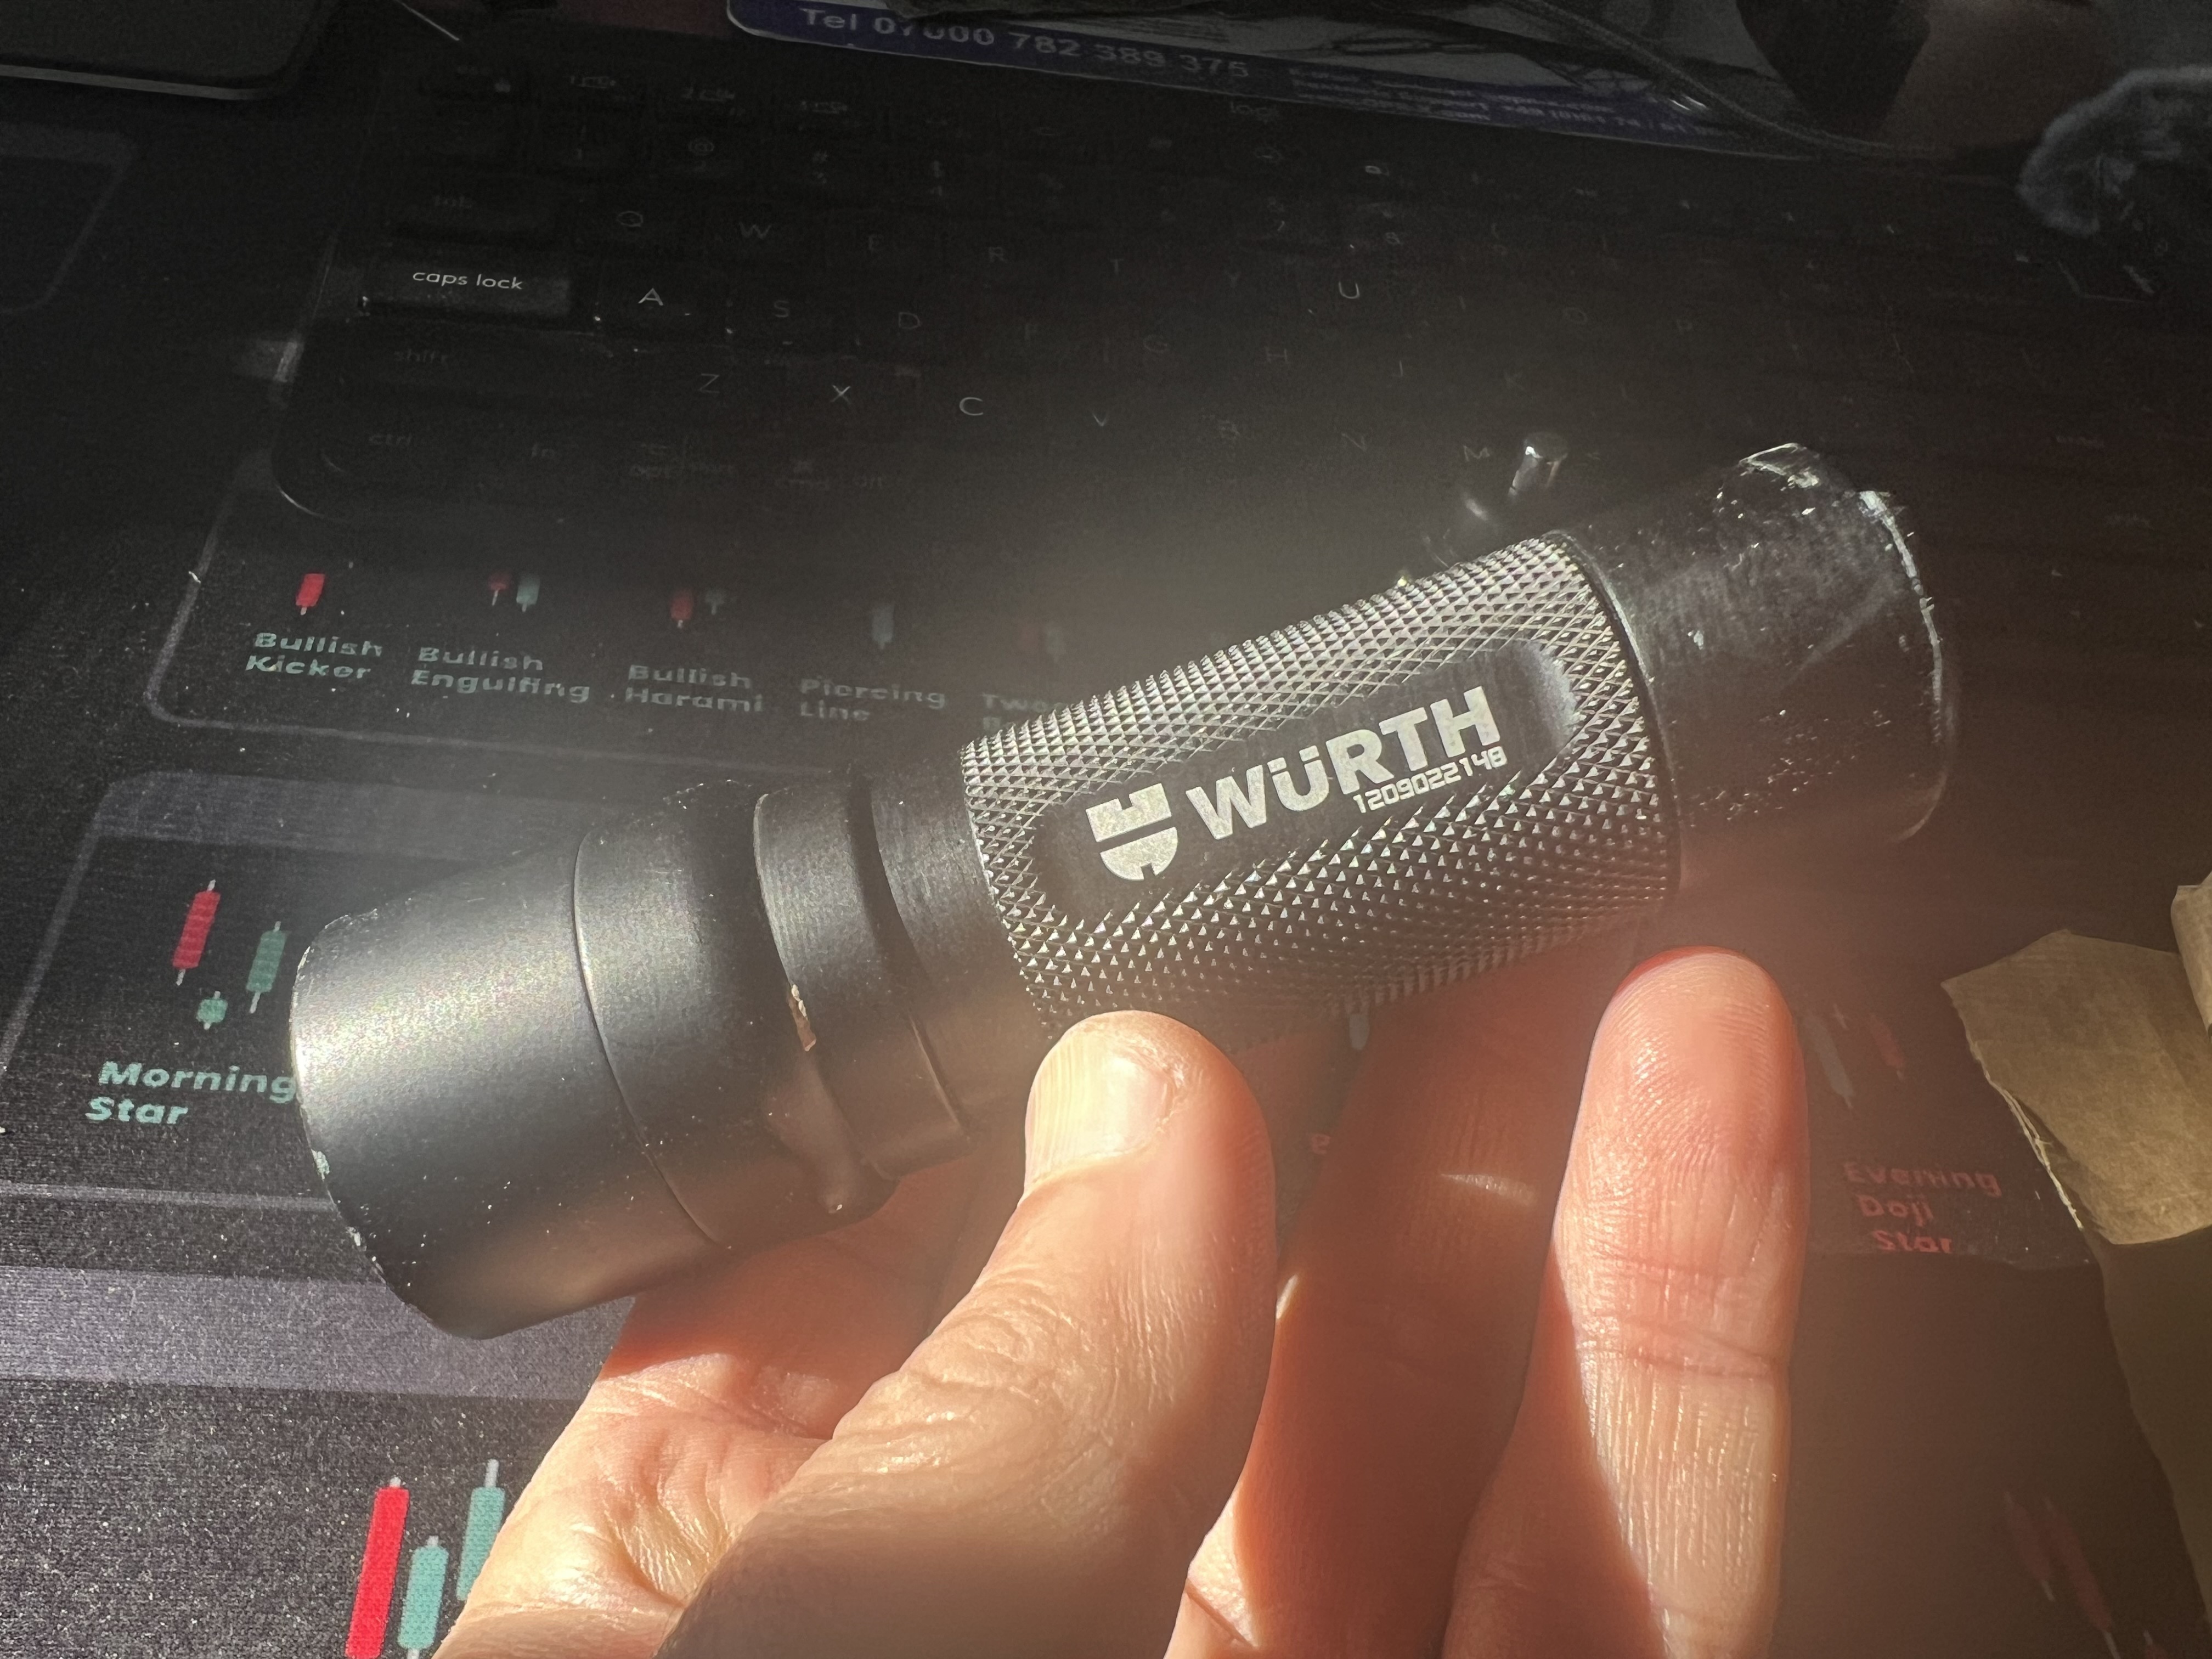
The files consist of an adaptor for a Convoy 1288 switch , an adaptor for a 16mm LED and finally a slieve for a 18500 LiIon cell. With those parts I was able to put a 10W Cree LED in the good old LEDlenser body. Don't forget to order some…
🧩 4×4 Rubik’s Cube Rebuild Jig Rebuilding a 4×4 Rubik’s Cube can be… an adventure. Between the inner layers, the floating pieces, and the general chaos, it’s easy for the whole thing to collapse mid‑assembly. This simple jig was designed…
A vertical desk stand that holds a closed laptop on its long edge, freeing the ports on both side edges - dock on USB-C at one end and Ethernet at the other. The honeycomb is not just decoration: every hexagon in the walls and the base…
The Step rebuild of the CR-5 PRO Fan Duct with step files. The rebuild dosen't match the original 100%, but at the import parts. The red Part shows the Original and the green the rebuild by my self.
IMPORTANT. Print using PETG and TREE SUPPORTS so that the figure and the parts don't blow to bits. (11/4/25 UPD: Thickened the arms and legs since it wouldn't load correctly in Orca Slicer.) (MEGA-UPDATE 11/18/25: Added new joint designs,…
IMPORTANT. Print using PETG and with TREE SUPPORTS so that the figure and the parts dont swiss cheese themselves by accident. For the shoulders, make sure to insert the armor parts carefully onto the shoulder rod. (11/4/25 UPD: Thickened…
Made this to make cell removing easier on my fingers and not use a metal tool and make sparks! Especially when they use rubber spacers made for the old 20r cells and put 25r cells in it. A bit tight!!
The files consist of an adaptor for a Convoy 1288 switch , an adaptor for a 16mm LED and finally a slieve for a 18500 LiIon cell. With those parts I was able to put a 10W Cree LED in the good old LEDlenser body. Don't forget to order some…
Rebuild the model to correct all the mistakes in the original one.
Hardware Required Magnets Recommended magnets: Amazon Link 100% Scale Models: 5 × 2 mm magnets 6 × 2 mm magnets (may have slight tolerance fit issues in some parts) 50% (Tiny) Models: 2 × 1 mm magnets 3 × 1 mm magnets (may also have…
Before you go further! This model is available for free for all my supporters in Printables Club 🧡 Consider joining my club to have access to all ⭐⭐⭐ exclusive projects ⭐⭐⭐ and be part of my community! This project is for personal use…
With four additional small ears, different sizes can be strung together as a small ornament. I hope you like this design
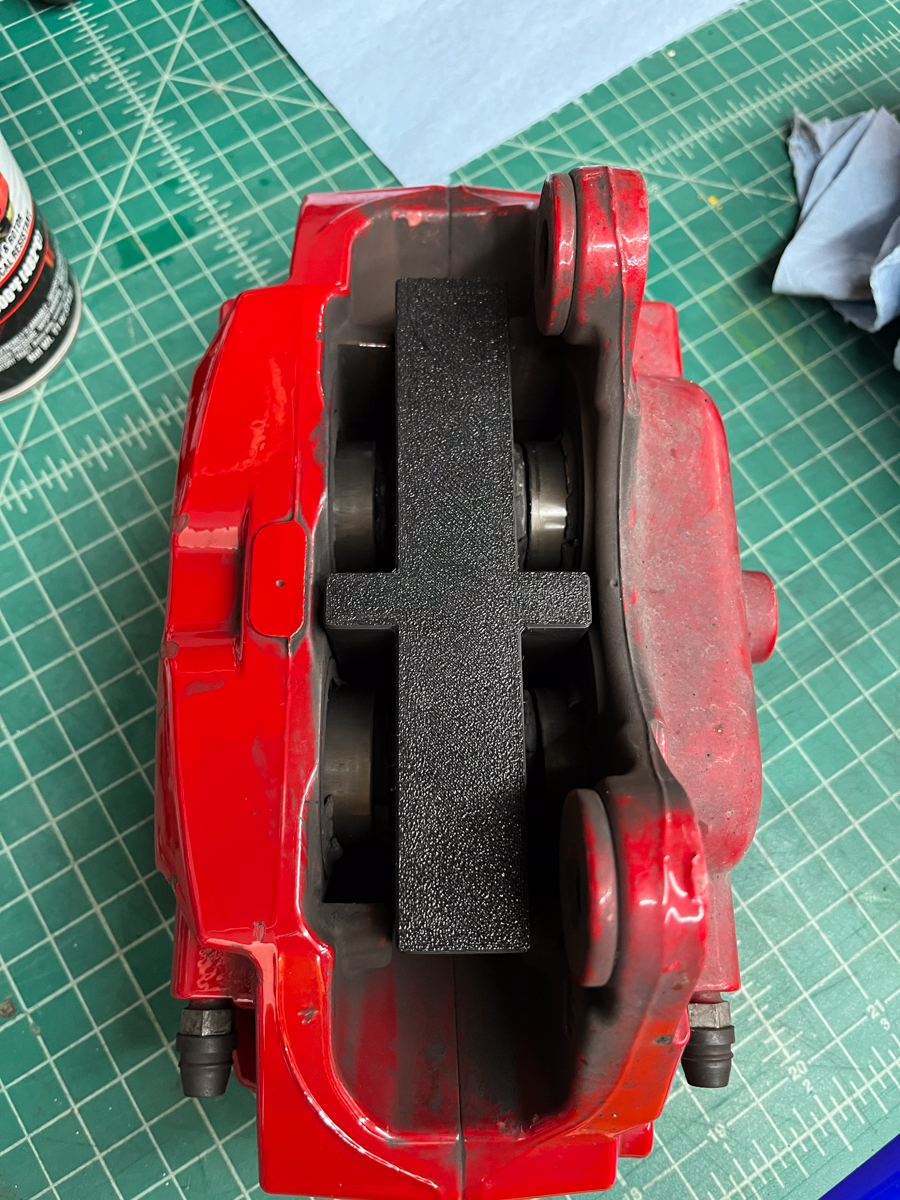
When rebuilding OE Brembo calipers for the ND generation MX5 Miata, this tool can be used to keep the pistons in the caliper as you press them out of their bores using compressed air. The pistons will remain in their bores by a few mm,…
For the original part 6 of the set did not fit. It was way to loose. I created a new part by using the original part 1 as a "template", then scaled down 5% (in x and y only) and the screw now fits perfectly. Category: 3D Printer Parts
A 3d-printable model of the hairclips of rei from the evangelion rebuild 3.0+1.0 movie
A 3d-printable model of the headband of Mari from the Evangelion Rebuild movies
A basic 3d printable model of the mask worn by Gendo in the Evangelion Rebuild 3.0+1.0 movie
A basic 3d model of the hairclips worn by Asuka from the anime Evangelion at the end of the Rebuild Movie 2.0
A 3d-printable assembly of the progressive knife used by unit 1 in the evangelion rebuild movies designed to be assembled using 4mm pegs and be foldable/movable
A basic 3d model of the progressive knife used by unit 1 in the evangelion rebuild movies
A basic movable model of the prog knife used by Unit 02 by in the Evangelion rebuild movies made of 2 printable parts that snap together and slide into each other
A 3d-printable model of the progressive knife of Unit 02 in the Evangelion Rebuild animes
A 3d-printable model of the plugsuit backpack worn by Shinji in the rebuild movies of the anime Evangelion
A 3d-printable model of the plugsuit backpack worn by Rei in the rebuild movies of the anime Evangelion
A 3d-model of the backpack worn by Asuka at the end of the Evangelion Rebuild 2.0 movie
A 3D-model of the head of Evangelion Unit 02 from the rebuild of evangelion made by commission for a cosplayer to be worn on top of his head as part of a large suitthis includes several versions of solid models as well as one split as a…
IMPORTANT. Print using PETG and TREE SUPPORTS so that the figure and the parts don't blow to bits. (11/4/25 UPD: Thickened the arms and legs since it wouldn't load correctly in Orca Slicer.) (MEGA-UPDATE 11/18/25: Added new joint designs,…
IMPORTANT. Print using PETG and with TREE SUPPORTS so that the figure and the parts dont swiss cheese themselves by accident. For the shoulders, make sure to insert the armor parts carefully onto the shoulder rod. (11/4/25 UPD: Thickened…
The lights keep going out due to the MR16 bipin lights not being held securely. The top heavy lamps unplug from the socket with the slightest tap. The "sleeve" or collar slides into the base and supports the lamp securely. This is shown…
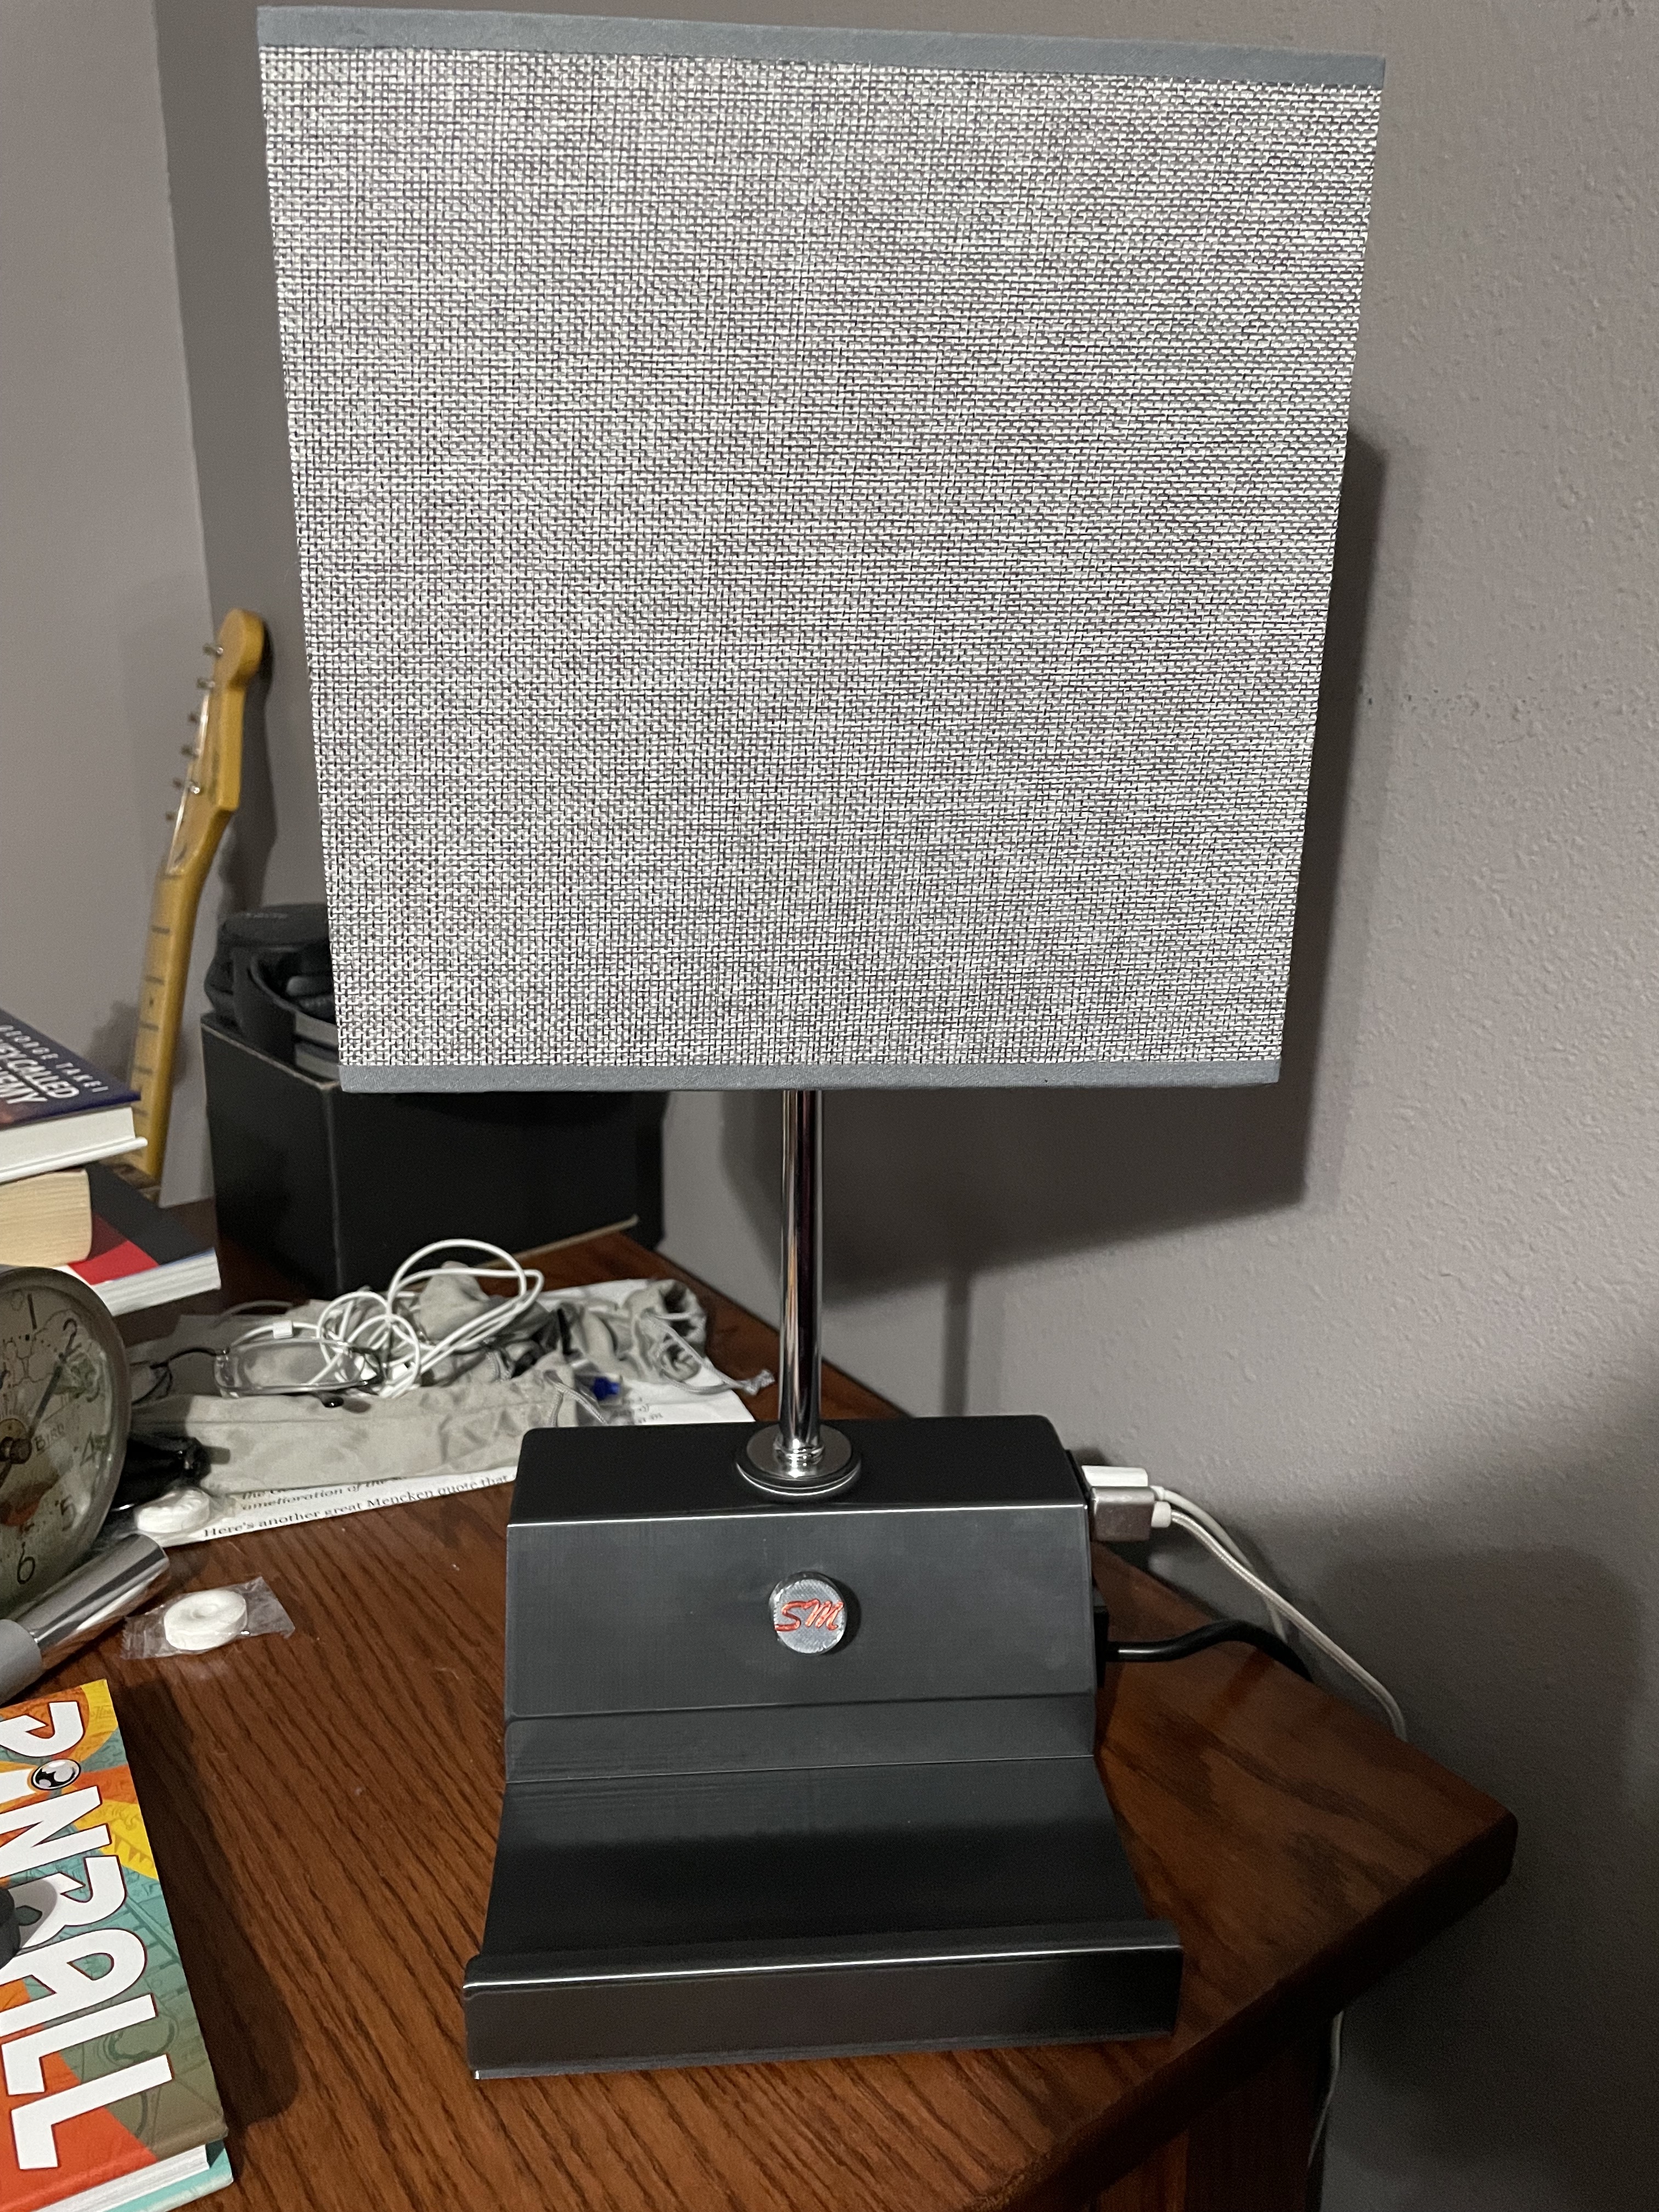
We wanted to reduce clutter around my bedside table so we ordered a lamp with USB plugs. It arrived from Amazon with the base broken. In Amazon fashion, they just sent me another one. So I thought I would design “better” one for my needs…
A bracket to install a motor recovered from a CD/DVD drive to replace a broken motor in a USB powered fan by RS Components. Category: Replacement Parts
Printed in PLA worked well, no need to buy a 10$ part just to do two calipers. 09756–00010
This replaces the metal gantry assembly and solves the issue with the x-rods slipping and x-axis racking to an extent. Its designed to use the stock printer parts and provide a bit more access during assembly and cleaning. I've also…
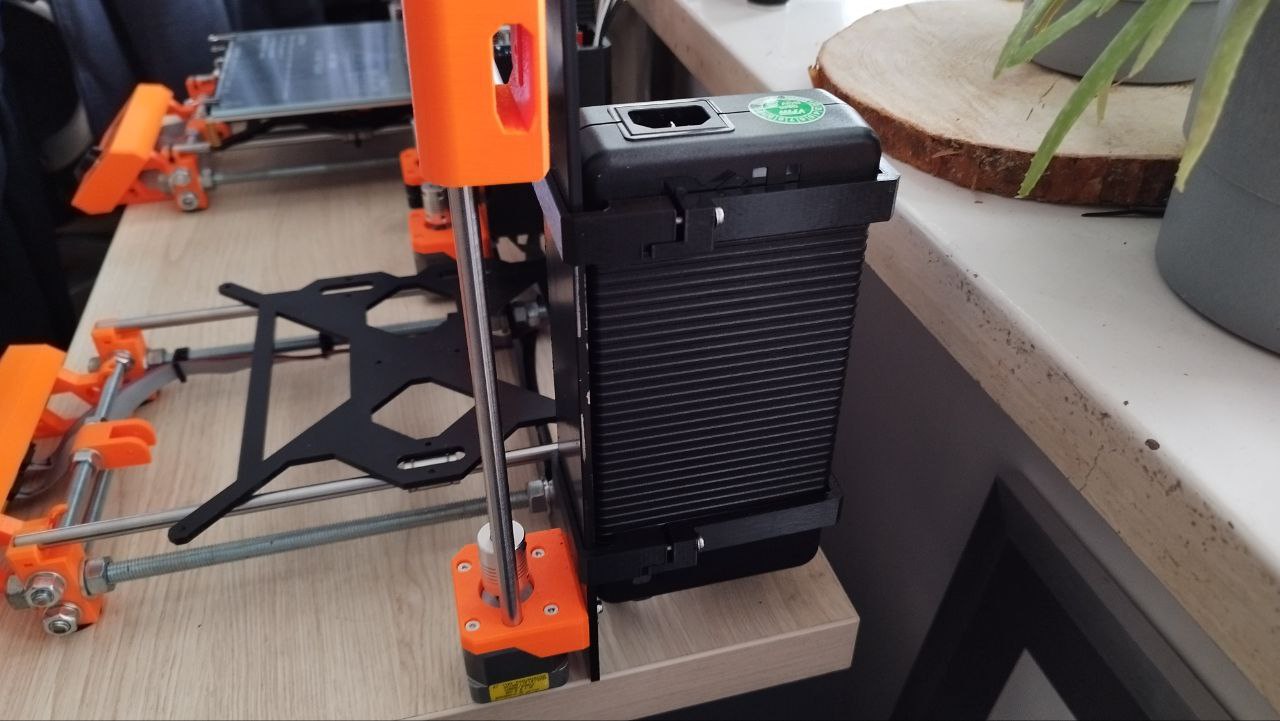
The model uses part of the assembly from the original power supply. It stiffens the frame of the printer. Print with PETG fill of 20%. The whole is bolted together with M3 screws
This is a ramp walking robot called Wobbly. Thanks to cevinius and Roberto Lou Ma for the inspiration. The axis is a 3,2mm woodpick. Scale it down to 62.5% and you can use a toothpick. Category: Mechanical Toys
Before you go further! This model is available for free for all my supporters in Printables Club 🧡 Consider joining my club to have access to all ⭐⭐⭐ exclusive projects ⭐⭐⭐ and be part of my community! This project is for personal use…
Before you go further! This model is available for free for all my supporters in Printables Club 🧡 Consider joining my club to have access to all ⭐⭐⭐ exclusive projects ⭐⭐⭐ and be part of my community! This project is for personal use…