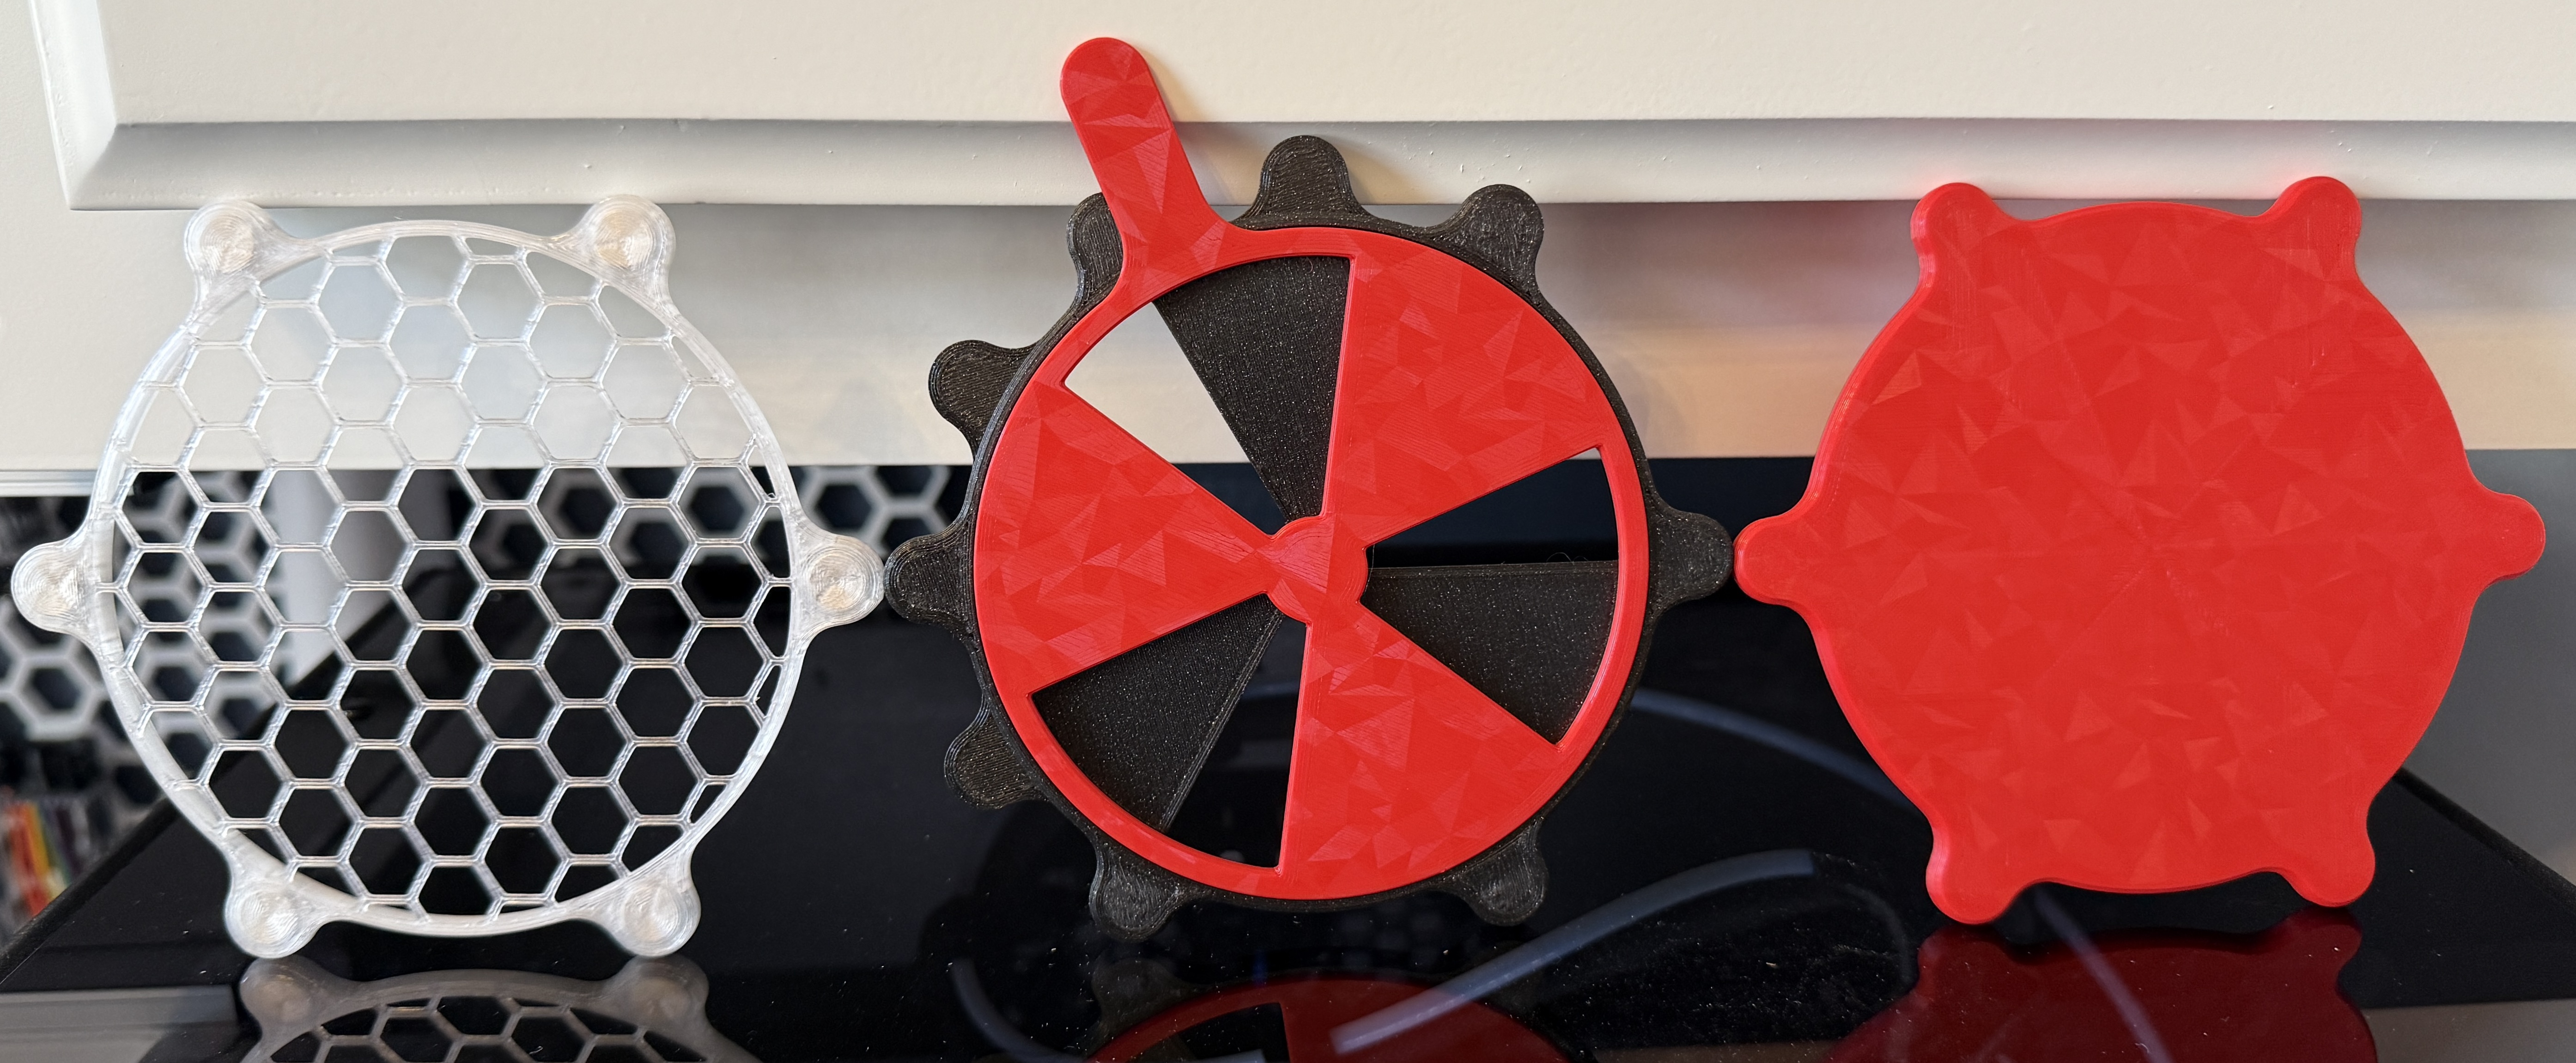
MagDuct Parametric Fume Extraction Nozzle and Screen
We calculate the final price from your selected file. You review and accept it before payment.
Saved on this device.

MagDuct compatible fume extraction nozzle and screen.
- Rating
- 0 / 5
- Likes
- 1
- Downloads
- 12
- Makes
- 0
- Views
- 98
- Reviews
- 0
Updated at source:
Model information
- Source
- Printables
- Category
- Tools
- License
- Creative Commons — Attribution — Noncommercial — Share Alike
Motivation
See here for a full explanation of the MagDuct system. This accessory provides a way to connect an open-air fume extraction nozzle to a MagDuct compatible ducting setup.
Solution
This design achieves the following objectives:
MagDuct compatibility
Fully parametric providing customization of all dimensions
(optional) Detachable and reversible screen
Customization
The Fusion file is included. You can customize the parameters (DESIGN | SOLID | MODIFY | Change Parameters) as necessary. When you open the Parameters dialog, first sort by name. The parameters most optimized for customization are favorited. The non-favorited parameters should work as well but may require more tinkering to repair broken downstream features.
Critical Parameters
THERE ARE THREE PARAMETERS WHICH ARE CRITICAL FOR MAGDUCT COMPATIBILITY. THEY MUST REMAIN CONSISTENT WITH ALL OTHER MAGDUCT DESIGNS. In the Fusion files, these parameters start with '_' and include:
_MagDuctDiameter - Outside diameter of the MagDuct template. If you have a duct that is already the right size for your ducting, you can most likely use that dimension for this parameter. But again, make sure that is the ducting you will use most throughout all designs you would like to be interchangeable.
_MagnetCount - Total number of magnets used in each template. Default is 6 as discussed in the design section above.
_MagnetSlotDiameter - Diameter of your magnets including tolerance
The MagnetSetback can be changed from the default of 0.6 mm — including down to 0.0 mm if you do not want to embed your magnets (not recommended for the mount ring since it's double-sided). In my testing, I found that 0.4 mm was a little thin to give the printer enough layers for smoothing over the bridging and provide enough strength to prevent the magnet from tearing out, but you may be able to dial this in better.
If you cannot get Fusion to work for you, please send me a message (see below) and I will post your requested model files at my earliest convenience.
Materials
(6 per side per interface) 8x3 neodymium magnets – I used these from Amazon.com
Of course, if you customize the size of the magnet slots, you will need those magnets instead
Printing
See the attached .3mf for my settings and model orientation. I printed with Prusament PETG Jet Black, Clear, and Carmine Red. I printed on a PEI sheet (with plenty of glue stick when printing PETG) to ensure the magnetic interface was as flat as possible.
Supports
Supports should only be required with large MagDuct/ducting diameters and relatively short transition length parameters.
Magnets
If you plan to embed magnets during the print, ensure you have the following ready to go before starting the print:
Magnets
Pause(s) inserted at each layer immediately after an embedded magnet slot (the same layer that bridges to close the slot). These pauses should already be inserted in each of the Print and PrusaSlicer Project files but double-check before printing.
A plan for your desired polarity orientation.
With the default 6-magnet configuration, simply alternating North and South around the circumference of the base of the fume extraction nozzle opening will allow proper part alignment at each 120° of rotation. For the screen, alternating will also allow the screen to be reversed by flipping and rotating it.
If you care about the aesthetics of the parts, also consider the seam placement in relation to the magnet orientation. I set seam alignment to rear for all the parts in the .3mf files.
Here is what I used with a 6-magnet configuration:
Nozzle Base – Alternate North and South around the circumference
Nozzle Opening and Screen – If you have no intent to reverse the screen, then simply match the opposing opening and screen polarities. See the following guide if you want the ability to invert the screen. I used a small dab of CA glue in each hole before inserting the magnet since these magnets are far from the magnetic bed so there is no magnetic force from the bed to hold them down. Alternatively, you could play with the tolerances on the magnet slots to get them to print as tightly as possible while still allowing for trouble free insertion. You can also try to use magnets from underneath to hold the slotted magnets in place.


I prototyped on a Prusa CORE One.
Questions
Please let me know if you have any questions (Messenger | Printables.com).
Shameless Plug
If this model helped you solve a problem, save some time, or in any way made your life a little easier then please consider clicking the Like button and posting your Makes! If it fell short after clicking on the title of the model, please let me know (Messenger | Printables.com). Either way, Thank you!
Related
Complete exhaust configuration
Adapters - Convert machine exhausts to ducting diameter and/or MagDuct
xTool P2 Exhaust Duct Adapter (configured as 4 in)
MagDuct xTool F2 Ultra UV Slip Adapter
MagDuct CORE One Exhaust Adapter and Gasket
Ducting
xTool pipe (included w/ xTool IF2 2.0 and xTool F2 Ultra UV)
xTool 72.5 mm ducting (included w/ xTool P2)
Couplers - Convert flexible ducting or pipe/rigid ducting to MagDuct
Connectors - Convert ducting for attachment to inline fan or external surface
Duct Expander (configured as 4 to 6 in expander)
Ducting to Window Insert Connector (attached to a piece of 1/4" acrylic inserted in the channels of my double hung windows which allows for quick installation/uninstallation (configured as 148.0 mm (6") and 72.5 mm exhaust port)
Inline Exhaust Fans
Mounts - Securely mount MagDuct components to a surface using a third-party mount
Accessories
MagDuct Fume Extraction Nozzle and Screen - Direct smoke and fumes (e.g., soldering) into exhaust ducting
MagDuct Generic Accessories - Control airflow volume and chamber temperature (e.g., enclosed 3D printers)